Chapter 3 -Preoperational Setup-
72
AS-410M Auto Slide Preparation System
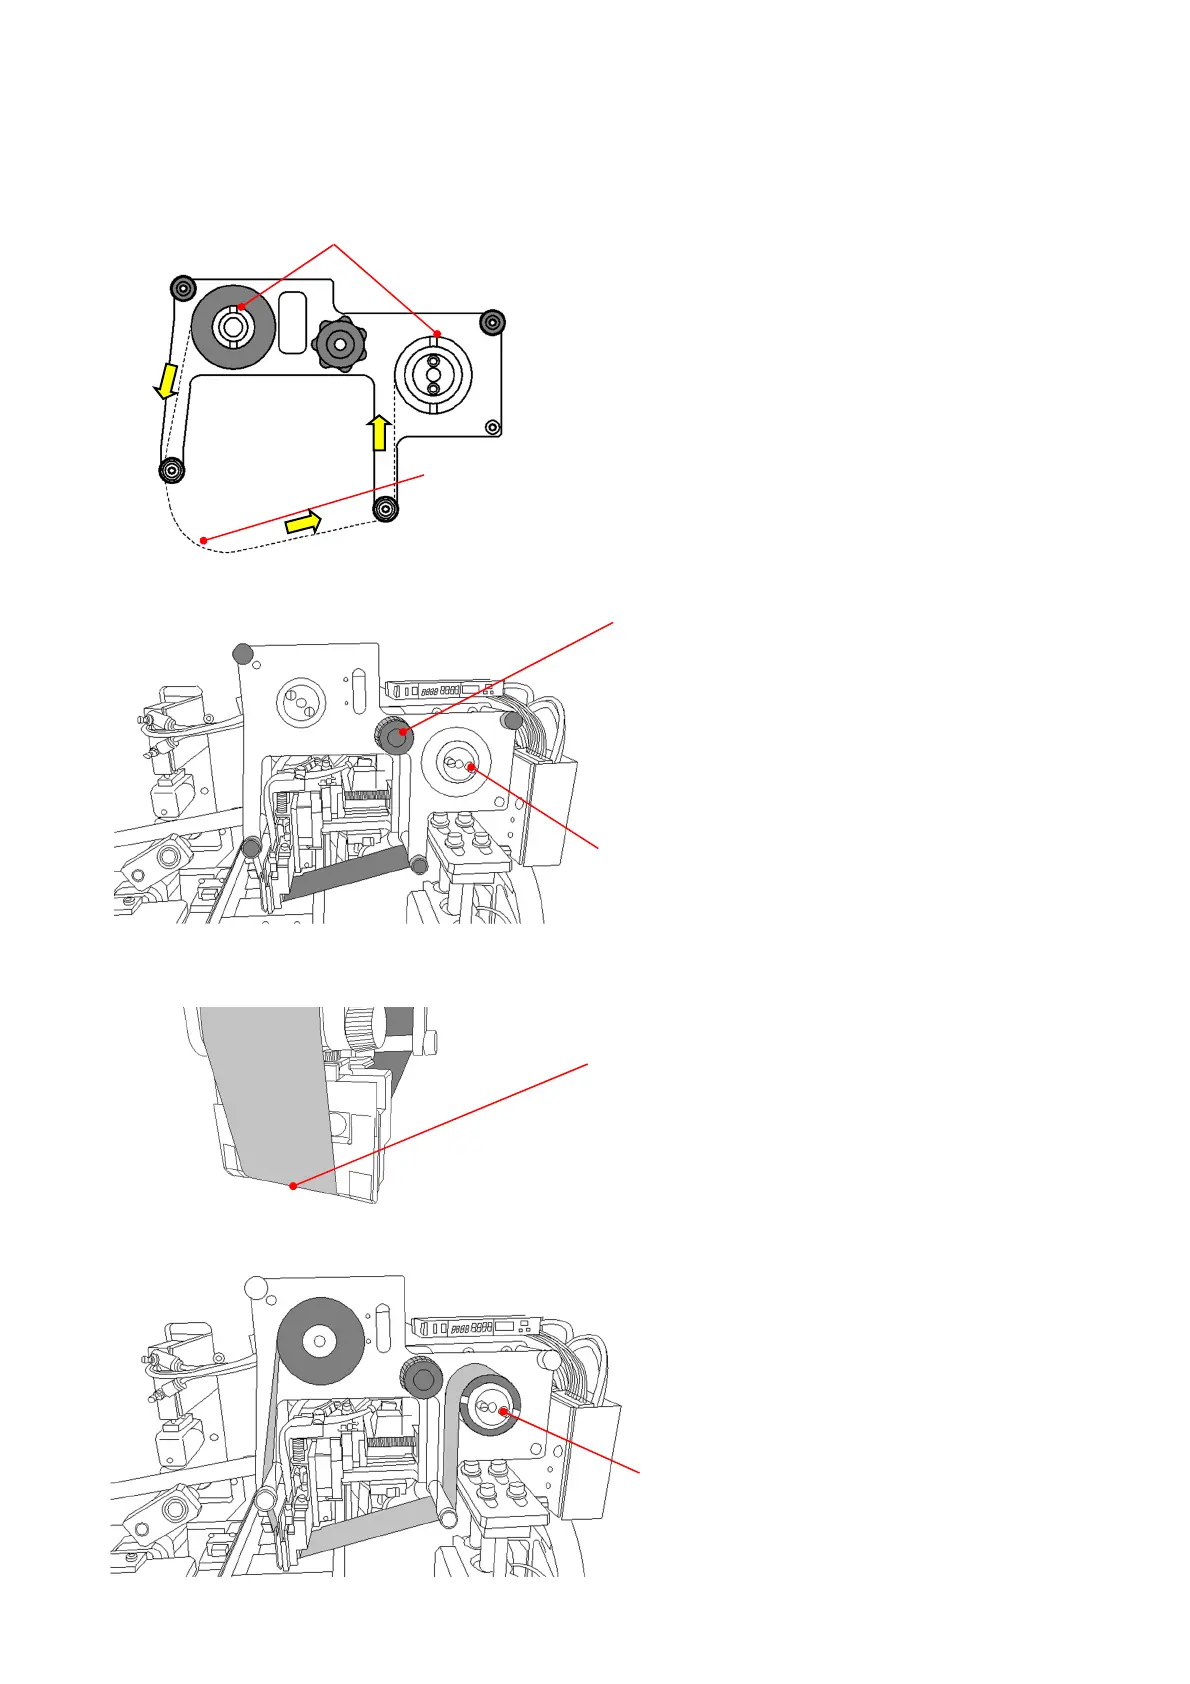
⑤ After setting the ink ribbon as shown on the
left drawing, fit the cover and tighten the
four knobs to fix.
At this time, make the ribbon slack a little
to avoid the head getting caught during the
installation of the cassette.
Make the ribbon slack
When set the ink ribbon,
insert the notch of the
core into the convex part of the roller.
Pinch the pins and turn the roller
to remove the slack out the ribbon
Installation of ink ribbon cassette
Thermal head of the main unit
⑦
Set the ink ribbon to the center of the
print head.
Confirm no bending or wrinkles.
⑥
Turn the fixing knob in the center to the
right to set the cassette onto the main
unit.
At this time, if it is difficult to set the
cassette,
pinch the pins of the ink ribbon
winding part and turn the roller slightly.
Pin
Installation of ink ribbon cassette
Routing of ink ribbon
⑧
Turn the roller to wind the ink ribbon,
and remove the slack of the ribbon.
 Loading...