Chapter 3 - Preoperational Setup -
AS-410M Auto Slide Preparation System
71
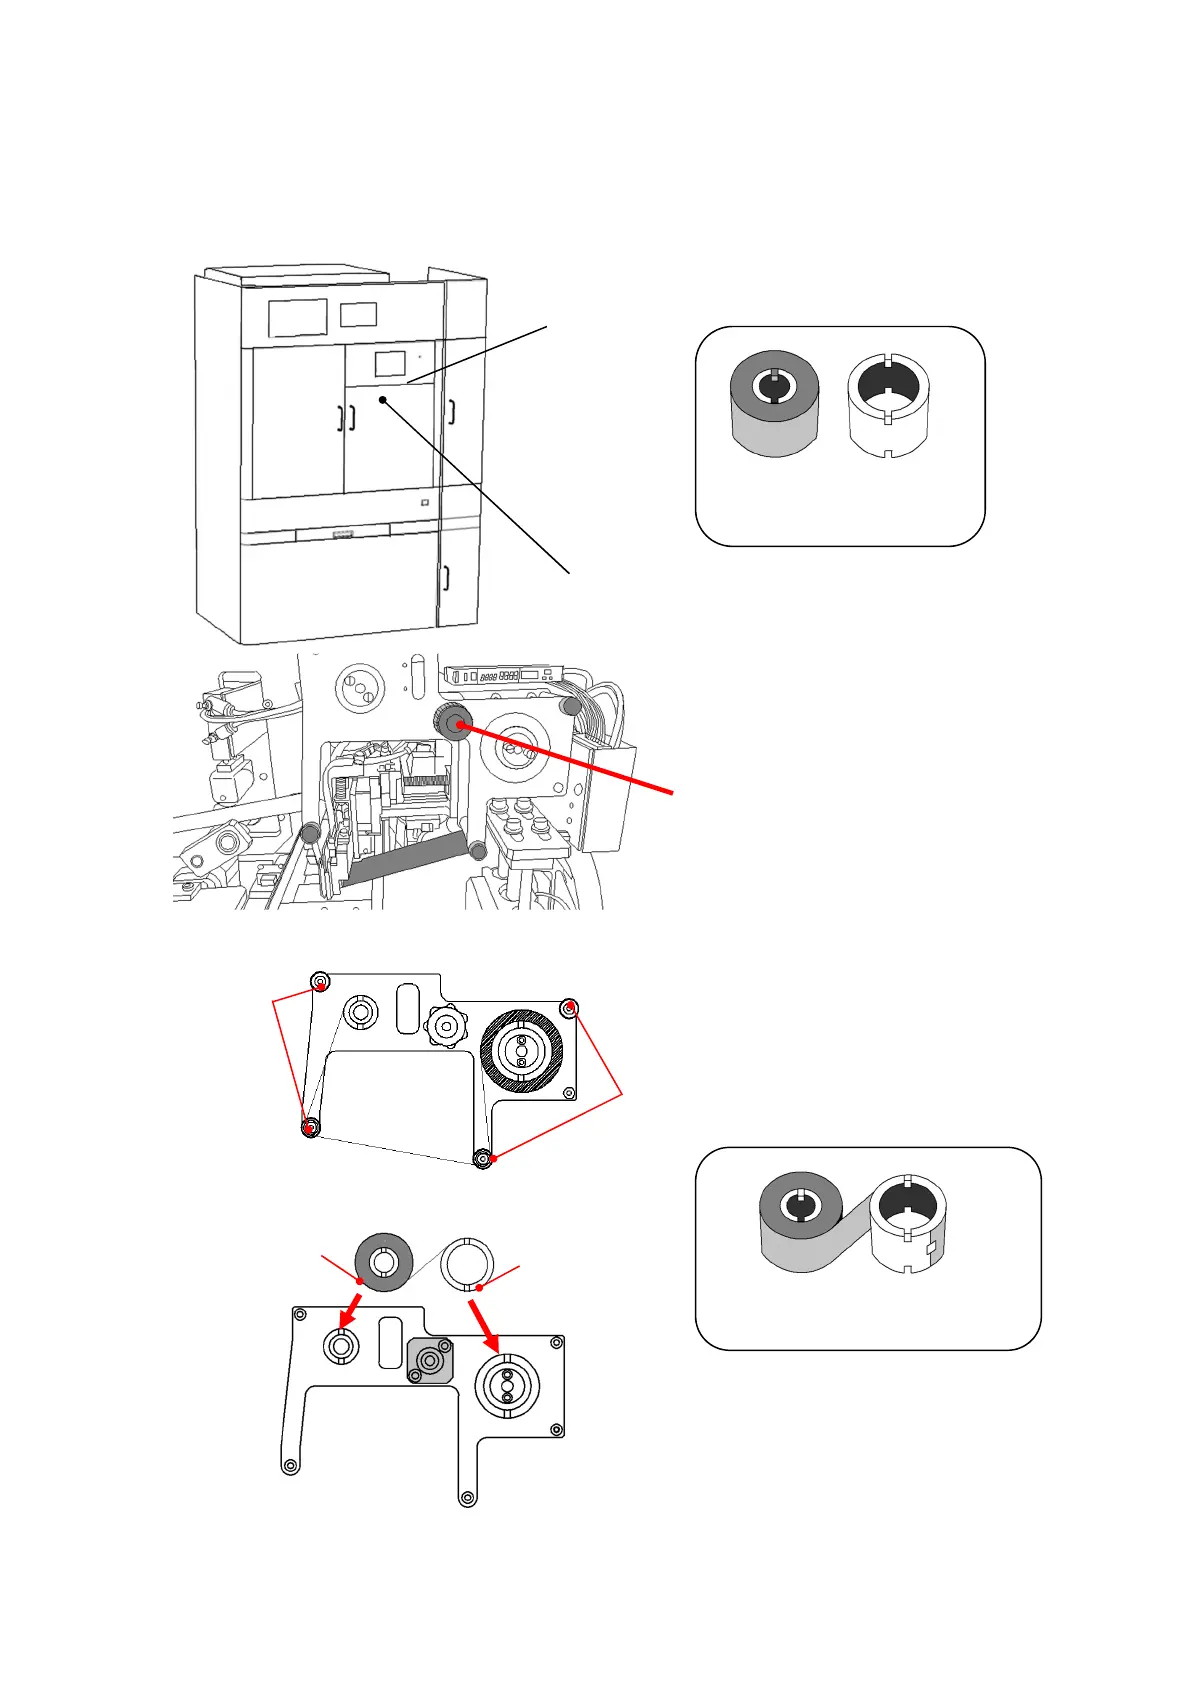
3-13 Setting the ink ribbon in place
When used with the sample identification option, the System is equipped with a printer. Open the right
door (R) of the Main Unit, remove the ink ribbon cassette from printer unit and set the supplied ink
ribbon (model number: SR-4).
Right door (R)
Thermal printer
Ink ribbon
(model number:SR-4)
Ink ribbon cassete for Thermal printer
Ink ribbon cassette parts
①
Turn the fixing knob in the center of
the ink ribbon cassette to the left and
gently remove the cassette from the
main unit.
② Remove the four cover knobs for the
taken out ink ribbon cassette unit and
remove the cover.
③ Tape the end of ink ribbon to the
core as shown above.
Core for rewinding
Fixing knob
Cover knob
Ink ribbon (new)
④
Remove the used and reeled ink
ribbon and the ink ribbon core
from the rollers respectively.
Replace the new ink ribbon
and the core to the roller
 Loading...