Chapter 4 -Operational Procedures-
140
AS-410M Auto Slide Preparation System
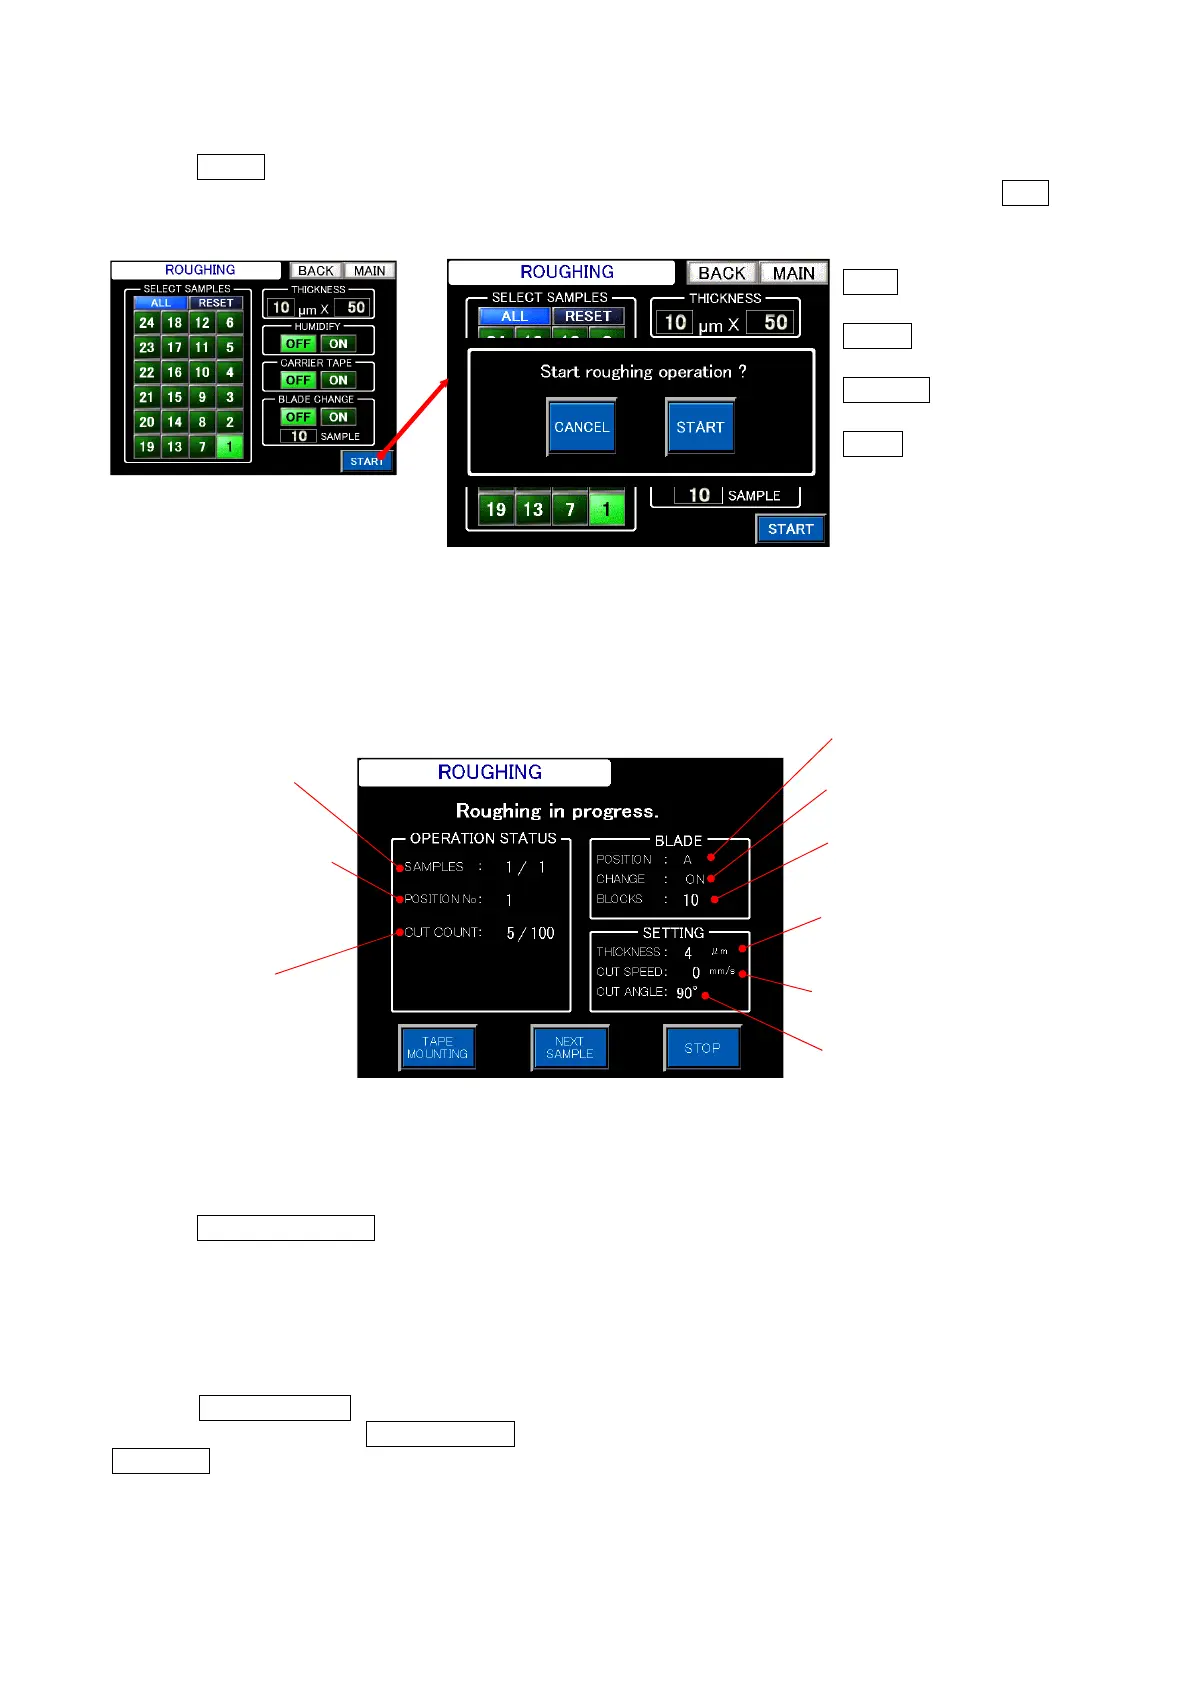
4-12-5 Execution of roughing and operation buttons for use during roughing
Touch START on the “Roughing settings” screen. Then, the AS-410M will check the presence of a
sample at the specified position and the “Start roughing” prompt will appear on the screen. Touch Start
to start roughing.
4-12-6 Screen during roughing
While roughing is in progress, the “Roughing in progress” screen displays the current condition
settings and the progress status.
In the roughing mode, the following operations are available during roughing:
① Single section attachment to carrier tape
Touch TAPE MOUNTING on the “Roughing in progress” screen to attach a single section to the
carrier tape, then rewind the carrier tape, and pause operation. When this sequence of operations
completes, the “Roughing is stopping” screen appears.
Observe the section attached to the carrier tape to check the exposure of the tissue surface.
② Slicing block change
Touch NEXT SAMPLE to process the next sample. After starting roughing with the number of
samples set to 1, pressing NEXT SAMPLE will result in termination of operation. Alternatively, touch
RESTART on the “Stopping” screen to resume the processing of the same sample.
Roughing in progress screen
Number of samples in
process/number of
Number of sample in process
* Set position number on
sample tray
Number of cuts
performed/
Specified number of
cuts
Slicing blade sliding function:
ON: Enabled, OFF: Disabled
Max. number of cuts per slicing
blade position
Position of microtome blade
in use
Rough-cut speed
Rough-cut angle
(pull-angle setting)
Roughing thickness
Start roughing prompt
MAIN
return to the Main
Menu screen.
START
start rough-
cutting.
CANCEL
return to the
previous screen.
BACK
return to the
previous screen.
Roughing setting screen
 Loading...