Home
DNS
Industrial Equipment
AS-410M
DNS AS-410M User Manual
4
of 1
of 1 rating
224 pages
Give review
Manual
Specs
To Next Page
To Next Page
To Previous Page
To Previous Page
Loading...
C
ha
pt
er
3
-
Pr
eo
pe
ra
ti
o
na
l
Se
tu
p-
8
4
AS
-4
10
M
Au
to
S
l
id
e
Pr
ep
ar
at
io
n
S
ys
te
m
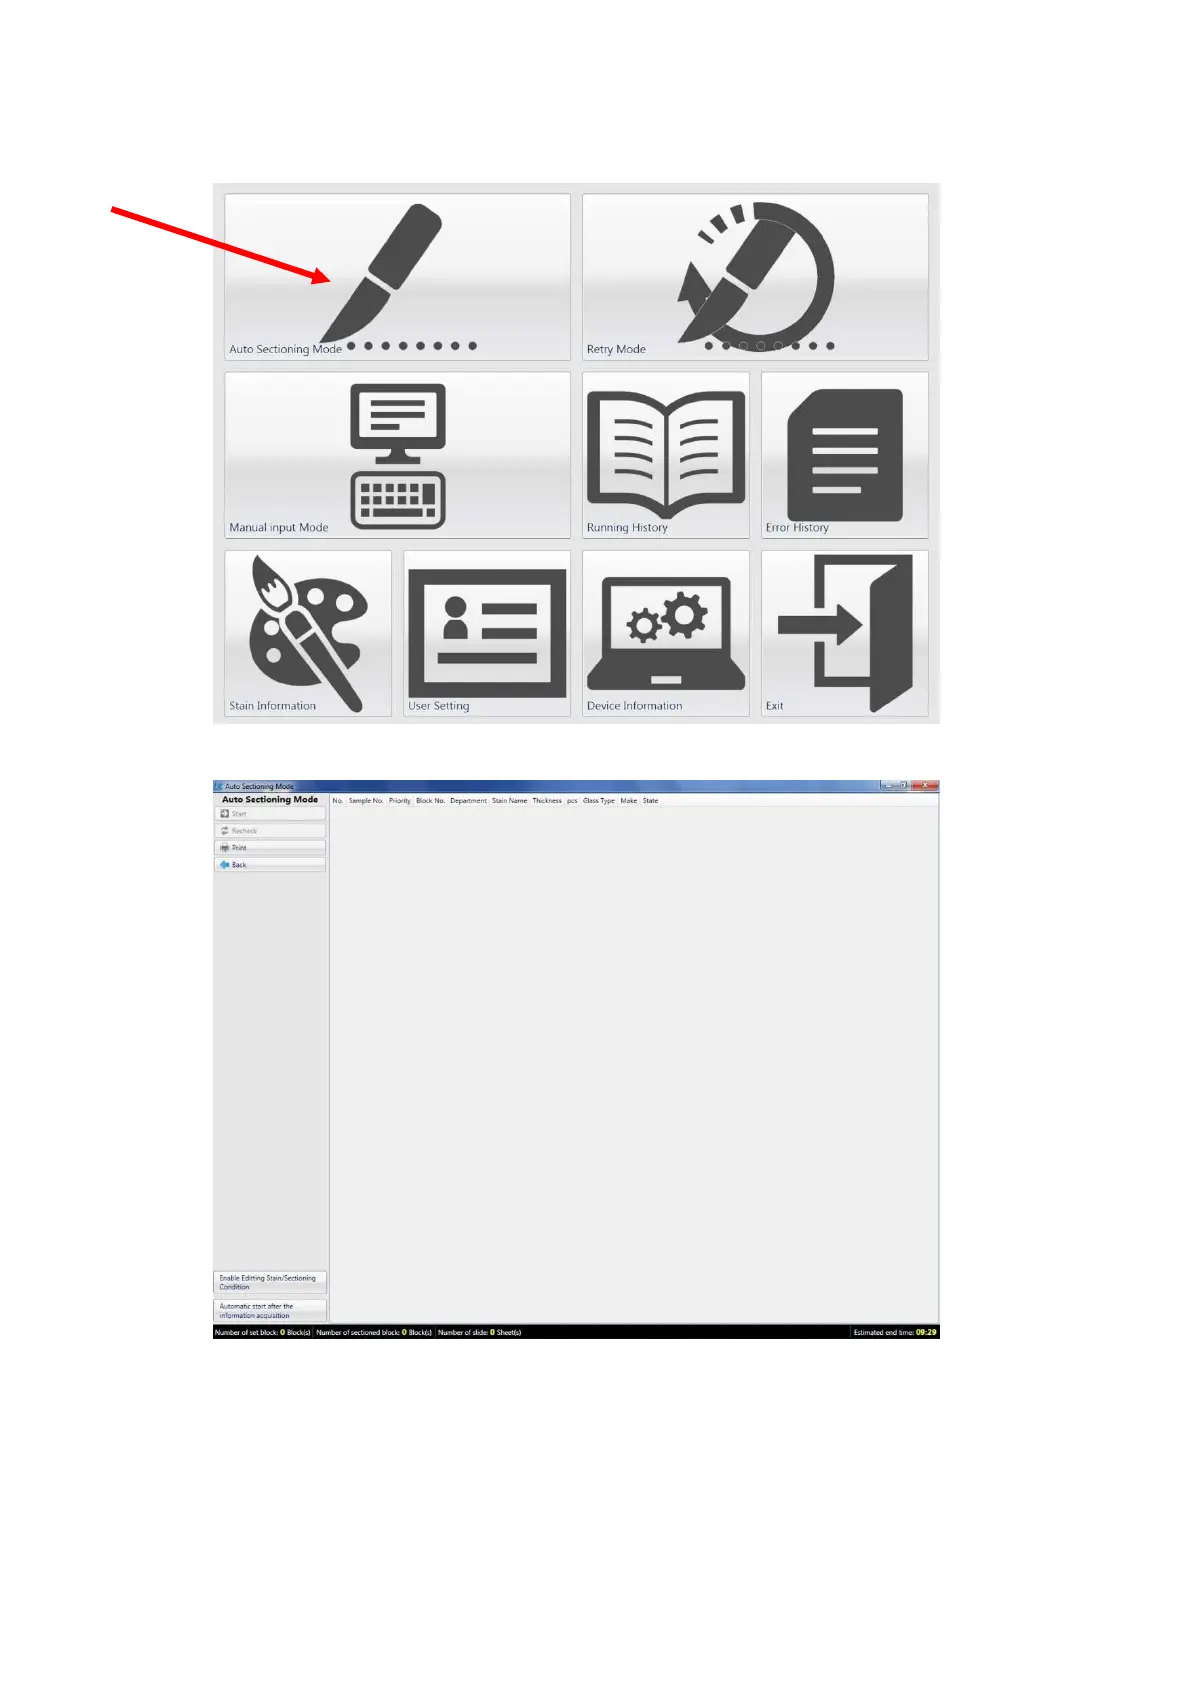
After logging in successfully
, the Main Menu screen will be displayed.
For sectioning with the on-line mode, select the auto sectioning mode or manual input mode.
Main Menu screen
Auto s
ection
ing mo
de scre
en (be
fore s
tarting
)
83
85
Table of Contents
default chapter
3
Before Using this Product
3
For Safe and Correct Use
4
Locations and Contents of the Alert Labels
6
Warranty
13
Structure of this Manual/ Table of Contents
14
Table of Contents
14
Chapter 1 - Overview
17
System Overview and Configuration
18
Tissue Slide Preparation Process
19
Additional Processes
20
Auto Trimming (Sample Surface Image Detection) (Option)
20
Sample Identification Function (Option)
20
Block Surface Temperature Detection Function (Option)
21
Step-Cut Function (INTERVAL Mode)
22
Two Sections on One Slide Sample Making Function (Option)
22
Blade Mark Check Function (Option)
23
External PC Connection Expansion Package (Option)
23
System Specifications
25
Components and Their Names
29
Main Unit and 100-Slide Dry Chamber Option
29
System with 96-Sample Feeding Option and 400-Slide Dry Chamber Option
33
Chapter 2 - Installation
34
Unpacking and Parts Check
35
Installation and Requirements
37
Power Requirements and Power Cable Connection
42
Grounding
44
Air Tube Connection
44
Connection of the Main Unit to the Pc for Auto Trimming
45
Chapter 3 - Preoperational Setup
46
Main Power Circuit Breakers
47
Power Switch
47
Internal Light Switch
48
Setting Samples in Place
48
Supported Sizes of Samples and Cassettes
48
Setting Samples in Place
49
Setting Slides in Place
53
Supported Slide Size
53
Setting the Humidifying-Water Bottle in Place
57
Setting the Application Medium Bottle in Place
59
Setting the Waste Fluid Tank in Place
61
Setting the Slide Collection Box in Place
62
Setting the Used-Blade Collection Box in Place
65
Setting the Dedicated Microtome Blades (Cassette) Replacement in Place
66
Setting the Carrier Tape Roll Replacement in Place
67
Carrier Tape Replacement Procedure
67
Routing of the Carrier Tape
70
Setting the Ink Ribbon in Place
71
Setting the Suction Filter of Paraffin Waste in Place
73
Adjusting the Temperature Controllers
74
Checking the Temperature Setting of the Colling Unit ( Built in the Main Unit )
76
Cooler Control Panel
76
Setting Change of the Cooler Temperature
77
Starting and Exiting the Auto Surface Detection Application
78
Start-Up of the Auto Trimming (Auto Surface Detection) Application
79
Monitoring the Auto Trimming
79
Exiting the Auto Trimming (Auto Surface Detection) Application
80
Start-Up and Termination of the Blade Mark Check Application
81
Blade Mark Check Application Start-Up
81
Termination of the Blade Mark Check Application
82
Start-Up and Termination of the Expansion Package Application
83
Start-Up and Log-In of the Expansion Package Application
83
Termination of the Expansion Package Application
85
Safety Interlock (Door Lock)
86
Compressor
87
Chapter 4 - Operational Procedures
89
Section Slide Preparation Work Flow
92
Operational Parameters
93
Selecting the Sectioning Parameters File
95
Selecting the Sectioning Parameters
95
Editing the Sectioning Parameters
96
Mount Setting
97
Cut Force Setting
98
Saving
100
Section Slide Preparation
101
Preoperational Checks
101
Selecting the Operation Mode
104
Preoperational Self-Diagnosis
115
Start" Prompt and Warning Messages
115
Starting Slide Preparation
117
Screens and Operations During the Slide Preparation
118
Screens During Slide Preparation
118
Checks During the Slide Preparation
123
Emergency Stop
127
Error-Triggered Shutdown
127
Shutdown Procedure
128
Operation Completed Screen
129
Switching the Modes between the Normal Operating and the Overnight Operating
130
Saving and Deleting Operation Log Data
131
Checking the Section Slide Quality and Collecting Section Slides
133
Maintenance Mode
134
Rough-Cut (Roughing) Mode
135
Roughing Parameters
136
Outline of the Operation and the Preoperational Setup
136
Outline of Roughing Operation
137
Roughing Condition Settings
138
Execution of Roughing and Operation Buttons for Use During Roughing
140
Screen During Roughing
140
Roughing Completed Screen
141
Initialization
142
Execution of Initialization
142
Staining Data
143
Setting Procedure
143
Print Settings
145
Error Log
151
Viewing the Error Log
151
Saving the Error Log
152
Time and Language Settings
152
Time Setting
152
Language Setting
153
Manual Operation
154
Outline of the Manual Operation Flow
155
Sample Feeding
156
Sample Holder
160
Blade
163
Carrier Tape
165
Slide Transfer
167
Putting (Mounting) Operation
169
Dry Chamber
171
Printing
176
Auto Trimming
180
Auto Trimming Setting
181
Remote Monitoring Setting
182
Chapter 5 - Errors and Troubleshooting
184
Caution Errors (Warnings)
186
Input Error
186
System Check and Initialization Errors
186
Errors Appearing before Operation Starts after Setting the Operating Conditions
186
Troubleshooting During Automatic Operation
192
Flow Chart
192
Operation Controls on the "Error" Screen
194
Error Code List
195
System Errors and Sample Feeding Unit Errors
195
Carrier Tape Puller Unit Errors
201
Dry Chamber Errors
204
Print Unit Errors
206
Trimming (Surface Detection) Unit Errors
207
Extension Packet Errors
209
Chapter 6 - Routine and Daily Maintenance
211
Routine (Daily) Inspections
213
Cleaning the Paraffin Waste Suction Filter
213
Cleaning the Paraffin Waste Tray (Shavings Collection Drawer)
213
Compressor Check
214
Cleaning of the Housing
214
Emptying and Cleaning the Waste Liquid Tank
215
Emptying of the Used-Blade Collection Box
215
Replacing Blades and the Carrier Tape
215
Date and Time Check
215
Error Log Check
215
Periodic (Monthly) Inspection
216
Power Cable Inspection
216
System-Internal Temperature
216
Safety Device Operation Check
217
Water Drainage of the Humidifier
218
Compressor Check
220
Maintenance Check
221
Timing of Maintenance Check
221
Contact Information for Inquiries on Operation, Maintenance, and Repairs
224
4
Based on 1 rating
Ask a question
Give review
Questions and Answers:
Need help?
Do you have a question about the DNS AS-410M and is the answer not in the manual?
Ask a question
DNS AS-410M Specifications
General
Brand
DNS
Model
AS-410M
Category
Industrial Equipment
Language
English
 Loading...