34 Eos Family v2.9.0 Operations Manual
Single Monitor Snapshots
The snapshots displayed here are single monitor-only snapshots recorded for the visible
workspace. For information about snapshots, see
About Snapshots (on page338)
. These
snapshots can be recalled from any selected monitor from the Workspace Layout Menu. You
can recall a monitor-only snapshot from the command line by using the syntax [Snapshot] [n]
[Enter]. When recalled from the command line, the selected snapshot will only affect the
monitor from which it was originally recorded.
To record a monitor-only snapshot, press the {New Snapshot} button on the Display Controls
menu screen. [Delete] [Snapshot] [n] [Enter] [Enter] will delete a monitor-only snapshot.
All snapshots can be viewed on the snapshot list display, which can be opened by pressing
[Snapshot] [Snapshot] or from the Workspace Layout Menu.
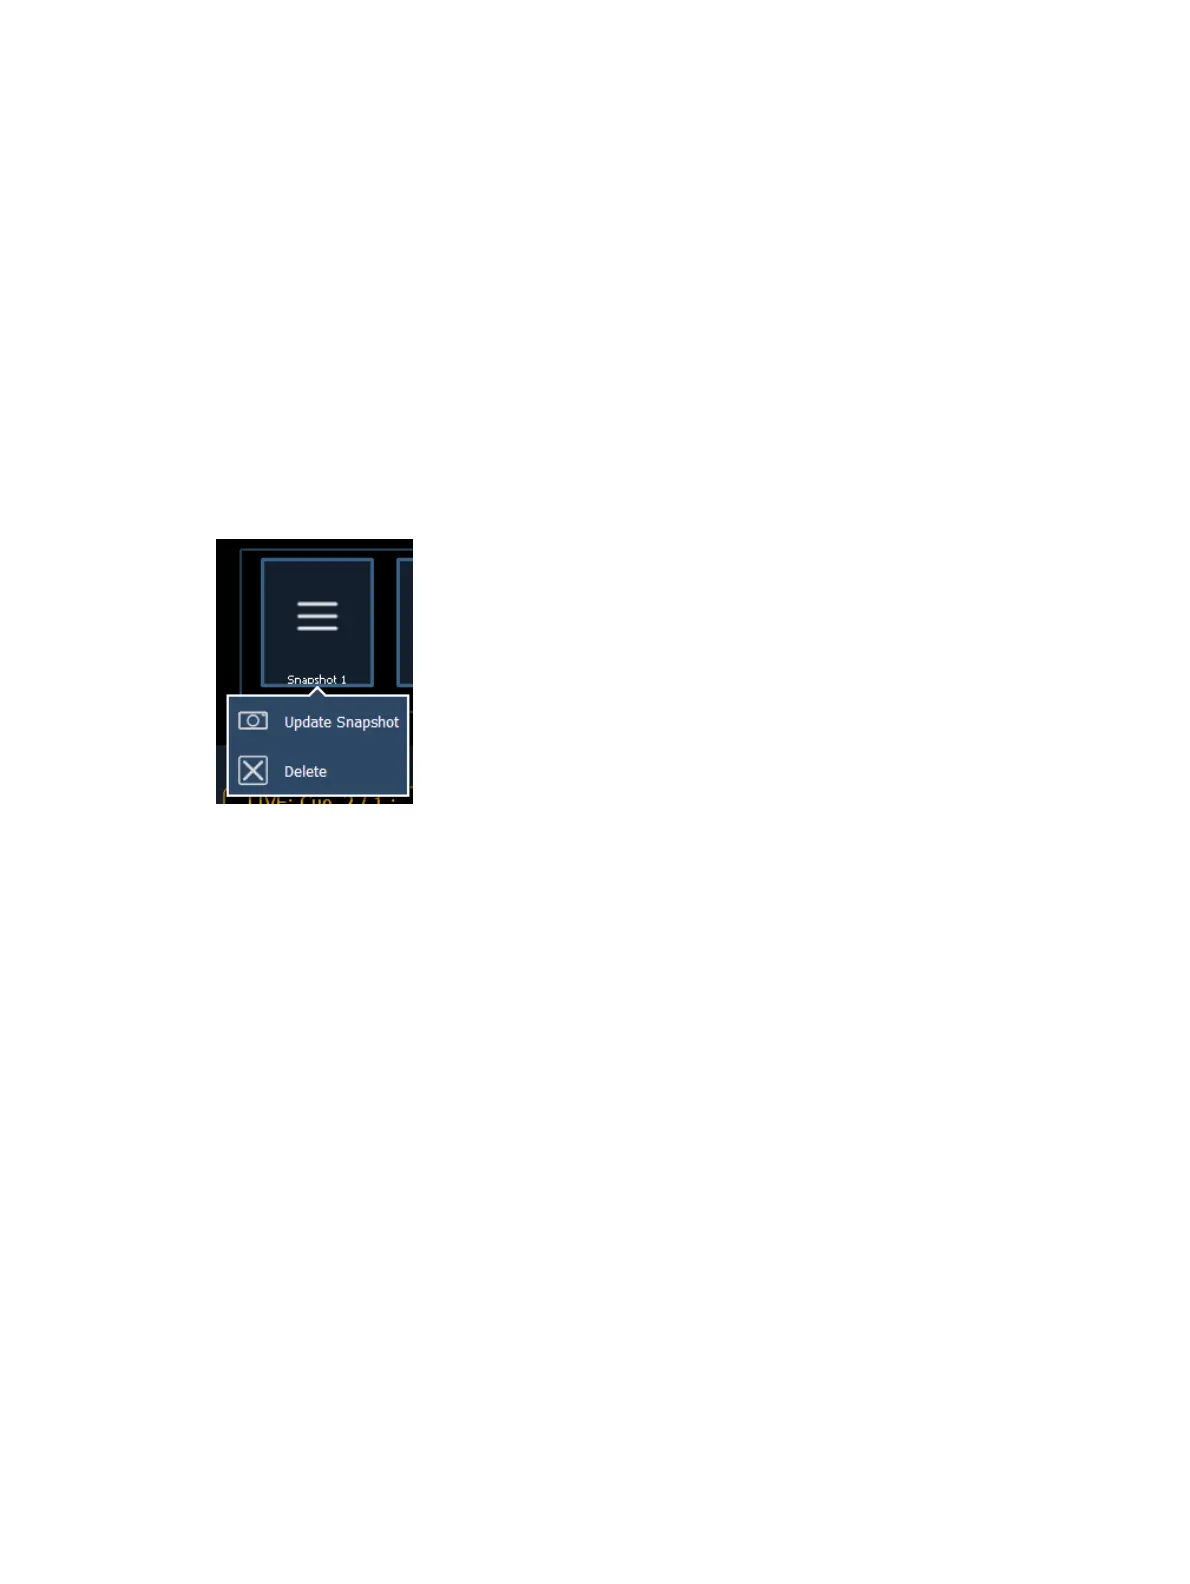
Updating a Single Monitor Snapshot
A single monitor snapshot can be updated or deleted by right clicking on its icon in the Snapshot
area of the Workspace Layout Menu.
Using Expand With Displays
[Expand] allows you to quickly create additional frames on a monitor.
To add frames, press [Expand] & [Page u] or [Expand] & [Page q] .
To collapse frames, press [Expand] & [Page t] or [Expand] & [Page p] .
Scrolling within a Display
By default the page keys will advance/retreat a display by one page per press. However, to scroll
through displays you may press the [Scroll Lock] key on the keypad. The LED on the button
illuminates red when in scroll lock mode.
Scroll lock is a toggle state. When scroll lock is first pressed:
[Page q] - scrolls table, spreadsheet and channel views down,
[Page p] - scrolls table, spreadsheet and channel views up,
[Page u] - scrolls table and spreadsheet views right,
[Page t] - scrolls table and spreadsheet views left.