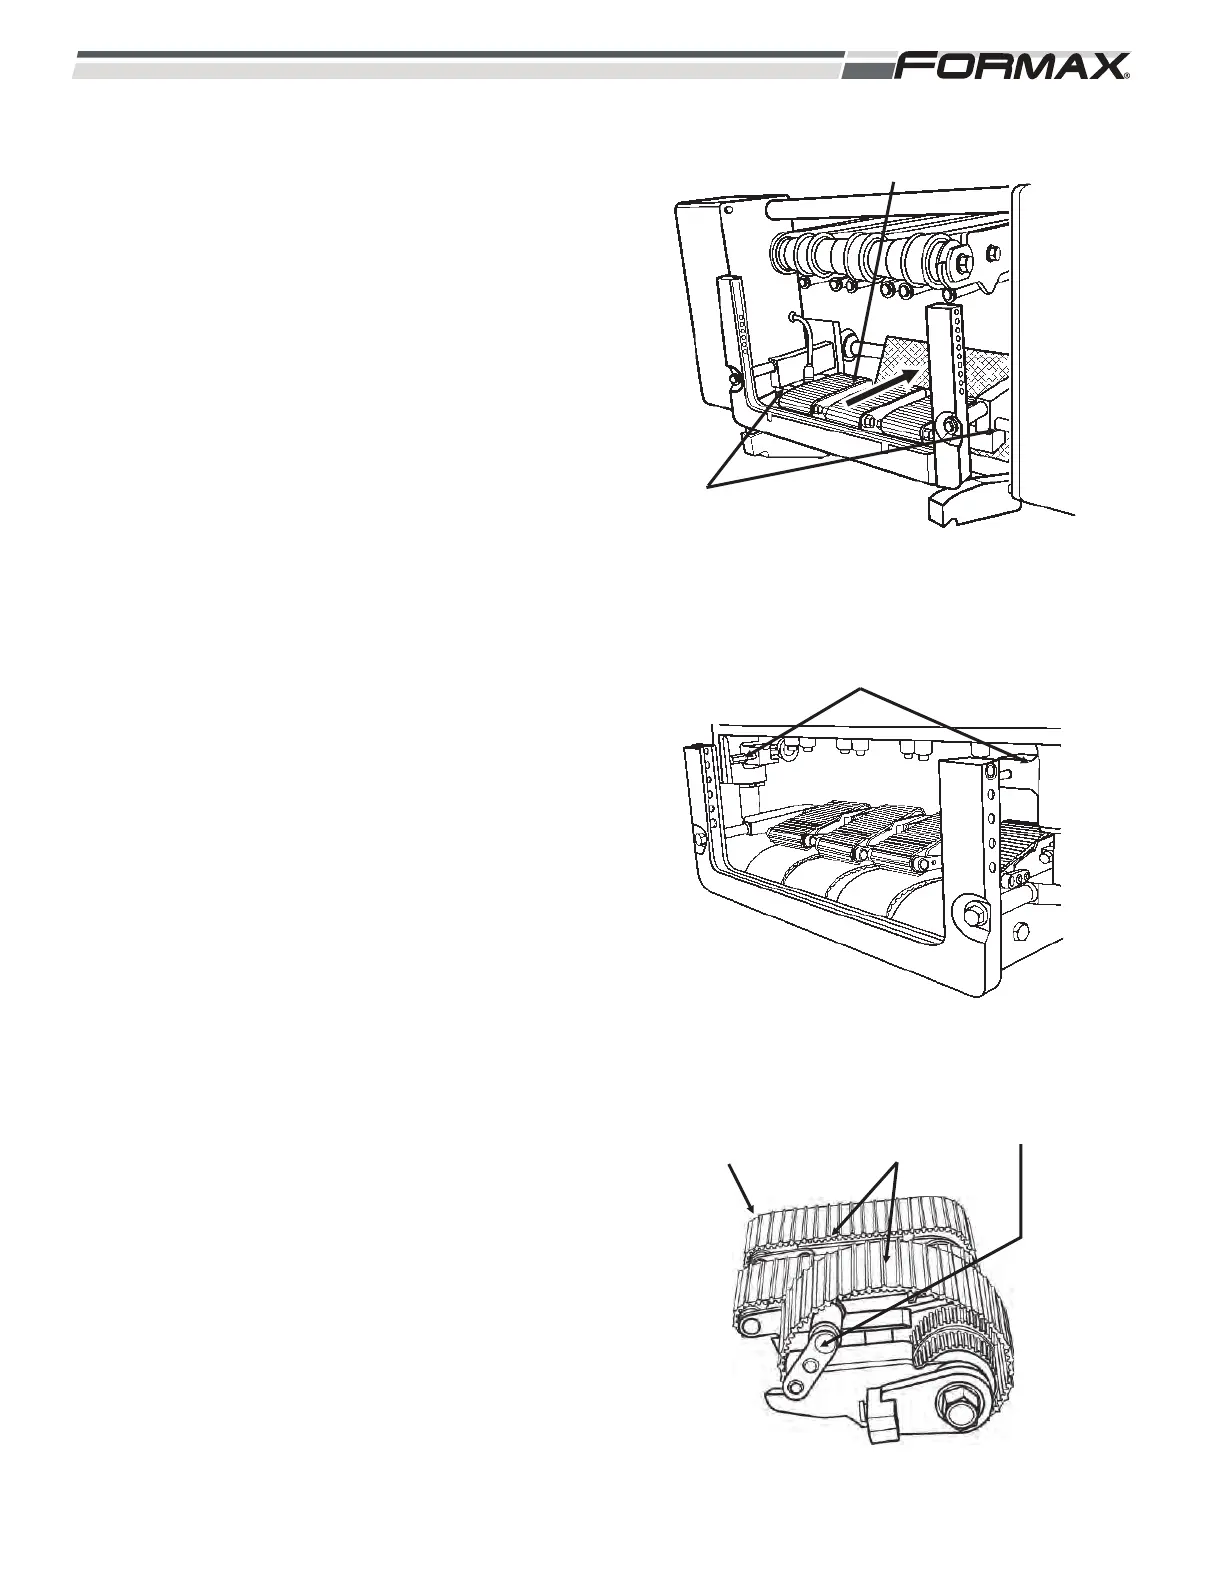
2. Loosen the Infeed Assembly and drive
coupler retaining screws. (Illustration 24)
3. Slide the #1 and #3 drive couplers away
from the drive shafts for the #1 and #3
Infeed Conveyors.
IMPORTANT!
It may be necessary to pivot the Idler Shafts
“down” and remove tension on the conveyor
belts, to turn the conveyor drive roller and
disengage the drive coupling.
4. Use 2 people and slide the Conveyor
assembly out of the mounting brackets
towards the rear. (Illustration 24 and 25)
5. Remove the Drive Couplers for the #1 and
#3 Infeed Conveyors. (Illustration 25)
6. Pivot the Idlers “down” to remove tension
from the conveyor belts. (Illustration 26)
7. Remove the Conveyor belts from the
Upper Infeed Assembly and hang the belts
and Infeed Conveyor Assembly on the
Cleanup Cart.
8-8 031914
ILLUSTRATION 25
DRIVE COUPLERS
ILLUSTRATION 24
RETAINING
SCREWS
SLIDE ASSEMBLY
TO BACK
ILLUSTRATION 26
UPPER INFEED
ASSEMBLY
CONVEYOR
BELTS
IDLER