STEP 6 COVER THE TOUCHSCREEN
WITH A PLASTIC BAG
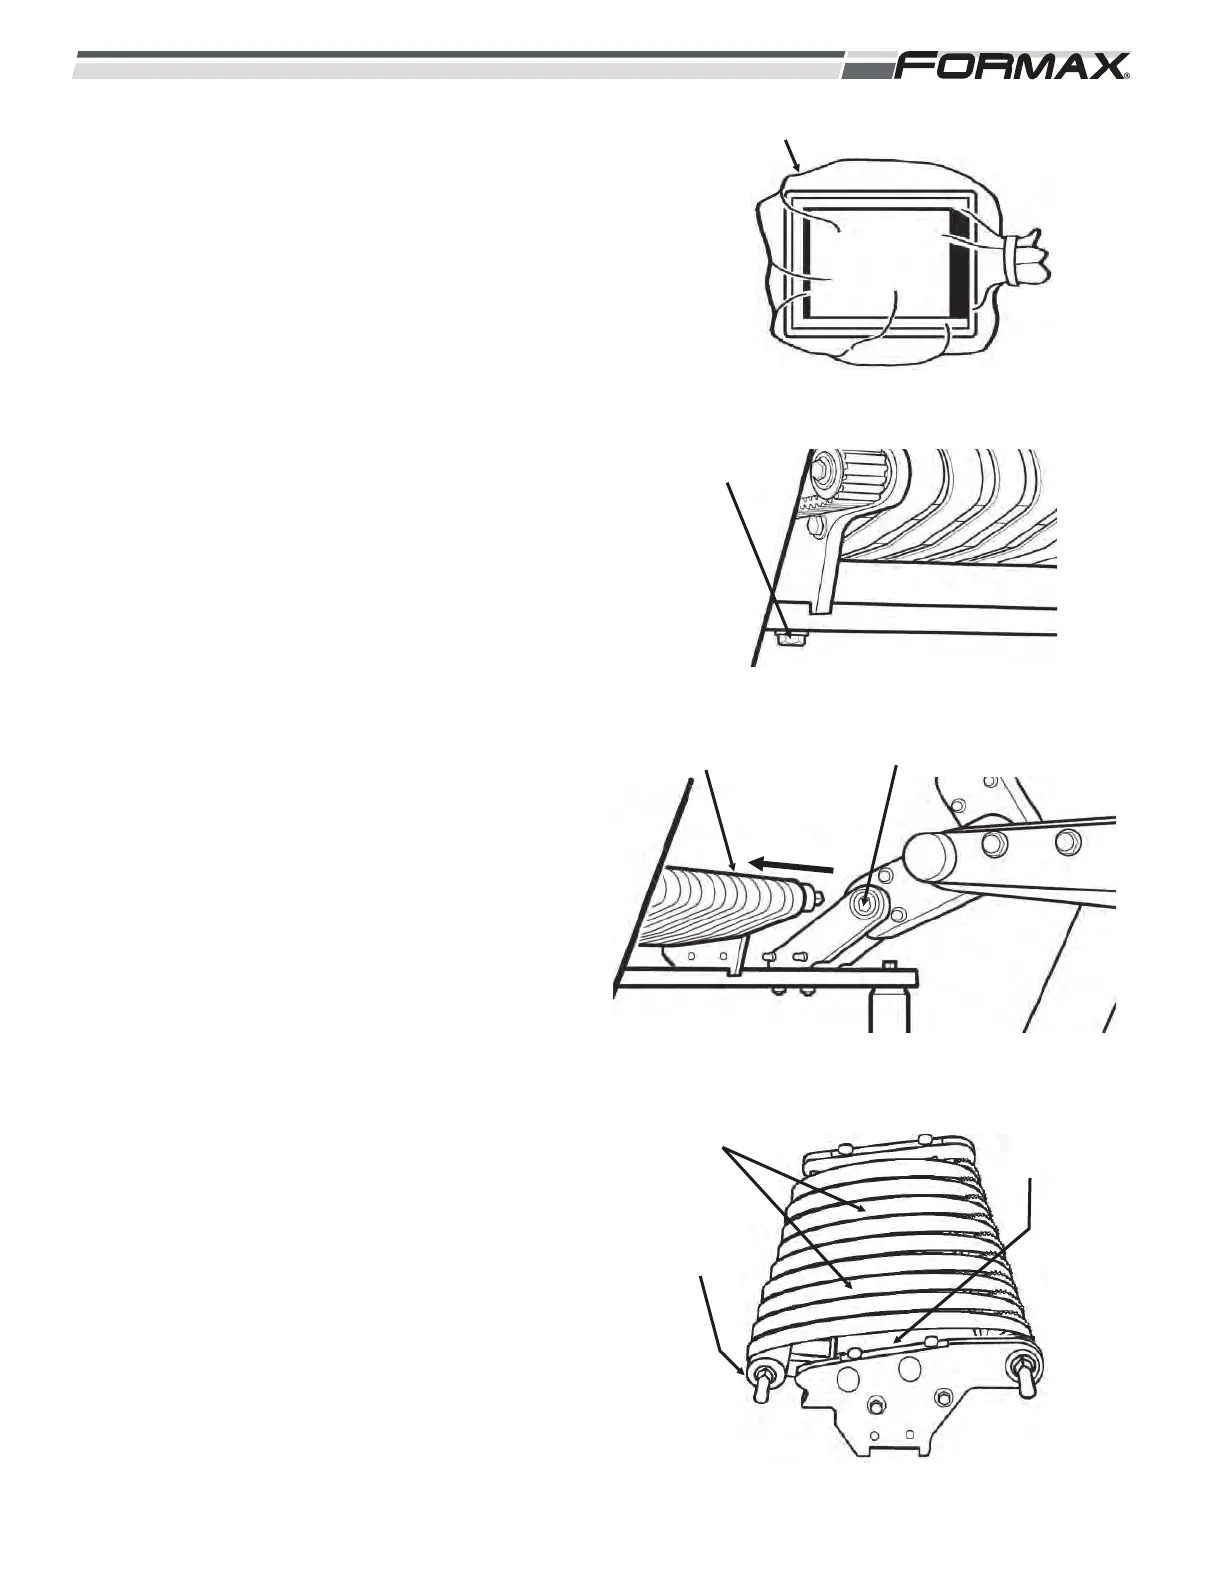
1. Cover the Touchscreen with a plastic bag
to prevent water damage. (Illustration 10)
STEP 7 DISASSEMBLE THE SLICING
CONVEYOR
1. Unscrew the retaining bolt from the
Stacker/Jump Conveyor with a 13-mm
wrench. (Illustration 10)
2. Slide the Jump Conveyor out to
disengage it from the Gearbox and
remove it from the machine.
3. Use a pry bar under one end of the Idler
Shaft to stretch the conveyor belts and
disengage the end of the shaft to remove
tension on the belts. (Illustration 11)
Disengage the other end of the shaft.
4. Slide the Idler Roller and shaft out from
under the belts. (Illustration 12) Slide the
shaft out of the Roller and place them in
the Cleanup Cart.
5. Remove the conveyor belts and slide
them onto the correct posts on the
Cleanup Cart.
6. Remove the tray from the support posts.
7. Place all conveyor parts on the Cleanup
Cart.
8-4 031914
ILLUSTRATION 11
RETAINING
BOLT
ILLUSTRATION 13
BELTS
IDLER
ROLLER
REMOVE
PAN
ILLUSTRATION 10
PLASTIC BAG
ILLUSTRATION 12
JUMP CONVEYOR GEARBOX