40
ENGLISH
Disp2: The alternave screen display to be viewed. Opons: “Obsev” (Remote Observaon) “7 ECG” (7 traces of ECG
waveforms), “NIBP”, “Parameter” and “Trend” can be selected. The factory default is “Observ”.
Inial: when the monitor is powered up, and 3 seconds later, the monitor will shi into default monitoring view
(screen) specied by “Inial” automacally. Two opons: “Main” and “Disp 2”. “Main” means the main screen as
default screen, and “Disp 2” means the default display screen will be set as alternave screen “Disp 2” while power
up.
Backlight: to set the brightness of LCD backlight, 3 levels (0, 1 and 2) for oponal, the factory default is level 0. Level
0 is darker and level 2 is the brightest. (Note: this funcon is oponal)
AlmVol: the alarm sound volume. The maximum volume is 7 and minimum is 0, i.e. no sound. When the seng is
“0”, the icon “ ” will be displayed on screen to remind user that the alarm sound is o and Alarm Silence funcon
is disabled. The default is 5.
Beep: If the seng is ON, the press of the buon will generate a keystroke sound. The factory is ON.
Pitch (Tone): to choose the style of pitchtone, the pitchtone means the tone of pulse beep (from ECG or Oximetry)
changes when the measured SpO
2
value changes, the higher SpO
2
value, the sharper beep sound (high-pitch). Two
opons: “Type1” and “Type2”. The dierence between “Type1” and “Type2” is the tone frequency at the same SpO
2
value. The factory default seng is “Type1”.
Key: to turn on/o the key sound. When the seng is “On”, it means the device will give sound out when rotang
the Knob or pressing any keys.
Exit: return to the System Setup screen.
5.2 Network Related Sengs
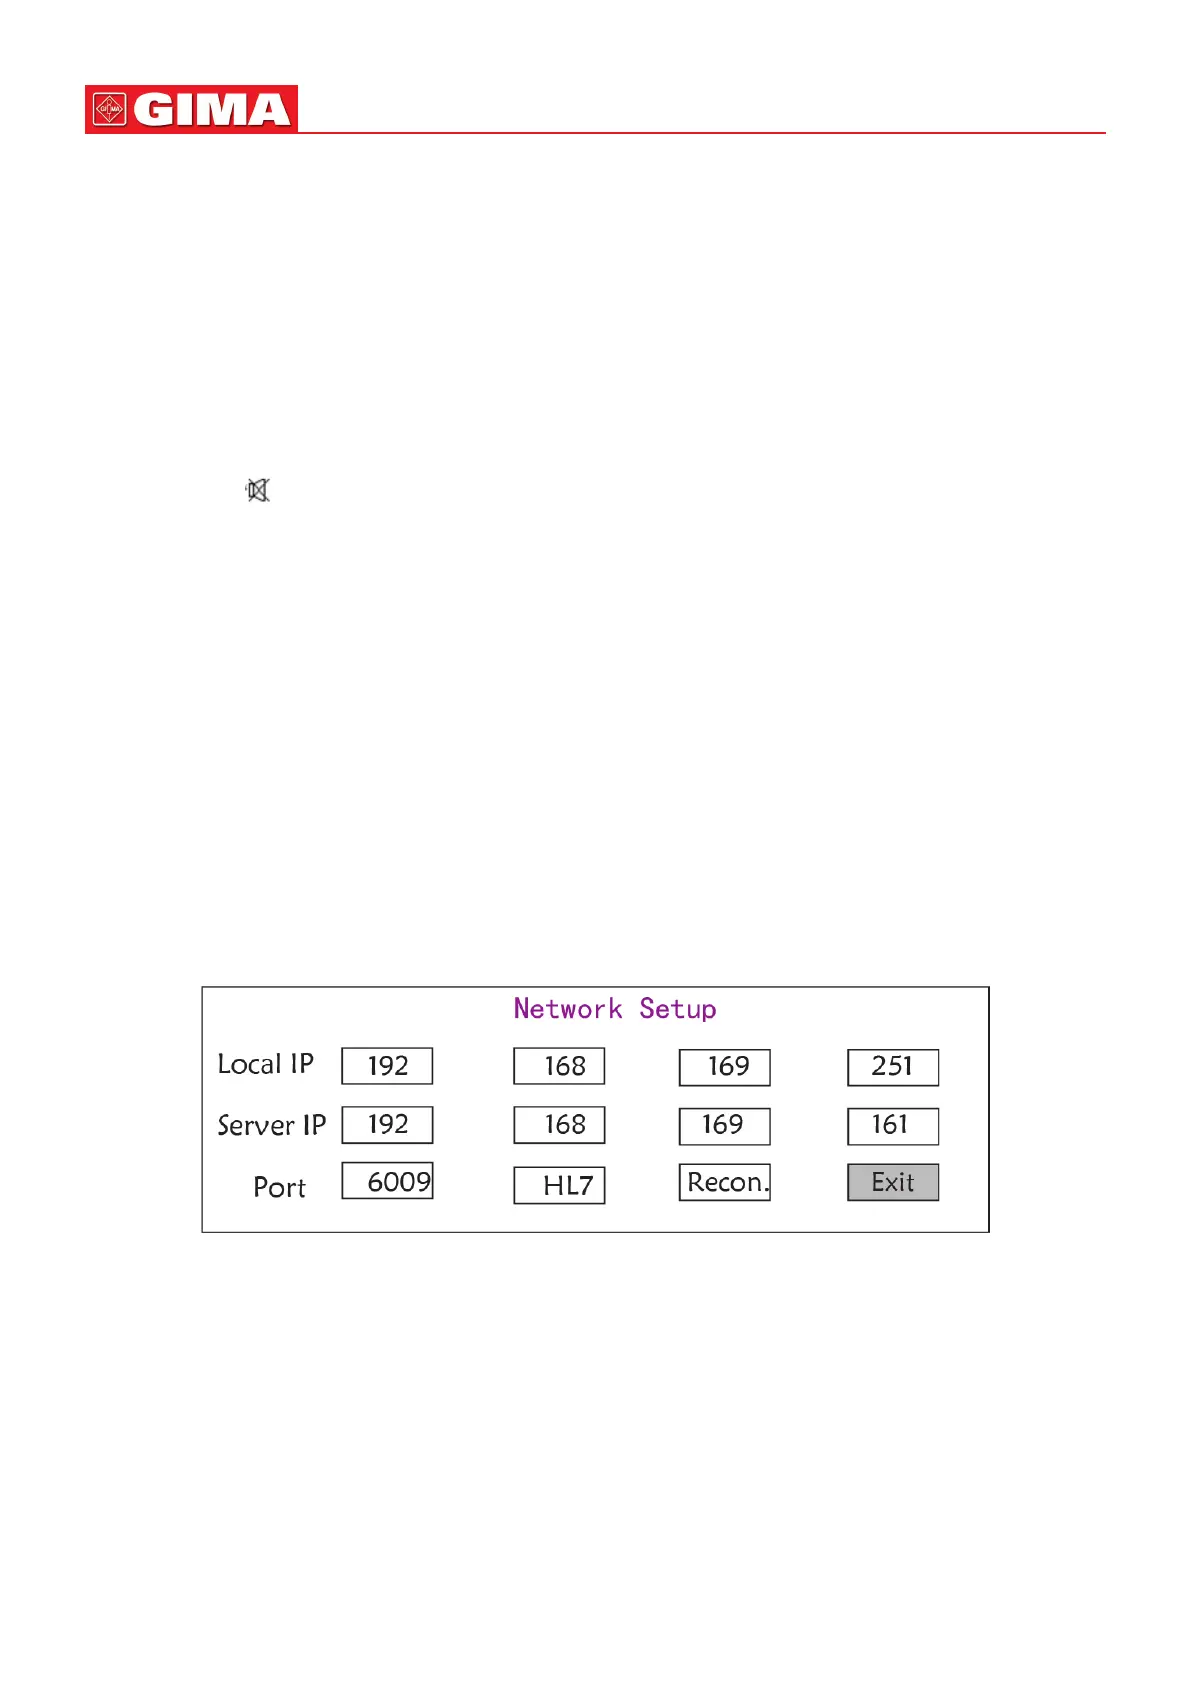
On “System Menu” screen, select “Setup”→“NET” to enter into network related sengs.
Figure 5.2 - Network setup
Local IP Address: the local IP address for this device working as a client.
Server IP Address: the IP address of the remote server (work staon) when connecng to a central monitoring
system.
Port: the remote port number to which the monitor will connect to the work staon in the central monitoring
system. Its seng range is from 6001 to 6064. It can also be used to represent the paent bed number connecng
to the work staon. For example, the port number 6002 means the monitor is assigned to the bed number 2 in the
CSM. The work staon can connect to up to 64 bedside monitors, so please set the port number between 6001 and