25
ENGLISH
4. Press the Power on/o key on the front panel to turn o the monitor.
Although not recommended, you can press and hold the Power on/o key for 10 seconds to forcibly shut down
the monitor when it can not be shut down normally or under some special situaons. This may cause loss of data
of the monitor.
3.4 Using Keys
3.4.1 Shortcut Key
Refer to Secon 2.2 for details.
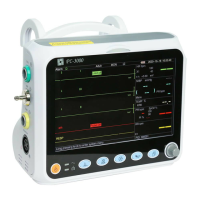
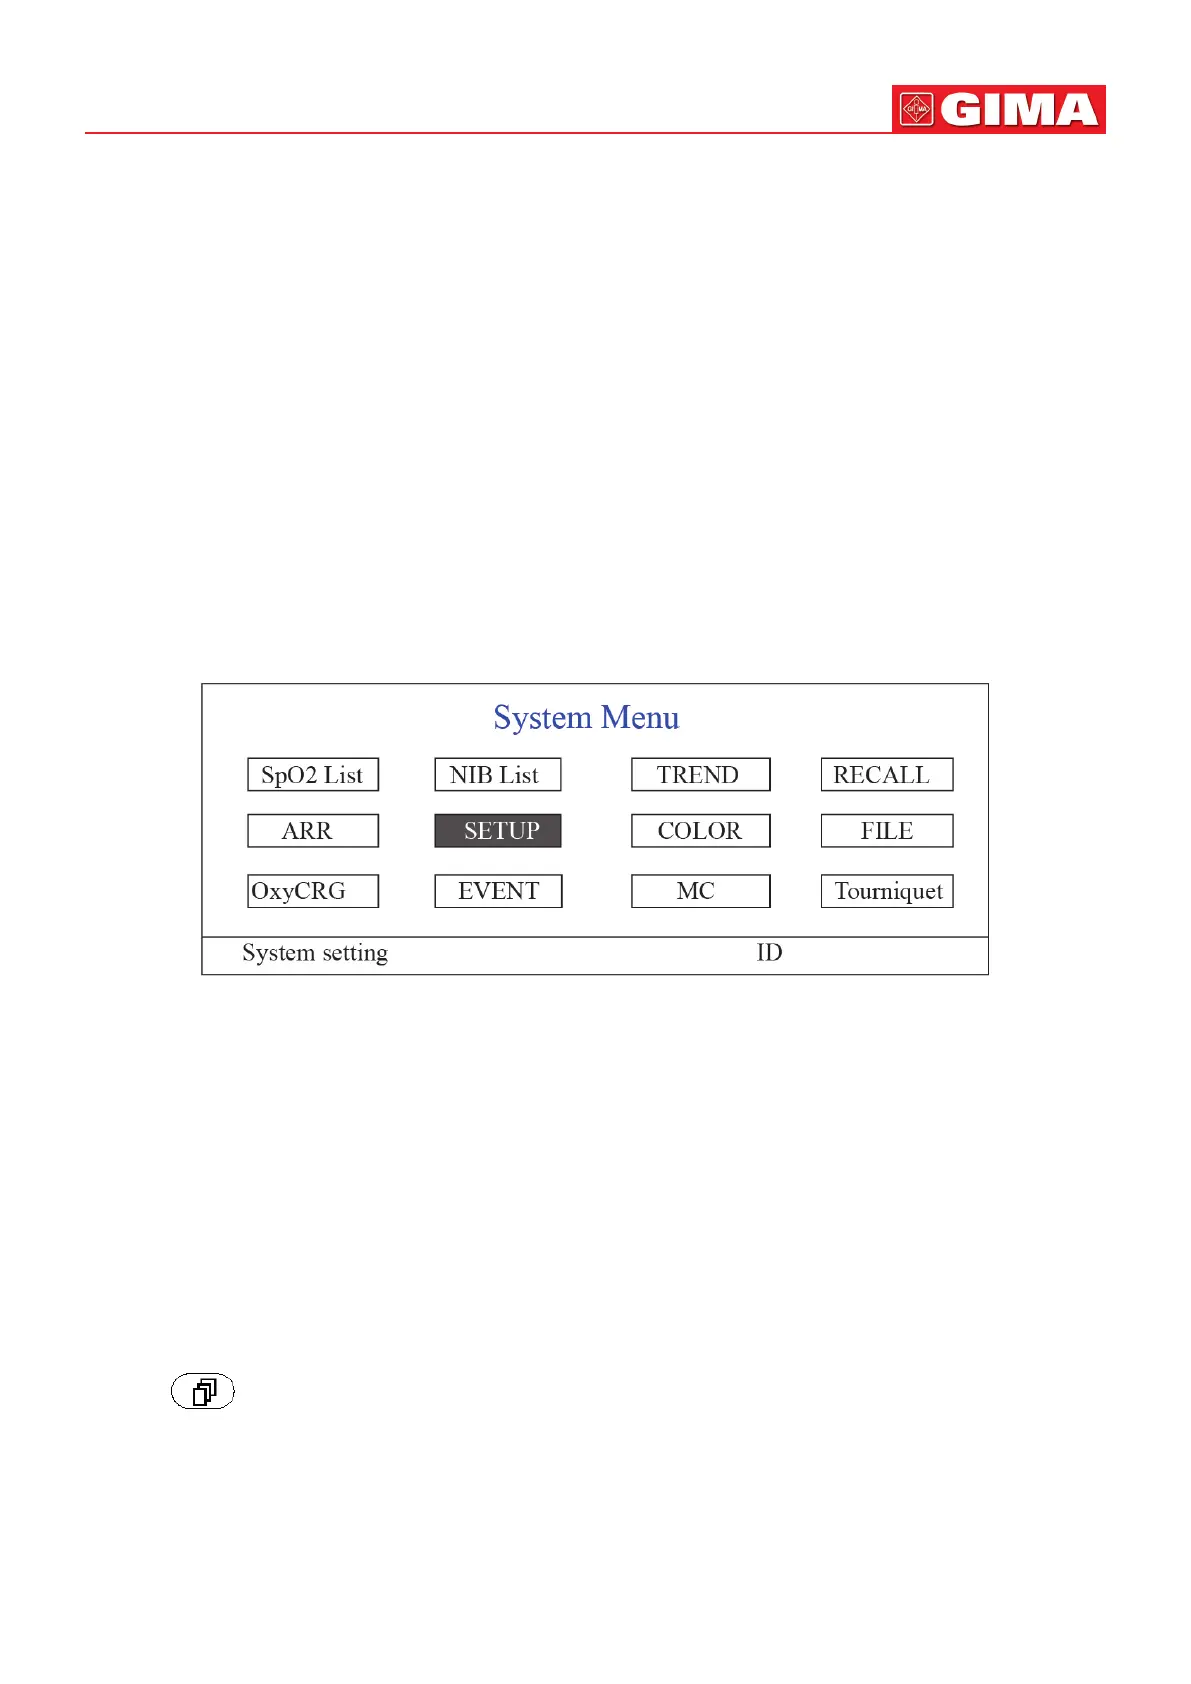
3.5 Using the Main Menu
To enter the main menu by Longme pressing the “Navigaon Knob” in the default screen, the System Menu screen will
display in the lower le area on the screen, as shown in Figure 3.1. Most of the monitor’s operaons and sengs can be
perform through the main menu.
Figure 3.1
Note: some of the above menoned funcons are for oponal, so your monitor may not cover all funcons, please
refer to the monitor in your hand.
3.5.1 How to Select the Menu Item
Step 1: rotate the knob to move the gray cursor to the corresponding item.
Step 2: press the knob to enter the corresponding screen: SpO
2
Data List Screen, NIBP Data List Screen, Graphic Trend
Screen, Recall Screen, Arrhythmia Screen, System Setup Screen, Color Sengs, File/Archive Management Screen, oxyCRG
Screen, Event List Screen, MC Calculator Screen or Cu (Tourniquet Funcon) Screen. The following chapters will describe
each one respecvely.
Pressing “ ” key to return to the Main Screen.
Note: For the monitor without ECG funcon, “RECALL”, “ARR” and “OxyCRG” are in grey and non-accessible. And MC
Calculator Screen or Cu (Tourniquet Funcon) Screen are not available.
3.6 Data Uploading
The data stored in this device can be uploaded to the computer via the oponally provided USB data cable for data