65
ENGLISH
4. Connect the sensor cable to the adapter cable.
10.4 Using Probe and Sensor
When selecng a SpO
2
probe or sensor, do consider the paent’s category, adequacy of perfusion, availability of probe
site and ancipated monitoring duraon. Use only SpO
2
probes provided by our company with this monitor.
We provide several probes for oponal, please refer to the following descripon according to the probe/sensor you’ve
purchased.
Type 1: Adult SpO
2
Finger Clip Sensor
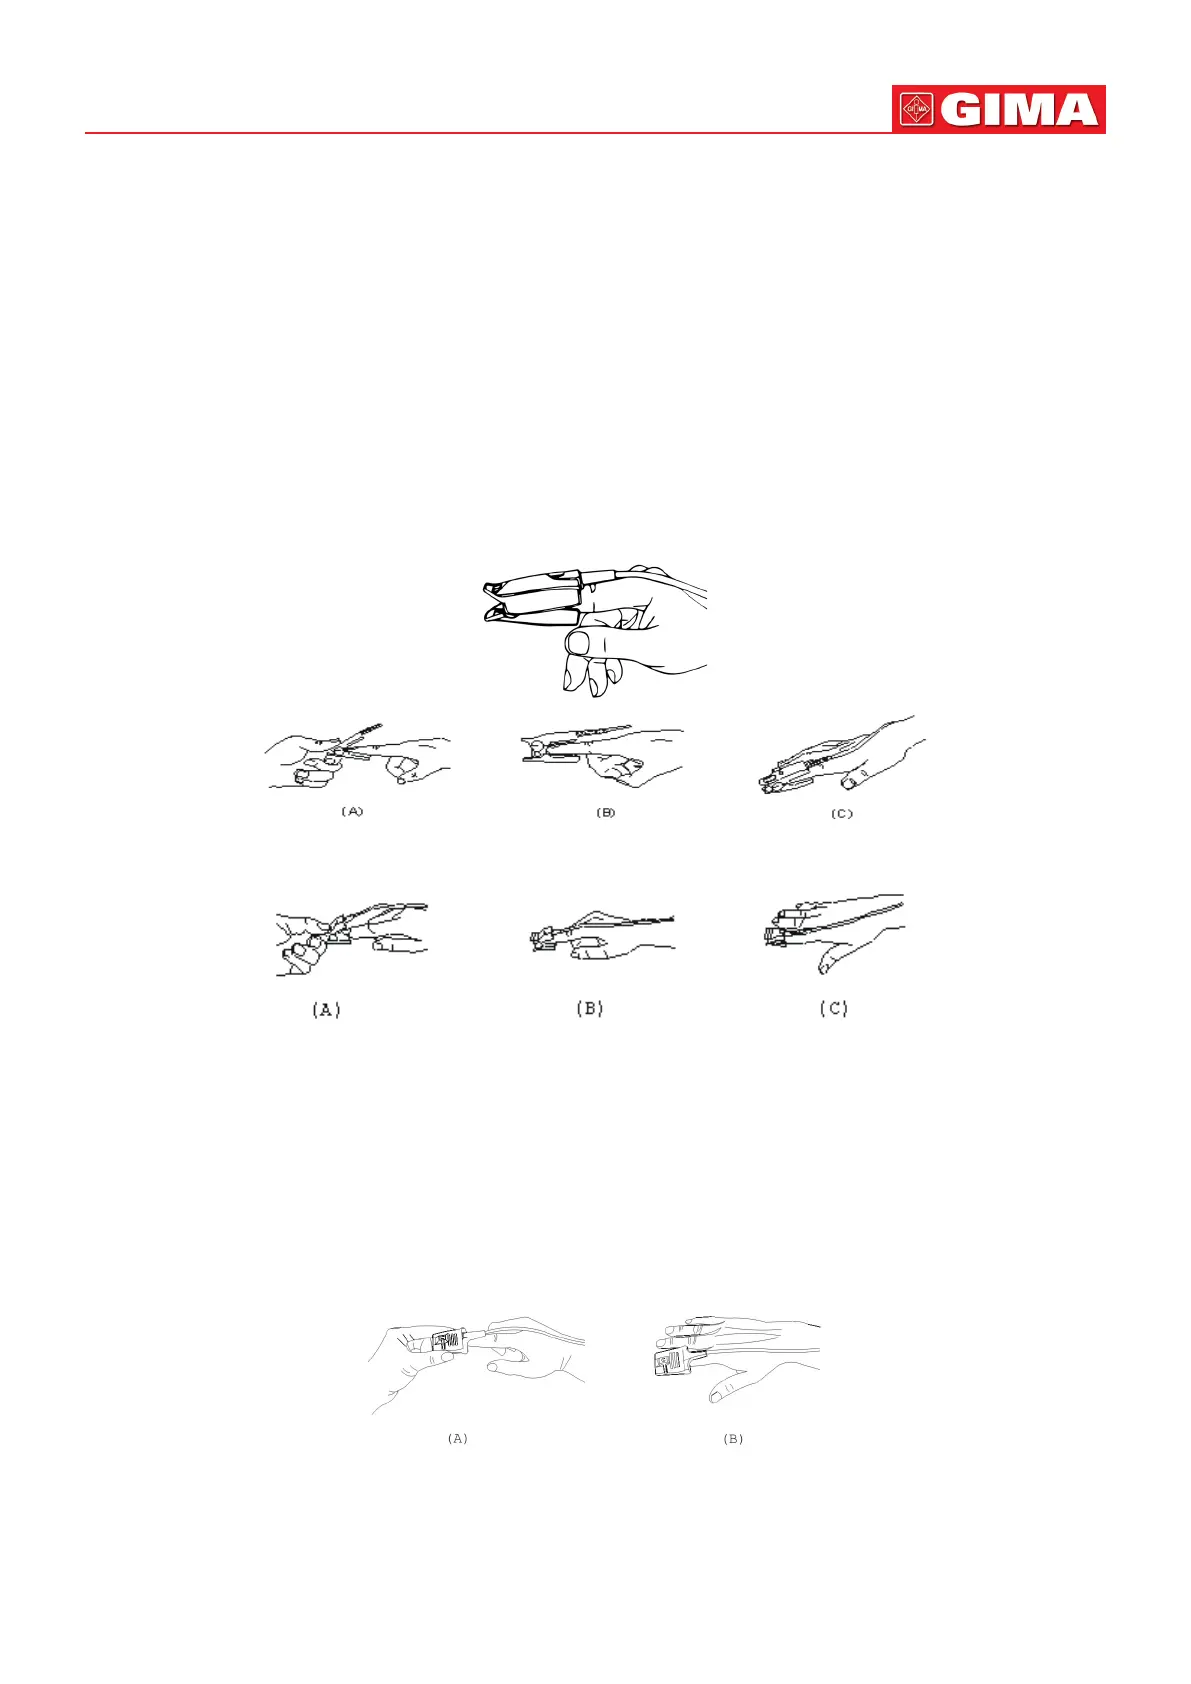
Insert one nger (index nger is preferred, but middle or ring nger with proper nail length is possible as well) into the
probe according to the nger mark on the probe, shown as below.
Type 2: Pediatric SpO
2
Finger Clip Sensor
With the upper and lower jaws open, place a nger evenly on the base of the clip. Push the nger p against the stop
so that it is over the sensor window.
(B) Spread open the rear tabs of the sensor to provide even force over the length of the pads.
(C) The sensor should be oriented in such a way that the cable is posioned along the top of the hand.
Type 3: Adult/Pediatric SpO
2
Finger Rubber Sensor
(A) Hold the sensor with its opening towards the paent’s nger, the sensor should be oriented in such a way that the
sensor side with a nger p sign is posioned on the top.
(B) Insert the paent’s nger into the sensor unl the ngernail p rests against the stop at the end of the sensor. Adjust