Operating Instructions • Thermal Transfer Printer TT4030 • 06-2017 • 031-93478
Maintenance
21
GBDEFRESPTITNLDKNOSEFIPLCZHUSIROTR
9.2.5 Cleaning the printhead
Substances may accumulate on the printhead during
printing and adversely affect printing, e.g. differences in
contrast or vertical stripes.
Cleaning intervals:
• Direct thermal printing: after every material roll change
• Thermal transfer printing: after every colour ribbon roll
change
CAUTION
Risk of injury from hot printhead line!
Hot printhead lines can cause injury if touched.
f Ensure that the printhead has cooled down.
NOTE
Material damage caused by improper work!
The printhead can be damaged by using aggressive cleaning
agents or hard materials.
f Do not use aggressive cleaning agents or hard materials
to clean the printhead.
f Do not touch the protective glass layer.
Proceed as follows:
1 Lift the printhead.
2 Take the materials and colour ribbon out of the device.
3 Clean printhead with special cleaning pen or a cotton
swab dipped in pure alcohol.
4 Allow printhead to dry for 2 to 3 minutes.
; The printhead is cleaned.
9.2.6 Cleaning the light barrier
The sensors can be soiled by paper dust. This can cause
problems with detecting the start of the material or print
markers.
NOTE
Material damage due to improper cleaning!
The light barrier can be damaged by using aggressive
cleaning agents or hard materials.
f Do not use abrasive cleaners or solvents and hard
materials to clean the light barrier.
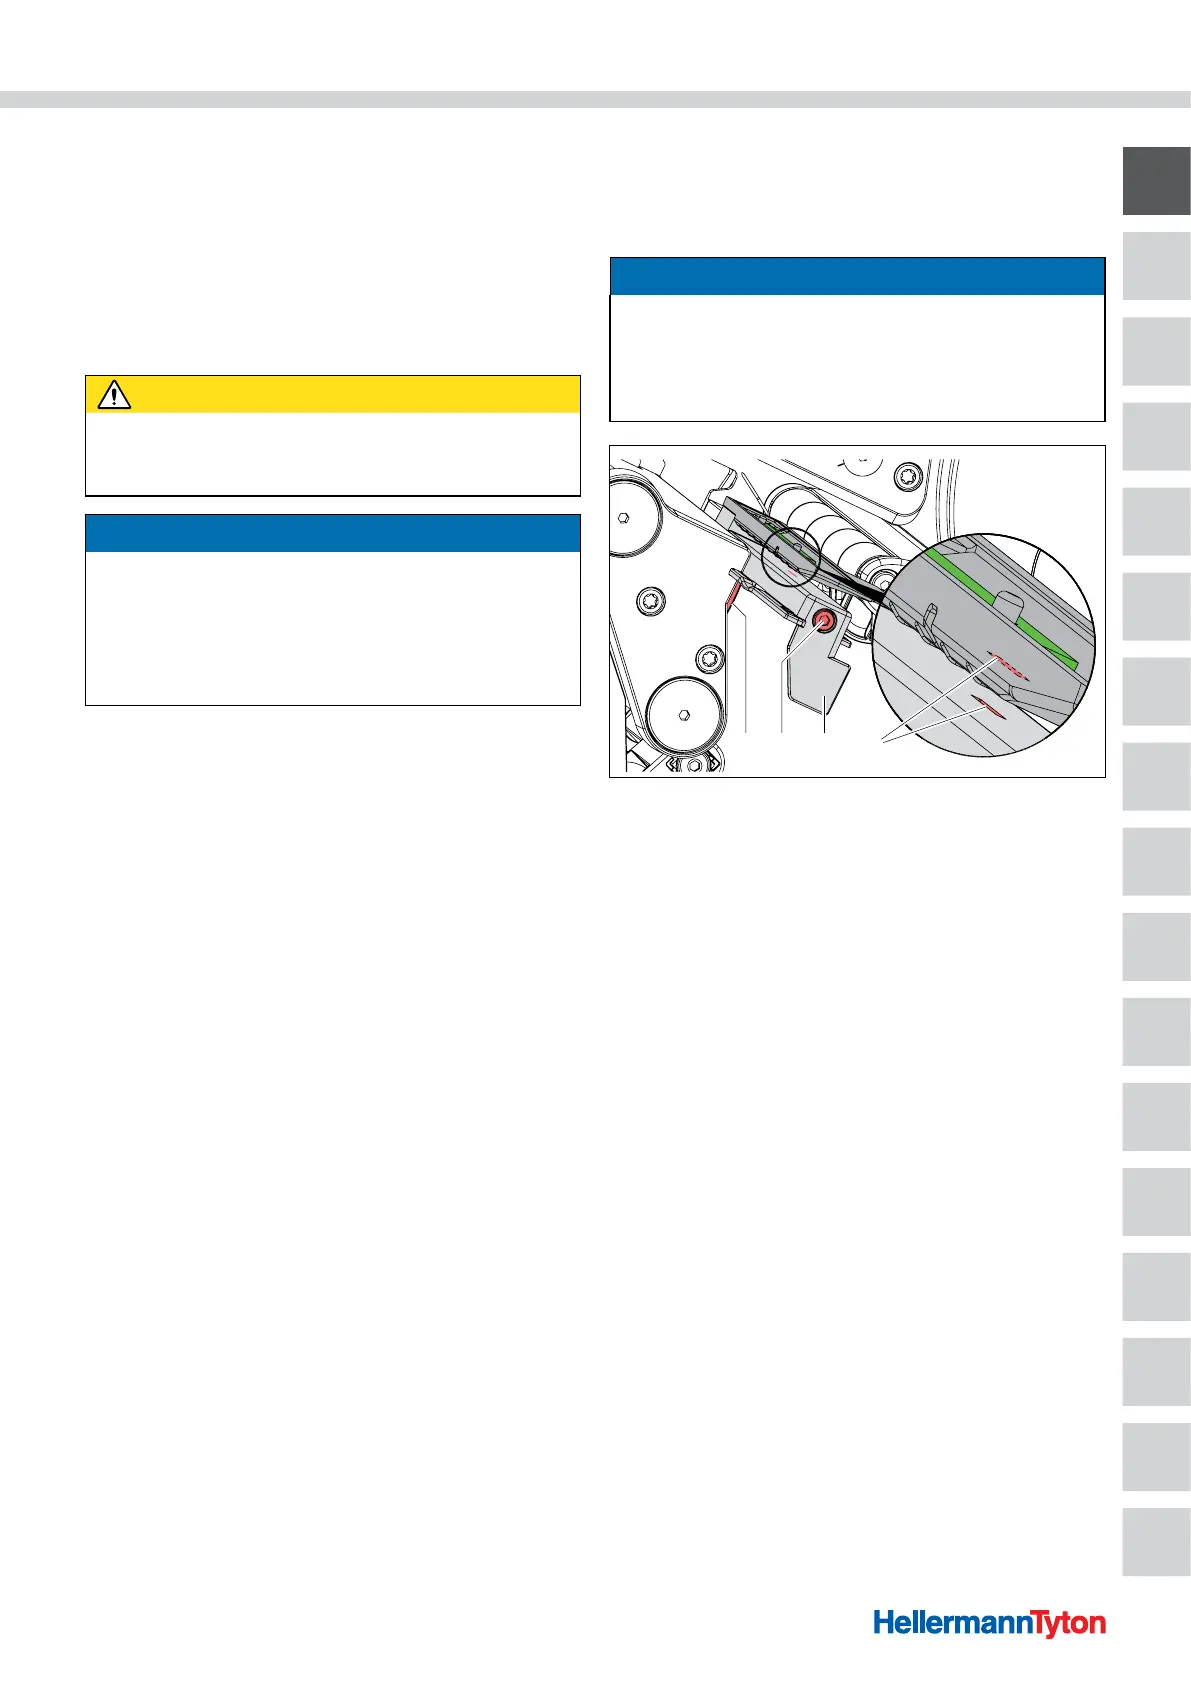
3 421
Cleaning the light barrier.
1 Knob
2 Screw
3 Light barrier
4 Sensor slits
Proceed as follows:
1 Take the materials and colour ribbon out of the device.
2 Loosen the screw.
3 Press and hold the button.
4 Using the handle, slowly pull the light barrier outwards.
f Ensure that the light barrier cable is not strained.
; The light barrier is pulled out.
5 Clean the light barrier and sensor slits with a soft brush
or with a cotton swab dipped in pure alcohol.
6 Push the light barrier back in using the handle and
adjust it.
Æ Section 6.1.3
7 Reinsert the materials and colour ribbon.
; The light barrier is cleaned.
 Loading...