GENERAL INFORMATION
- 29 -
CAUTION
Do not heat the housing with a propane or acetylene
torch. Never bring a flame into contact with the
bearing or housing. The direct heat will destroy the
case hardening of the bearing and will likely warp
the housing.
b. Remove the housing from the oven or hot plate, and hold onto the housing with welding gloves.
It is hot!
NOTE
Remove and install the bearings with a
suitable size socket and extension.
c. Hold the housing with the bearing side down and tap the bearing out. Repeat for all bearings in
the housing.
d. Before heating the bearing housing, place the new bearing in a freezer if possible. Chilling a
bearing slightly reduces its outside diameter while the heated bearing housing assembly is
slightly larger due to heat expansion. This makes bearing installation easier.
NOTE
Always install bearings with the manufacturer’s
mark or number facing outward.
e. While the housing is still hot. Install the new bearing(s) into the housing. Install the bearings by
hand. if possible. If necessary, lightly tap the bearing(s) into the housing with a driver placed on
the outer bearing race (Figure 43). Do not install new bearings by driving on the inner-bearing
race. Install the bearing(s) until it seats completely.
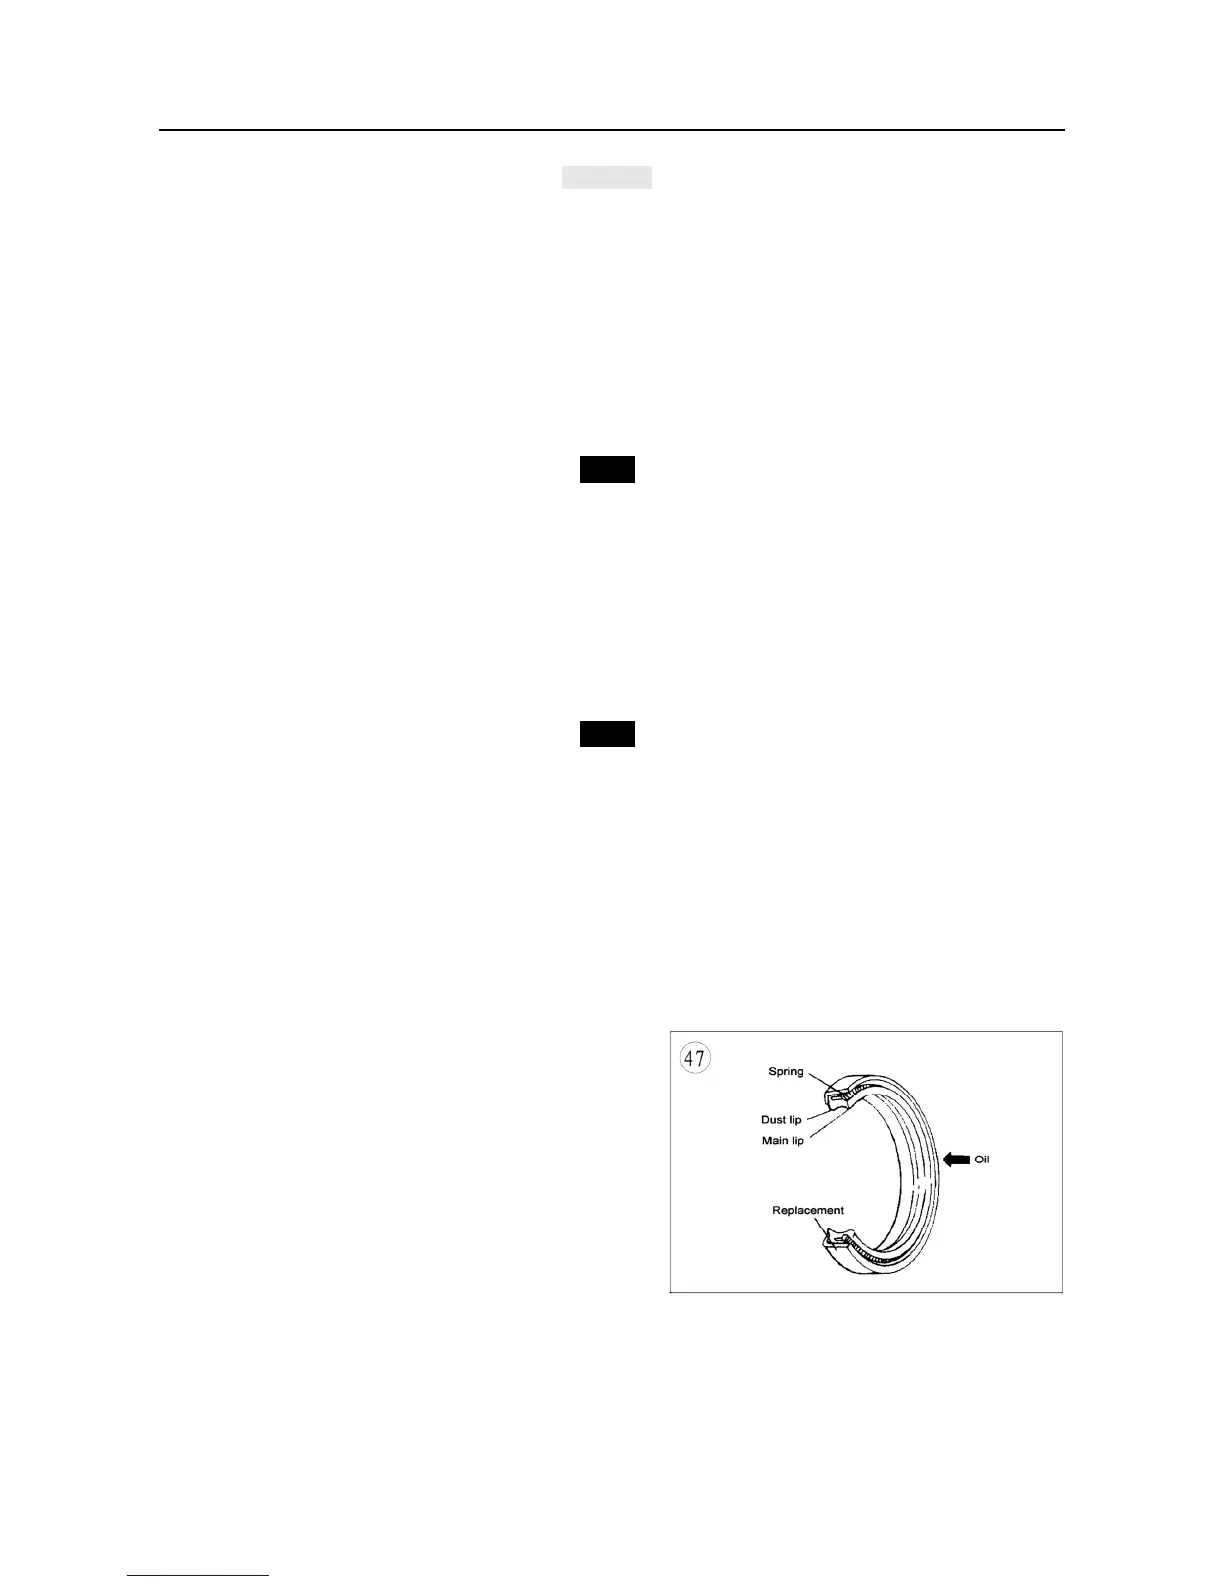
Seal Replacement
Seals (Figure 47) contain oil, water, grease or
combustion gasses in a housing or shaft. Improperly
removing a seal can damage the housing or shaft.
Improperly installing the seal can damage the seat.
Note the following:
1. Prying is generally the easiest and most effective
method of removing a seal from the housing.
However. Always place a rag underneath the pry
tool to prevent damage to the housing. Note the
seal’s installed depth or if it is installed flush.
2. Pack waterproof grease in the seal lips before the seal is installed.
3. In most cases, install seals with the manufacturer’s numbers or marks facing out.
4. Install seals with a socket or driver placed on the outside of the seal as shown in. Drive the seal
squarely into the housing until it is to the correct depth or flush as noted during removal. Never
install a seal by hitting against the top of it with a hammer.