5. Remove the memory carrier assembly. See “Removing the Memory Carrier Assembly”
(page 203).
6. Remove the processor board assembly. See “Removing the Processor Board Assembly”
(page 214).
7. Unplug the USB cable from the connector on the display board.
8. Remove the DVD drive. See “Removing the DVD Drive” (page 201).
9. Remove the display board. See “Removing the Display Board” (page 239).
10. Slide the SAS drives and fillers approximately two inches out of the drive bays. See “Removing
a Hot-Pluggable Disk Drive” (page 188).
CAUTION: When disconnecting the SAS cables, note the labeling on the cables. Both cables
and sockets are clearly marked with the correct channel. When reconnecting these cables,
match each cable with the appropriate socket on the SAS core I/O card. If the cables are
mismatched, your server will not boot the OS.
11. Unplug the SAS data and power cables from the connectors on the SAS backplane boards.
12. Remove the upper SAS backplane board. See “Removing the SAS Backplane Board” (page 243).
13. Remove the lower SAS backplane board. See “Removing the SAS Backplane Board” (page 243).
14. Remove the interconnect board. See “Removing the Interconnect Board” (page 245).
15. Remove the I/O board assembly. See “Removing the I/O Board Assembly” (page 223).
16. Remove the power supplies. See “Removing a Hot-Swappable Power Supply” (page 185).
17. Disconnect the fan cables from the fan 1 and fan 2/3 housing units.
a. Disconnect fan 1 cable connector.
b. Disconnect the fan 2/fan 3 cable connector.
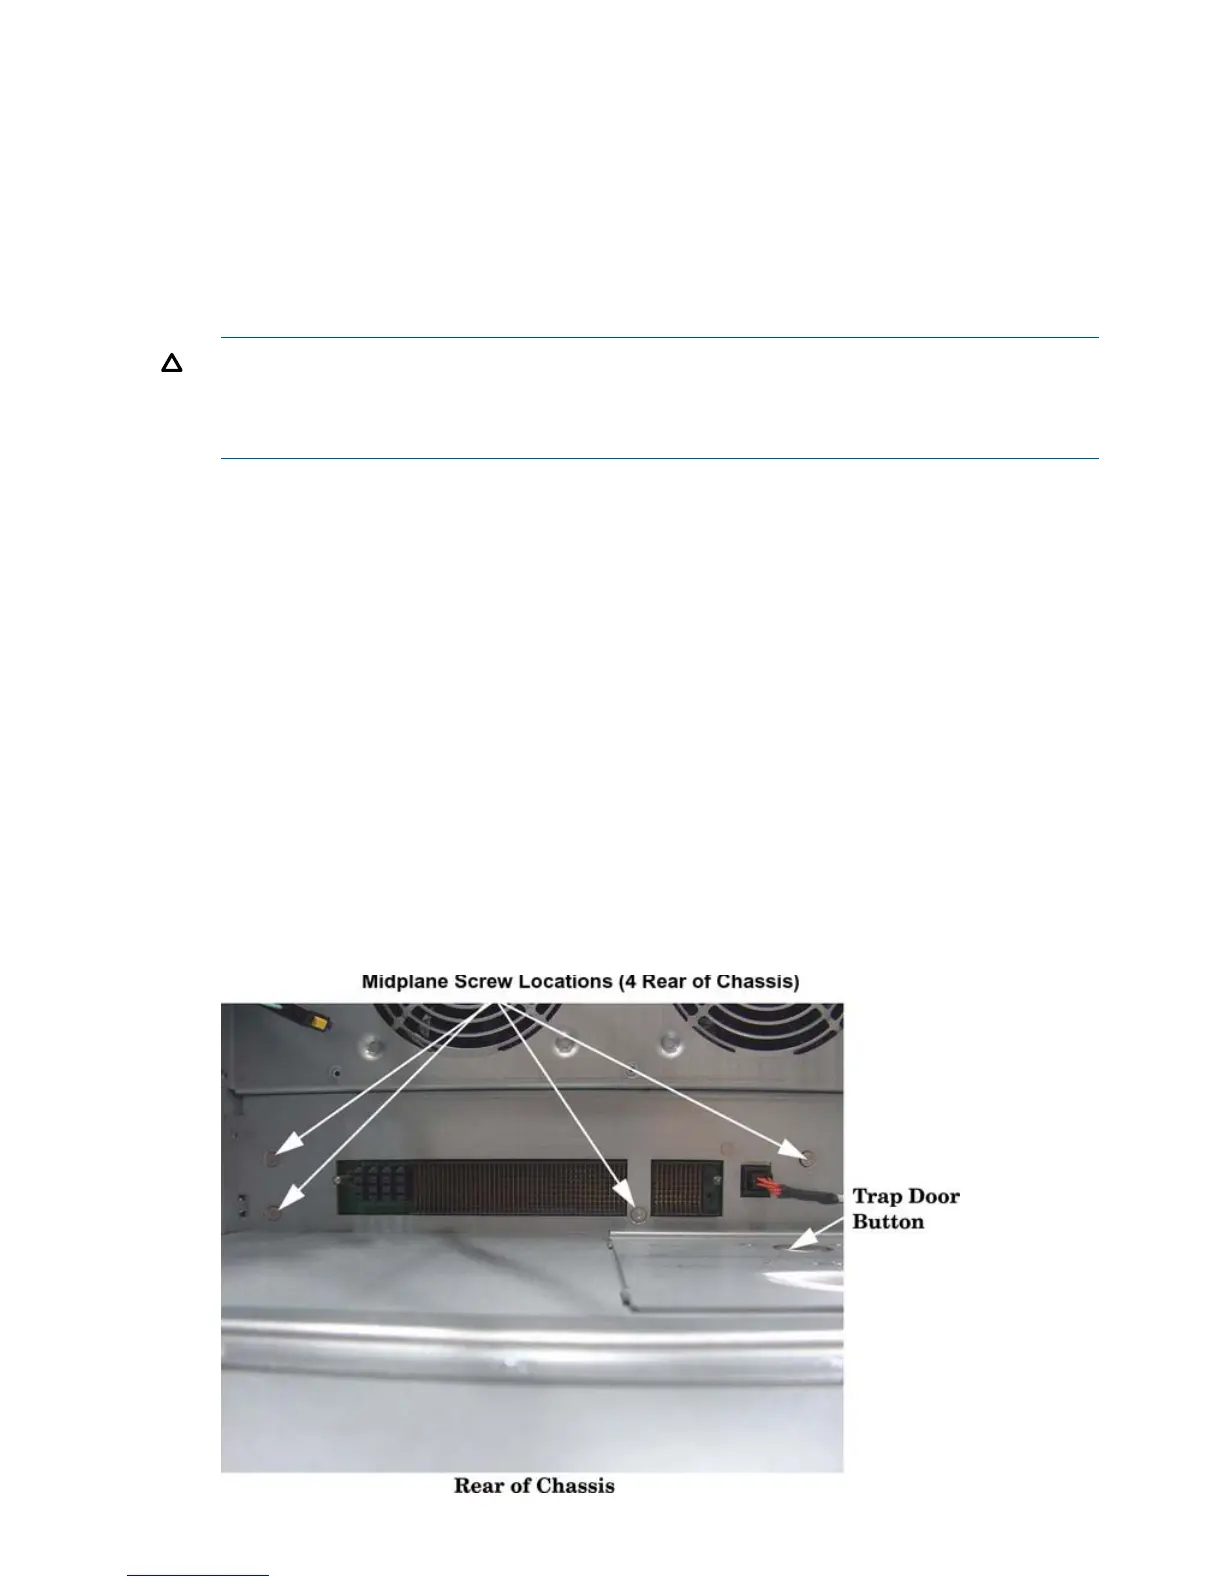
18. Open the trap door by pressing down on the button and sliding trap door toward the rear of
the server. (Figure 87).
19. Disconnect external fan cables.
20. Swing the hinged CPU panel up to expose the midplane screws.
21. Use a Torx 10 screwdriver to remove the three Torx screws attaching the midplane board to
the sheet metal bracket through the front of the chassis (Figure 86).
Figure 86 Midplane Board Screw Location (Rear of Chassis)
248 Removing and Replacing Server Components