Page 200
REPAIR INSTRUCTIONS, PART 1
BUSHING INSTALLATION
1. Clean the surfaces of the bushing and the
bore. Dry both surfaces with compressed
air.
2. Using a dark-colored felt-tip marker, mark
the cylinder block and bushing with a line to
facilitate correct alignment at installation.
Refer to Figure 202.
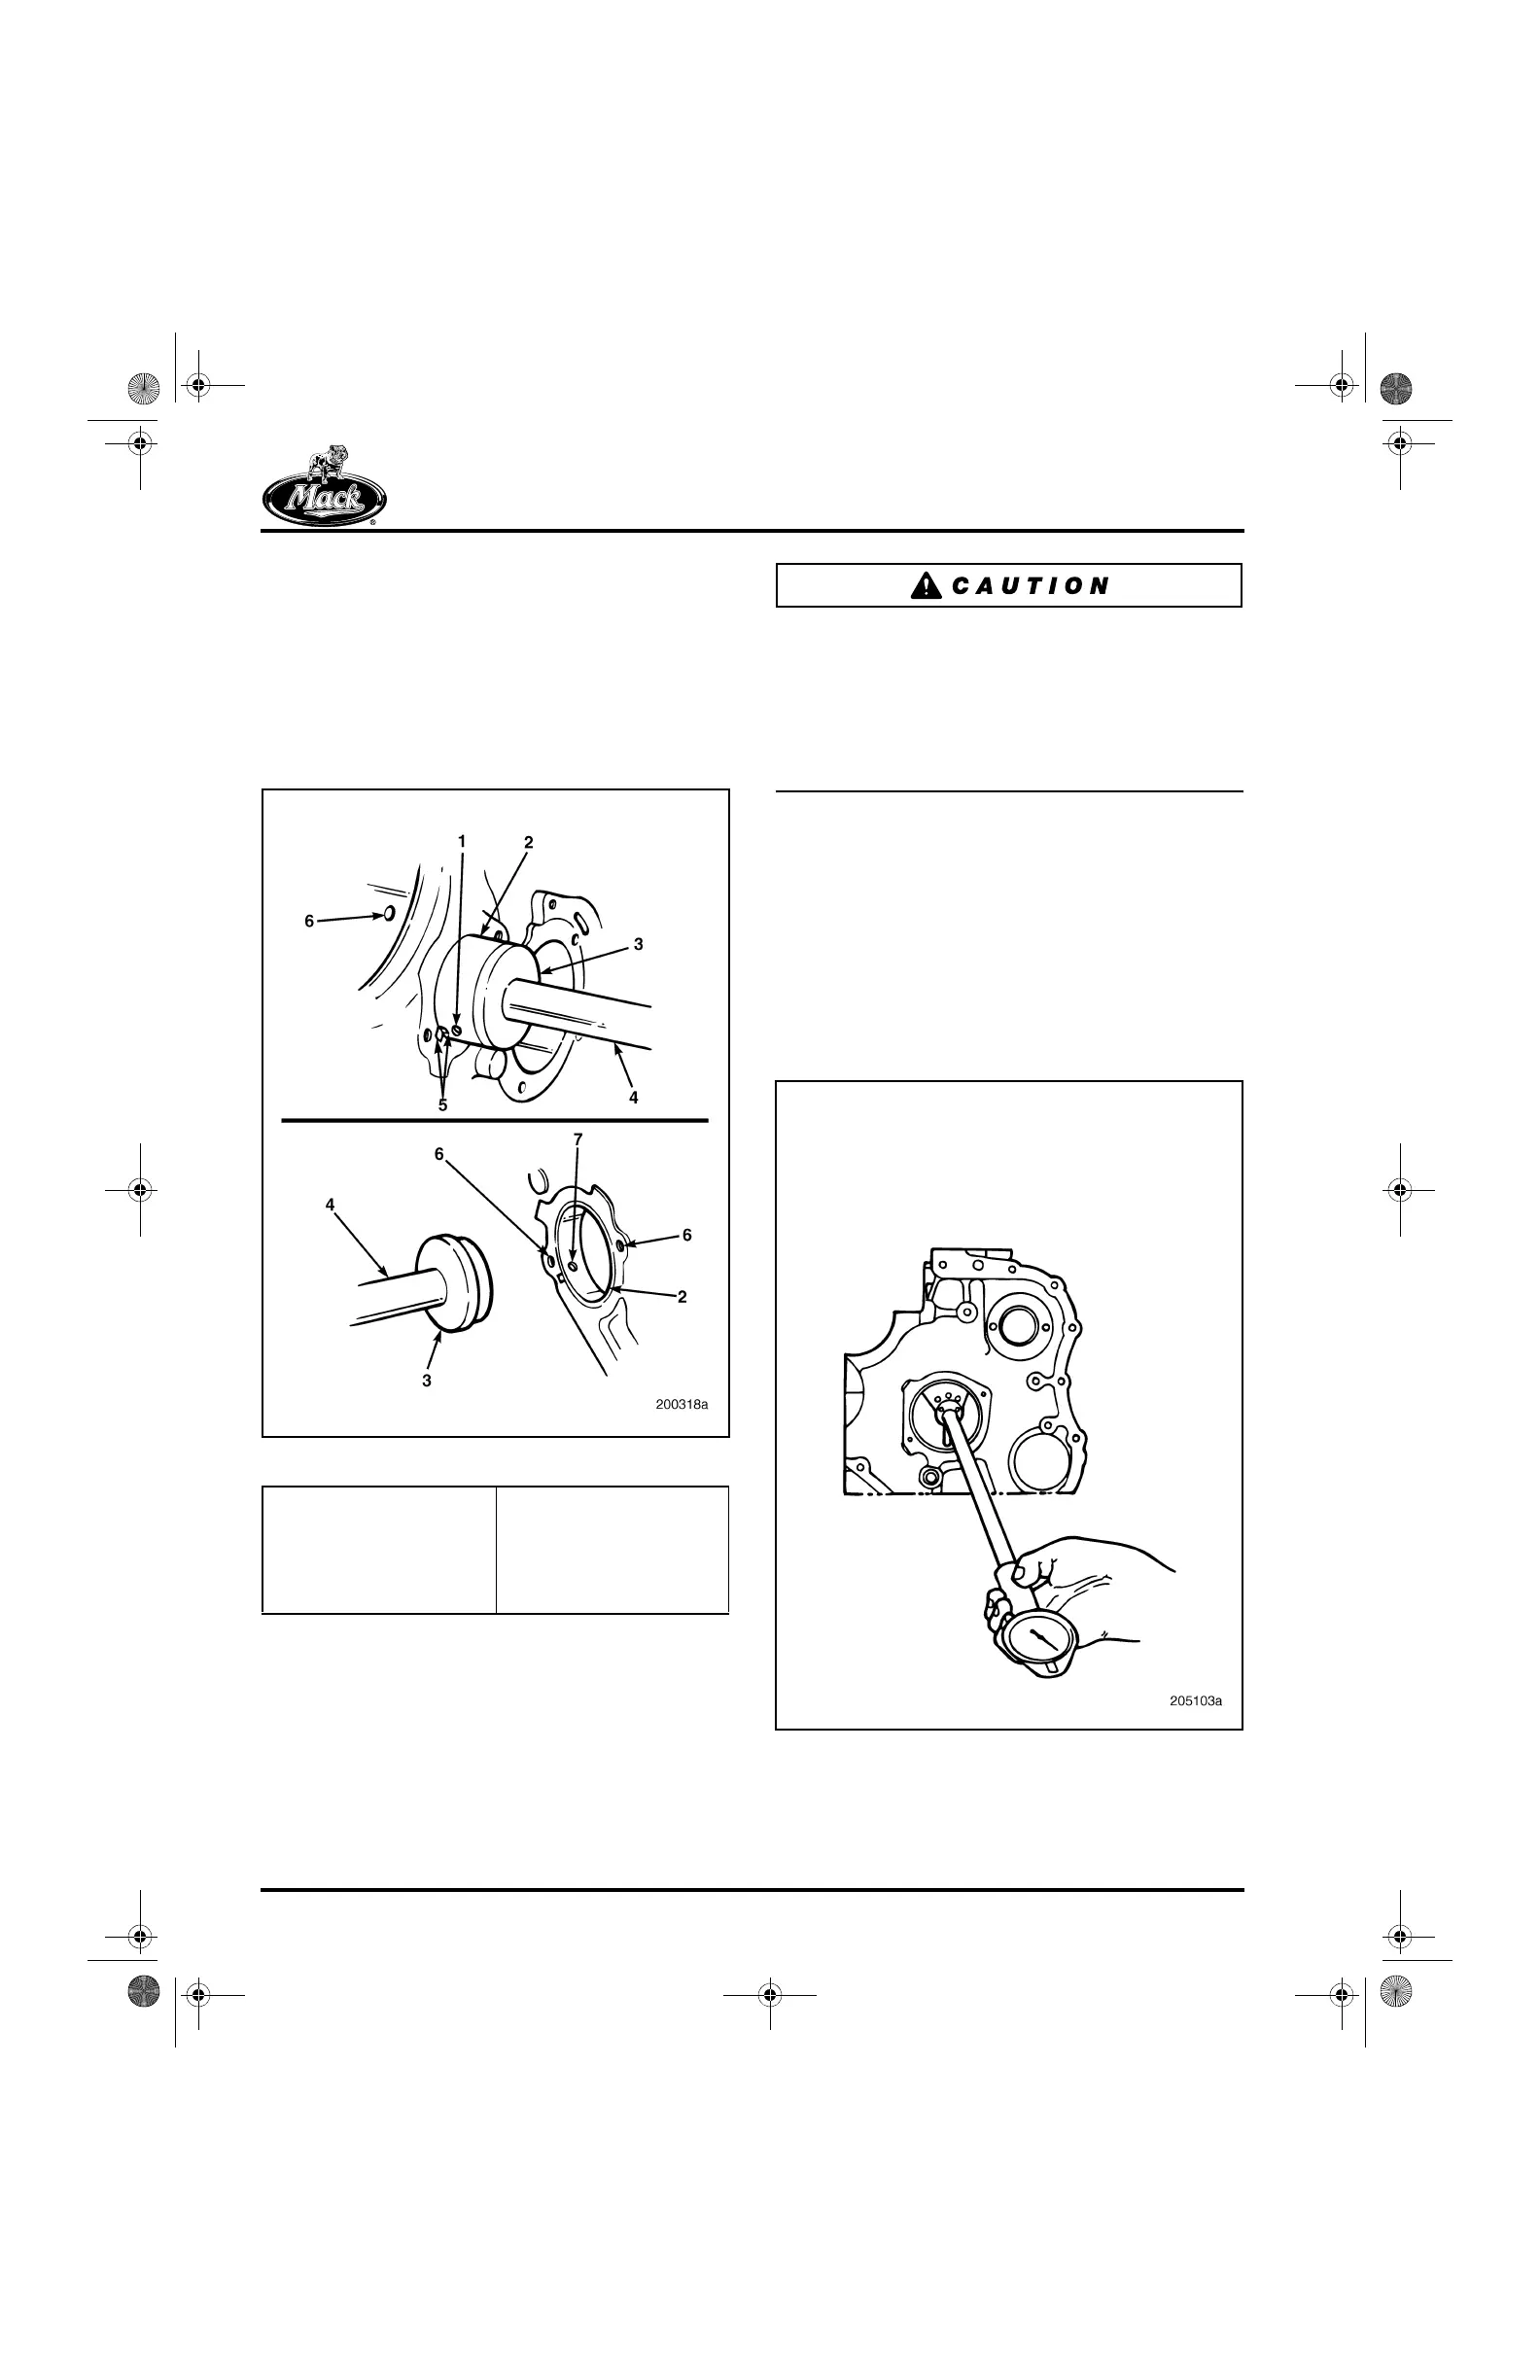
202
Figure 202 — Camshaft Bushing Installation
3. Position the replacement bushing against
the side of the block at the No. 7 (rear)
bushing bore. Align the oil hole in the
bushing with the oil passage in the block.
4. Using bushing remover/installer J 42377
(with J 21428-01 Cam Bushing Installer
Set), install the bushing.
Correct installation of each camshaft bushing is
very important. If a bushing is not properly
aligned with both its oil supply and oil feed
passages in the cylinder block, either the
camshaft bushing will fail or the components
lubricated by the bushing feed will fail from
inadequate lubrication.
5. Install the camshaft bushings in sequence,
starting at the back of the cylinder block with
journal No. 7 and finishing with No. 1.
6. After all of the bushings are in place,
measure the ID of each to ensure that they
are not undersize because of burrs on the
OD caused by installation (Figure 203).
Refer to the “Fits and Limits” charts in the
SPECIFICATIONS section for the correct
bushing ID dimensions.
203
Figure 203 — Camshaft Bushing ID Check
1. Bushing Oil Hole
2. Bushing
3. Pilot Adapter (J 42377)
4. Bushing
Remover/Installer
(J 21428-01 Kit)
5. Alignment Mark
6. Mounting Hole
7. Block Oil Passage
5-111.bk Page 200 Monday, July 10, 2006 2:26 PM