Page 270
REPAIR INSTRUCTIONS, PART 1
14. Continue assembly by installing the
remaining washers, rocker arms and
mounting bracket. Make sure that the
mounting bracket-to-rocker shaft bolt is only
finger-tight at this time.
15. Complete the assembly by lubricating a
spring washer with clean engine oil and
sliding it over the end of the rocker shaft
against the rear mounting bracket, then
lubricating the bore of the third inlet rocker
arm with clean engine oil and installing it
over the end of the rocker shaft.
16. Lubricate a flat washer, then slide it on the
rocker shaft. Install a circlip into the groove
at the end of the rocker shaft to secure the
assembly.
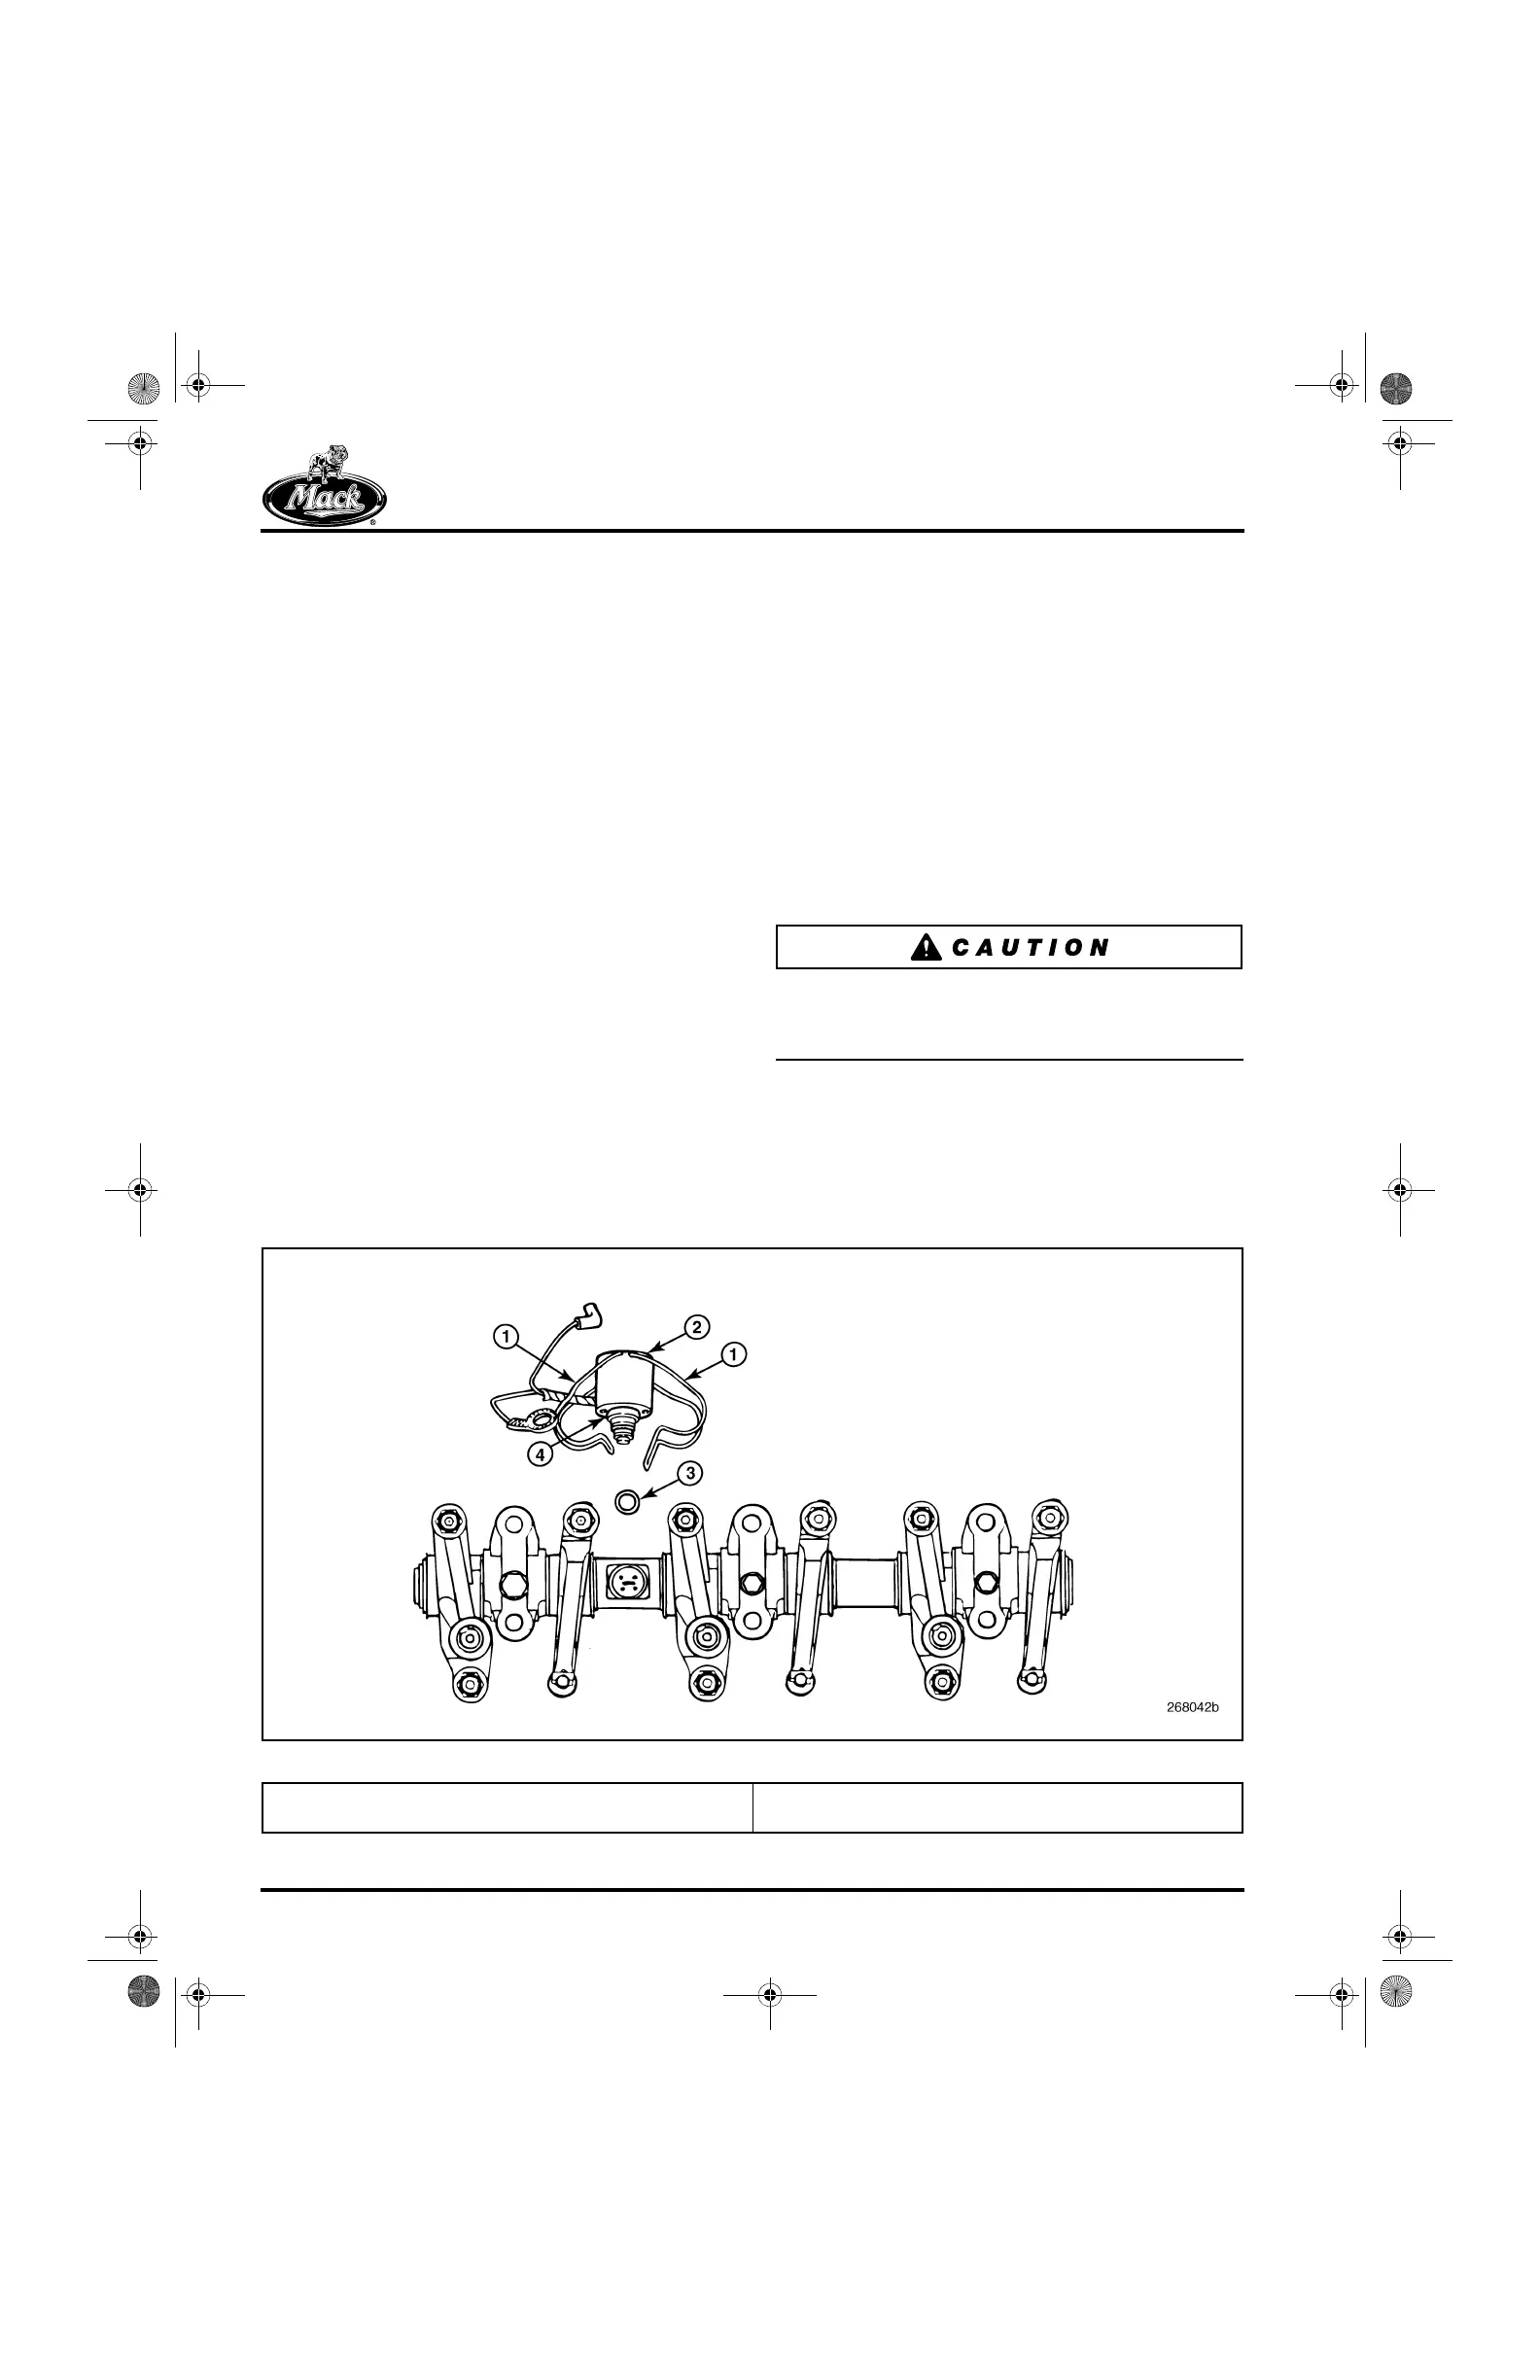
POWERLEASH™ ENGINE BRAKE SOLENOID
INSTALLATION
The PowerLeash™ engine brake solenoid is
secured to the rocker shaft with two clip-on type
spring retainers. A new solenoid supplied through
the MACK Parts System includes the spring
retainers and O-ring. The retainers are also
available separately through the MACK Parts
System. Installation of the solenoid is as follows:
Refer to Figure 299.
1. Place the lower O-ring into position, fully
seated in the bottom of the solenoid bore in
the rocker shaft.
Do not place the lower O-ring on the solenoid
adapter and then install the solenoid assembly to
the shaft. Doing so will cut the lower O-ring.
2. Lubricate both of the engine brake solenoid
O-rings with clean engine oil.
3. Position the solenoid for installation, with the
wire leads on the side of the rocker shaft that
faces the valves.
299
Figure 299 — Engine Brake Solenoid Installation
1. Solenoid Spring Retainer Set
2. Engine Brake Solenoid Assembly
3. Engine Brake Solenoid Lower O-Ring
4. Upper O-Ring Included with Solenoid
5-111.bk Page 270 Monday, July 10, 2006 2:26 PM