Page 294
REPAIR INSTRUCTIONS, PART 1
2. Place the piston marked No. 1 on a clean,
flat surface. Rest the piston and rod
assembly on the piston crown with the rod
upward.
3. Apply a light coat of clean engine oil to the
piston and rings.
4. Apply a light coat of clean engine oil to the
inside surface of the piston ring compressor,
J 23442, PT7070-A, or equivalent.
5. Install the ring compressor by slipping it over
the rod and down over the piston skirt.
Continue to slide the tool downward,
carefully guiding the rings into the ring
grooves until the tool contacts the surface on
which the piston crown is resting.
6. Position the upper bearing insert into the
connecting rod. Align the tab in the bearing
insert with the notch in the rod. Be sure that
the hole in the bearing aligns with the oil
passage in the rod.
The hole in the upper connecting rod bearing
must be aligned with the oil passage in the
connecting rod. Otherwise, damage to the
bearing, rod and crankshaft journal will result.
7. Apply a light coat of clean engine oil to the
bearing surface.
8. Apply a light coat of clean engine oil to the
inside surface of the No. 1 cylinder sleeve.
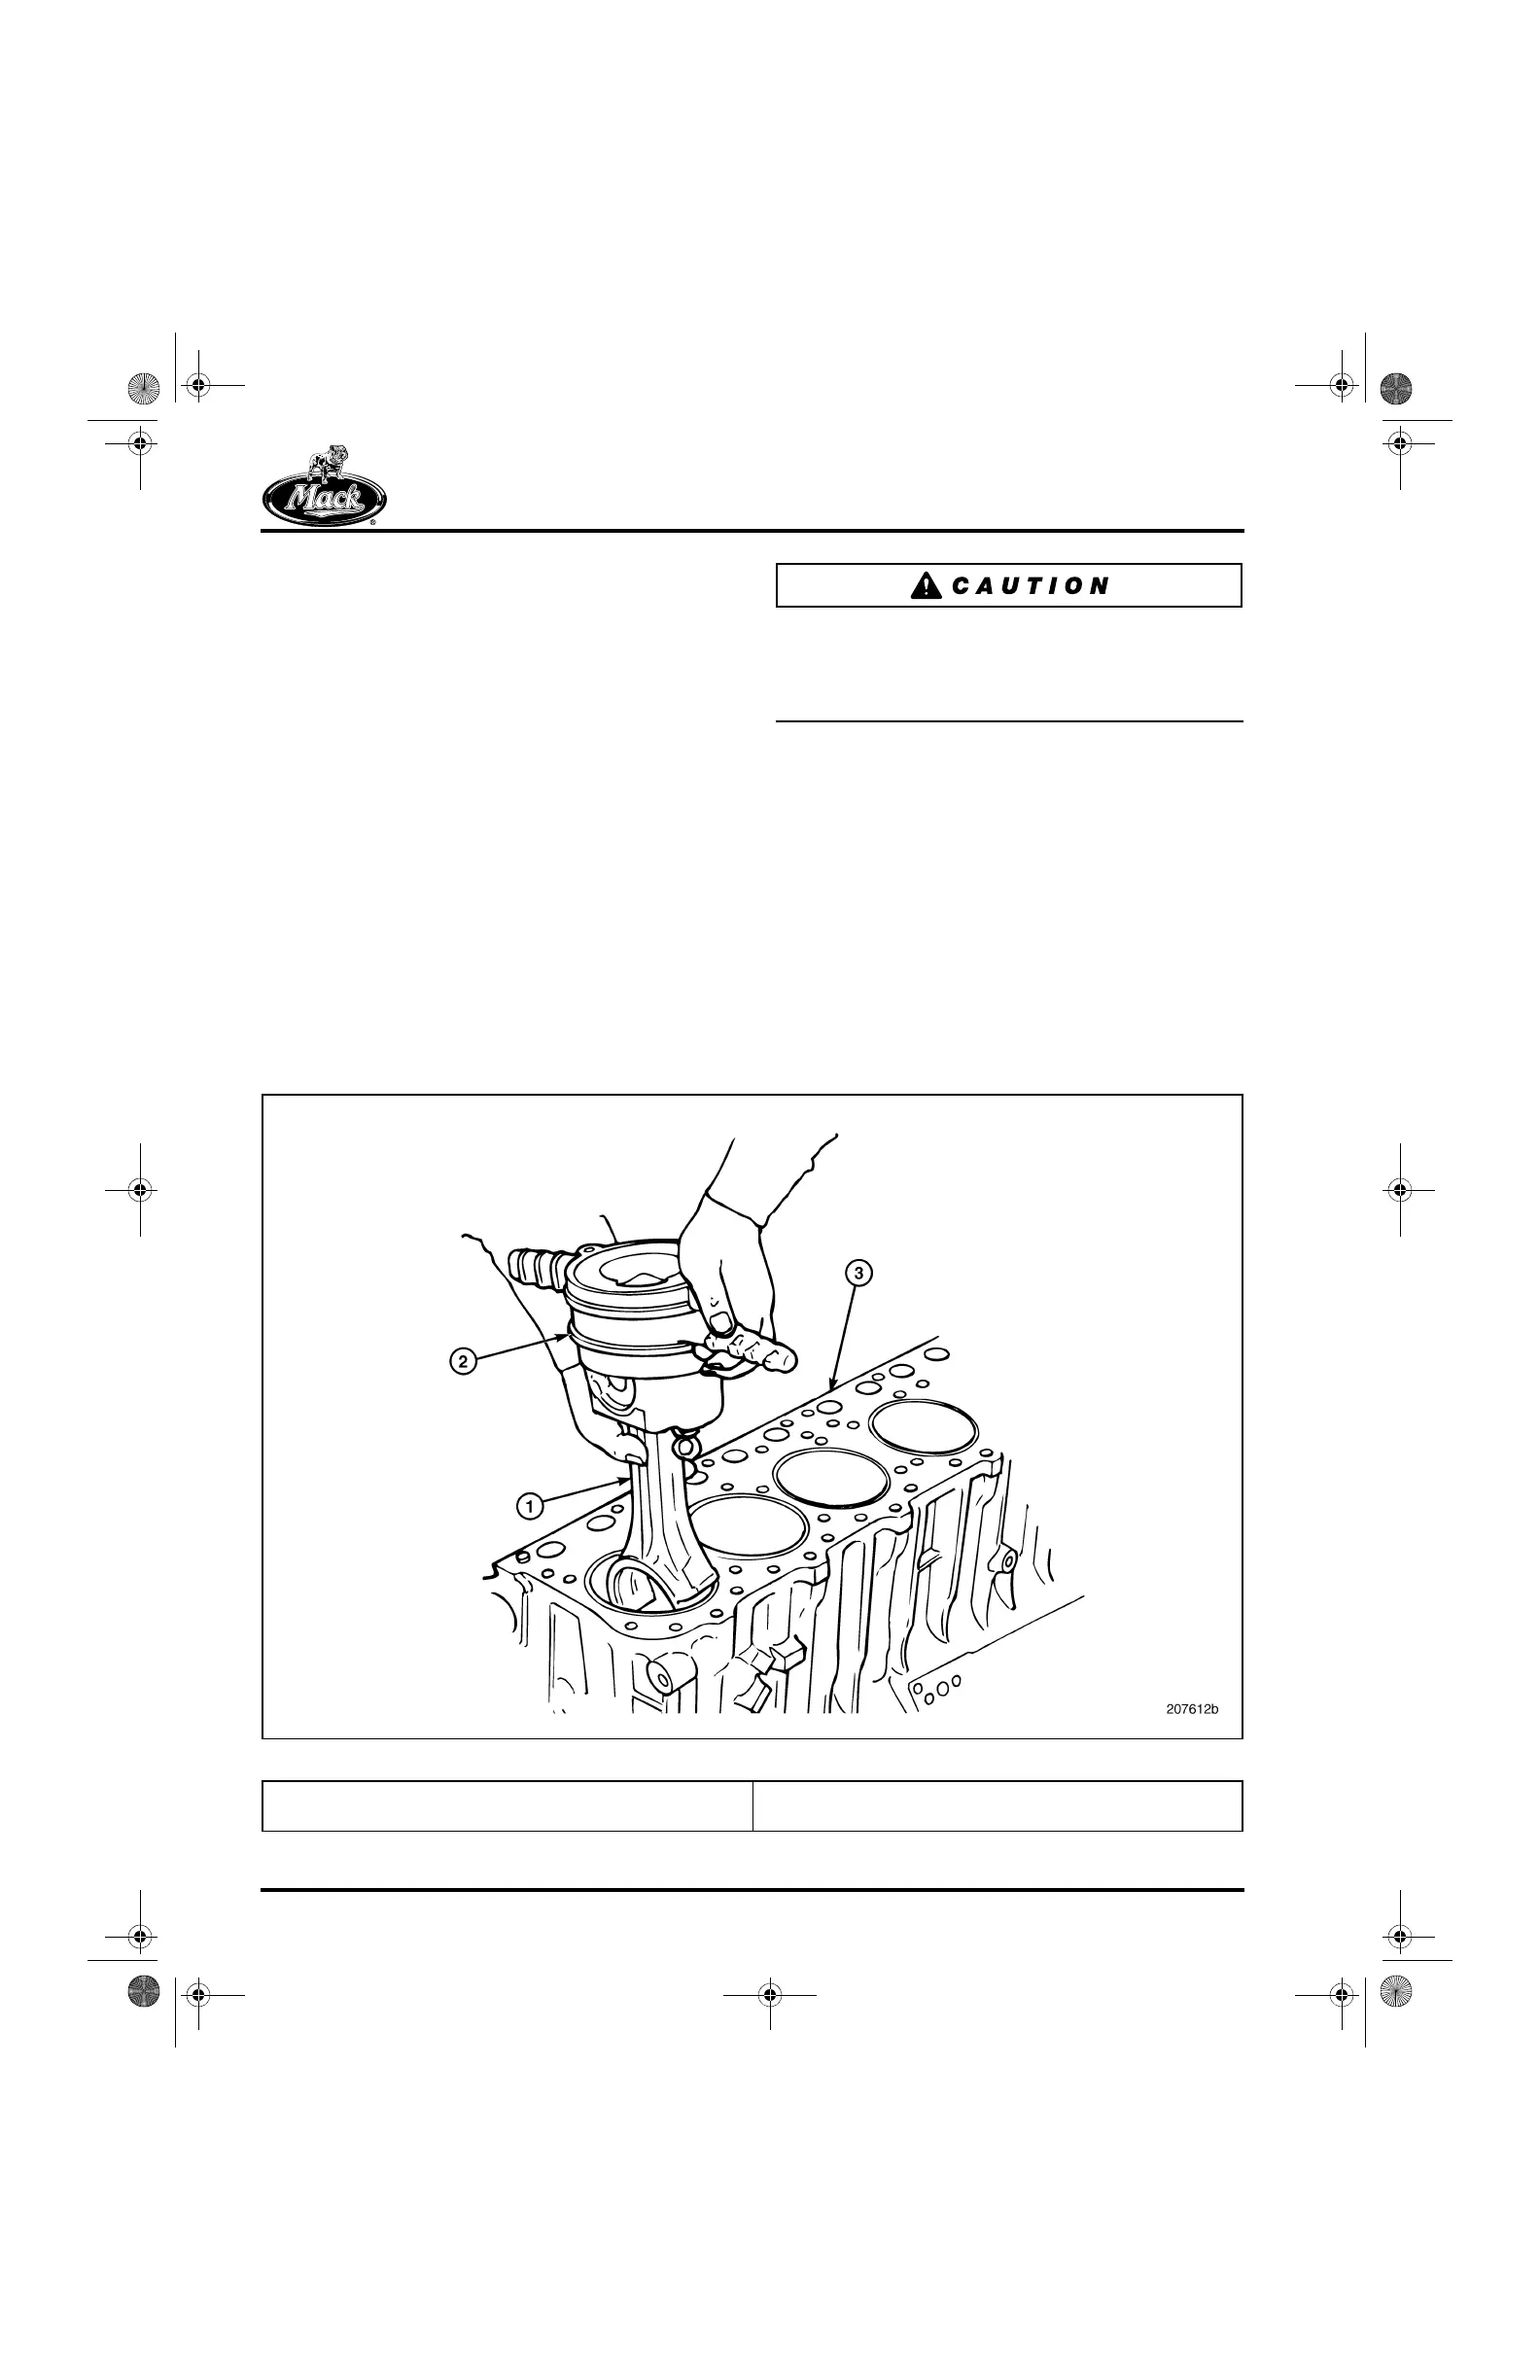
9. With the ring compressor in place, position
the piston and rod assembly into the No. 1
cylinder as shown in Figure 330 until the
compressor contacts the top of the sleeve.
The arrow and word FRONT on both the
piston crown and the connecting rod must
be facing the front of the engine.
330
Figure 330 — Piston and Connecting Rod Installation
1. Connecting Rod Assembly
2. Piston Ring Compressor Tool
3. Cylinder Block
5-111.bk Page 294 Monday, July 10, 2006 2:26 PM