NICE3000
new
User Manual 8 Description of Function Codes
- 253 -
This parameter takes effect to leveling of all oors. Therefore, if leveling at a single oor is
inaccurate, adjust the position of the leveling plate.
The NICE3000
new
has the advanced distance control algorithm and adopts many methods to
ensure reliability of direct travel ride. Generally you need not modify this parameter.
●
Fr-01 to Fr-20 record the leveling adjustment values. Each parameter records the adjustment
information of two oors, and therefore, the adjustment information of 40 oors can be recorded
totally.
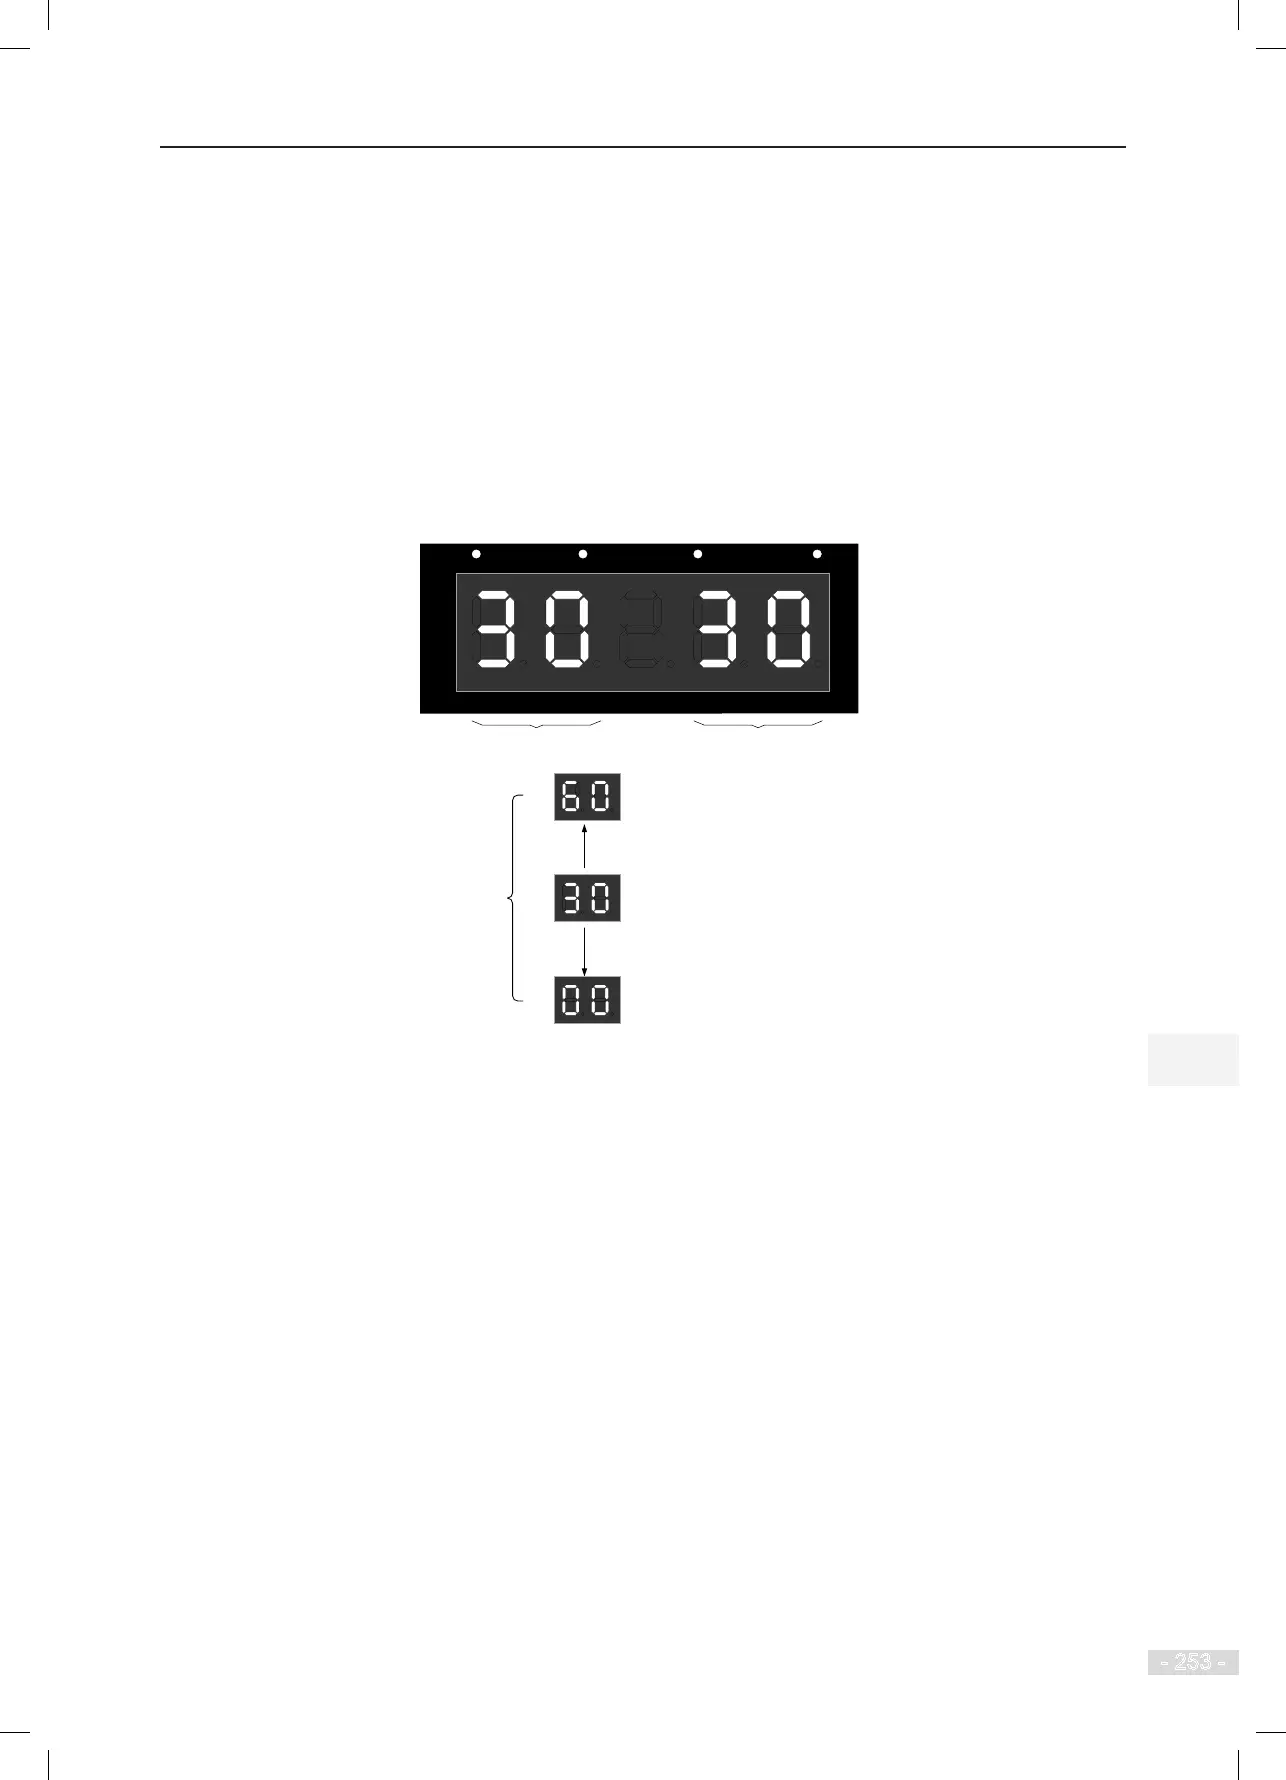
The method of viewing the record is shown in the following gure.
Figure 8-31 Viewing the leveling adjustment record
RUN LOCAL/REMOT FED/REV TUNE/TC
Second floor leveling First floor leveling
...
...
> 30: upward leveling adjustment
= 30: no leveling adjustment
< 30: downward leveling adjustment
Maximum
adjustment
range: ±30mm
As shown in the preceding gure, the left two LEDs and the right two LEDs respectively show the
adjustment bases of the rst oor and second oor. If the value is larger than 30, it is upward leveling
adjustment; if the value is smaller than 30, it is downward leveling adjustment. The default value "30"
indicates that there is no leveling adjustment. The maximum adjustment range is ±30 mm.
The leveling adjustment method is as follows:
1. Ensure that shaft auto-tuning is completed successfully, and the elevator runs properly at normal
speed.
2. Set Fr-00 to 1 to enable the car leveling adjustment function. Then, the elevator shields hall calls,
automatically runs to the top oor, and keeps the door open after arrival. If the elevator is at the top
oor, it directly keeps the door open.
3. Go into the car, press the top oor button on the CCB once, and the leveling position is changed 1
mm upward; press the bottom oor button on the CCB once, and the leveling position is changed 1
mm downward. The value is displayed on the car display board.
4. Positive value: up arrow + value, negative value: down arrow + value, adjustment range: ±30 mm
5. After completing adjustment for the present oor, press the top oor button and bottom oor button
at the same time to save the adjustment result. The car display restores to the normal state. If the