SECTION 5
DISASSEMBLY AND ASSEMBLY
106
Remove Wiper Roller
1. Using the Touchscreen, select “Menu,” and tap
“Maintenance” from the drop-down menu. Tap
“Inspect Sled”. The Service Station moves out
from under the Printhead Assembly.
2. Open the Top Cover.
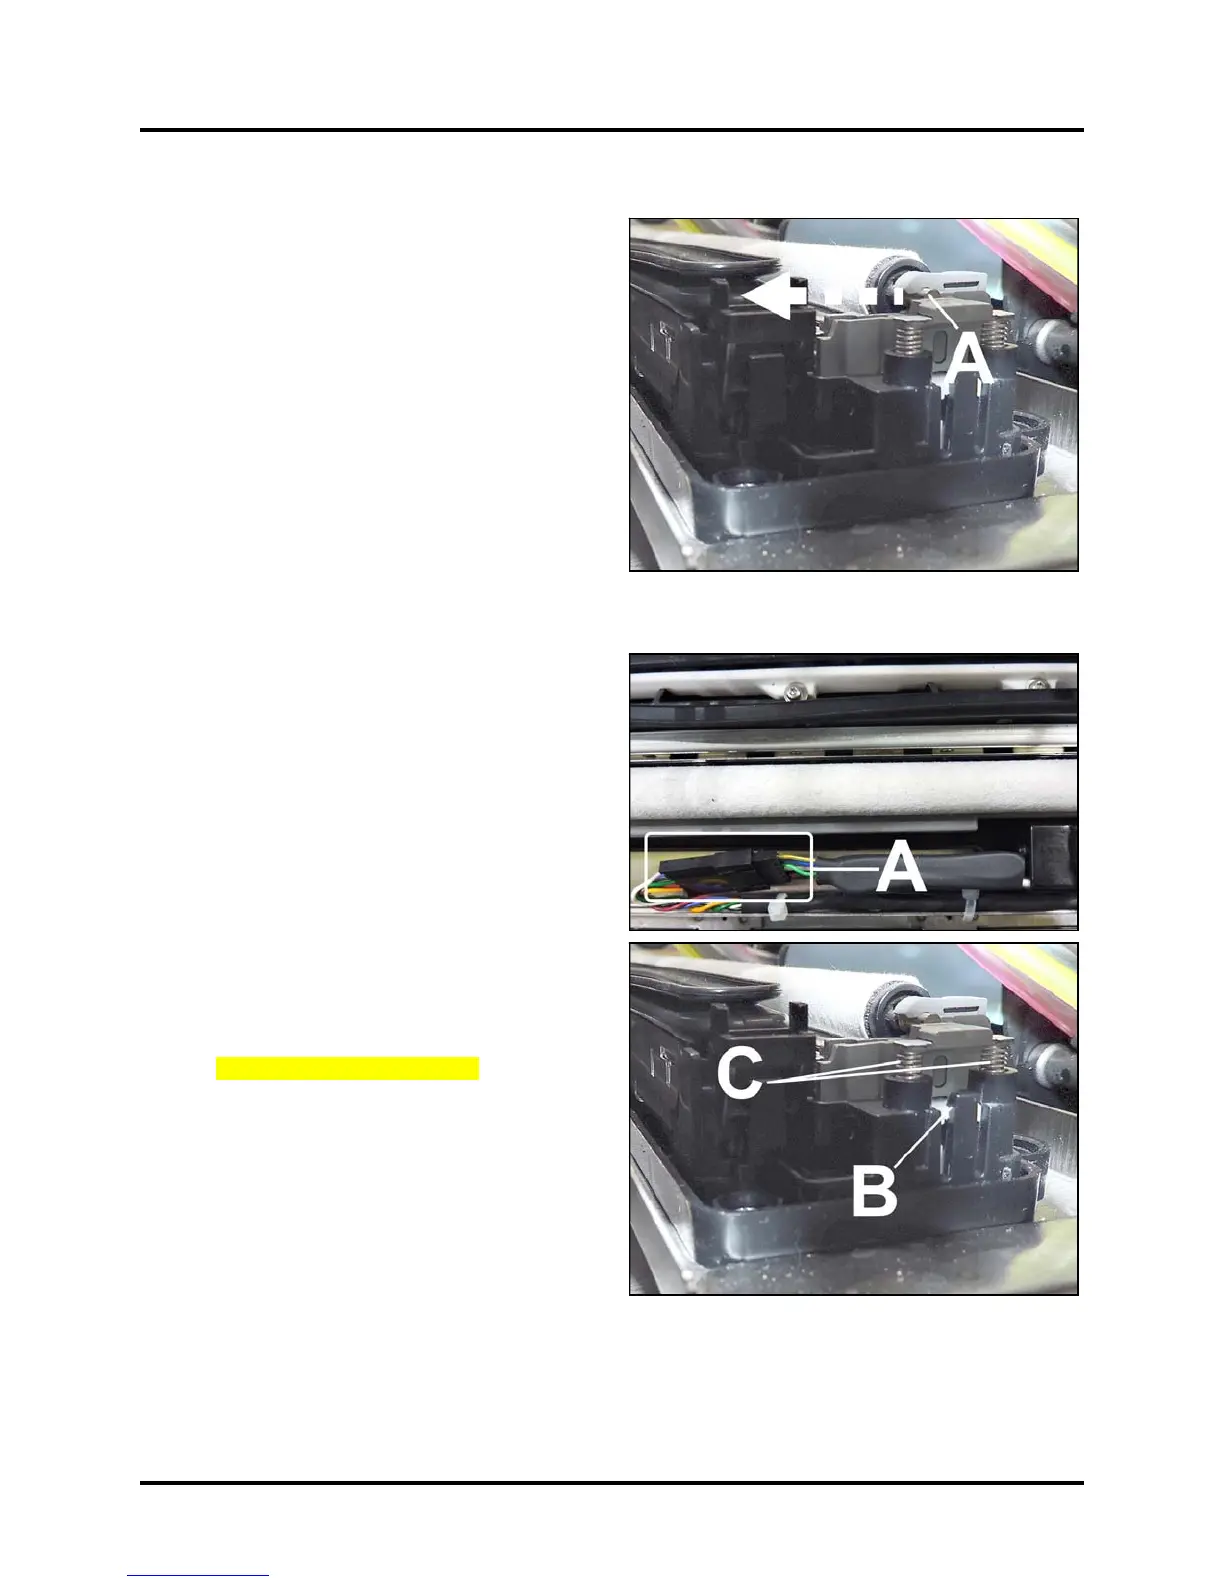
3. Release the Roller by pushing the non-geared
end toward the Capping Station [A]. This will
unsnap it out of the bracket. Then lift the Wiper
Roller out of the Wiper Roller Assembly.
4. Install in reverse order. Be sure to insert the
gear end of the Roller first and check that the
gear teeth mesh with the other gears.
Remove Wiper Roller Assembly
1. Using the Touchscreen, select “Menu,” and tap
“Maintenance” from the drop-down menu. Tap
“Inspect Sled”. The Service moves out from
under the Printhead Assembly.
2. Open the Top Cover.
3. Disconnect the Wiper Motor wire harness at the
connector [A].
4. Gently release the tabs [B] securing the
Assembly to the Service Station Base.
5. Lift the Wiper Roller Assembly out of the
Printer. NOTE: Be careful not to lose the
springs [C] located under the Assembly.
(2 at each end of the Assembly.)
6. Install in reverse order.
Run System Test to check operation.
System Test: Press Wiper Test.

 Loading...


