SECTION 5
DISASSEMBLY AND ASSEMBLY
108
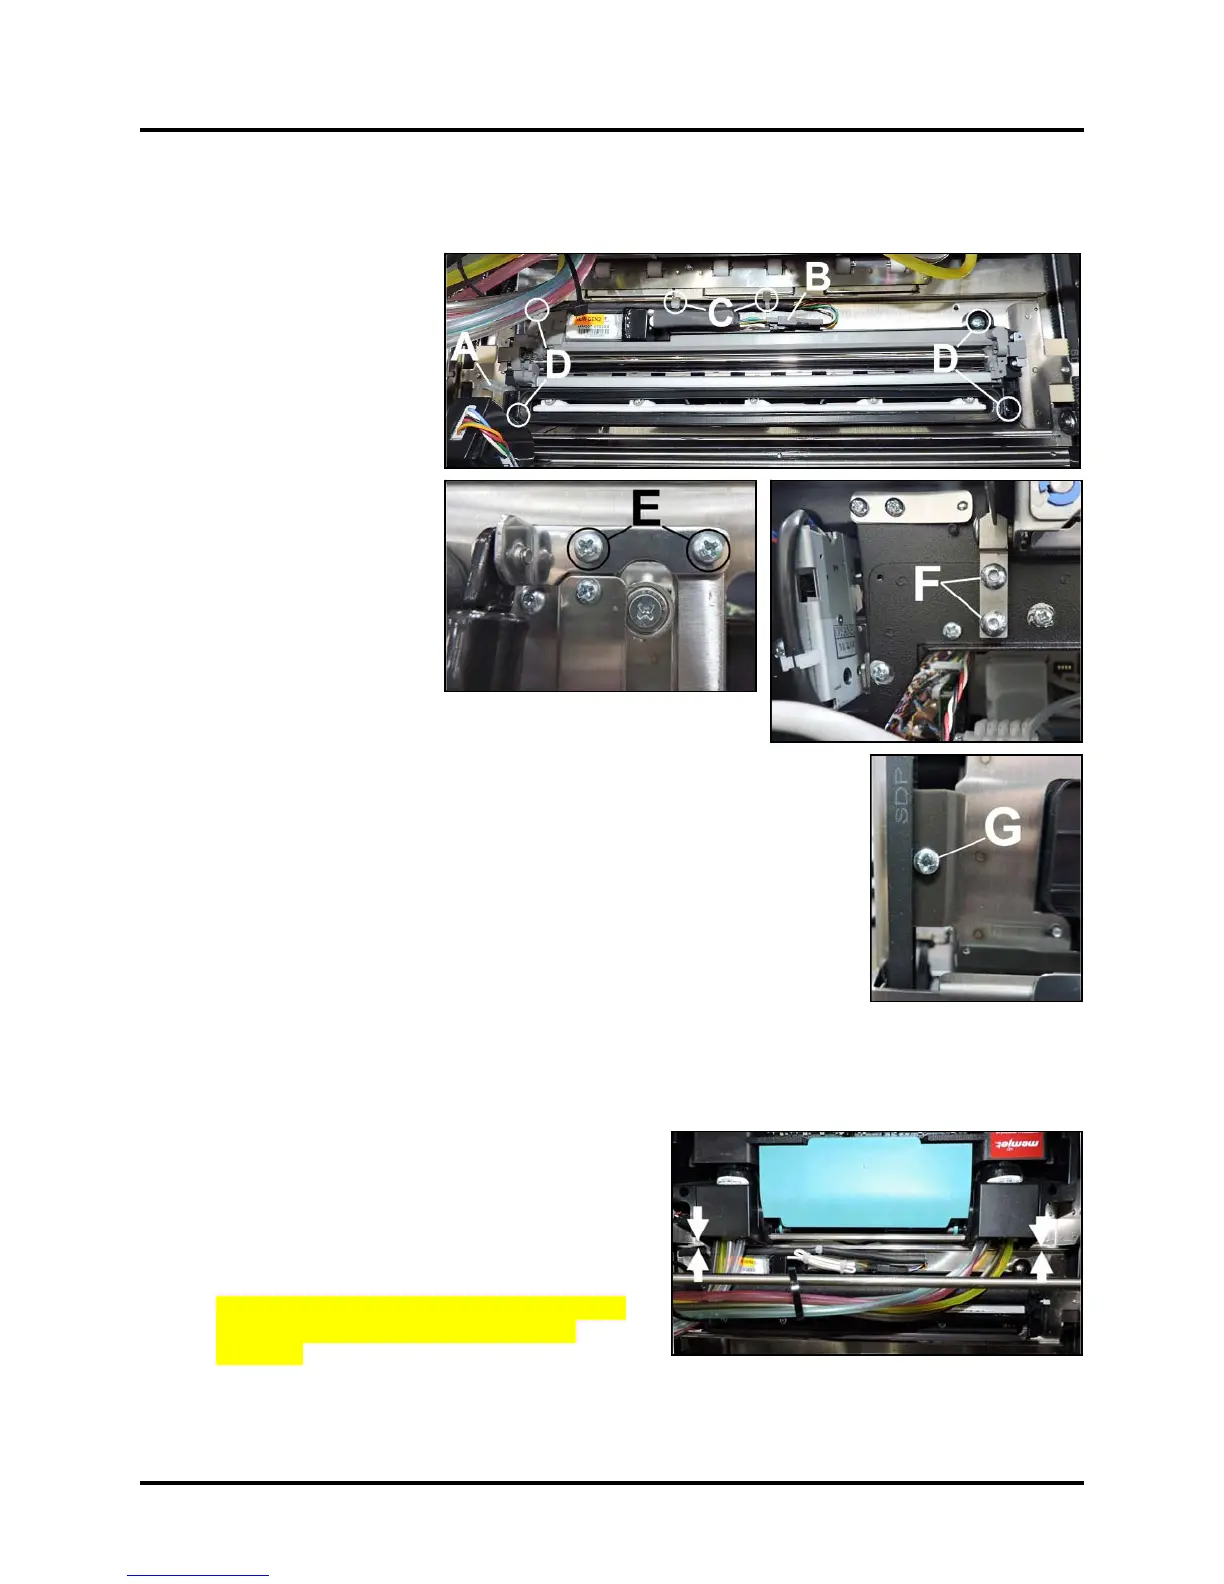
Remove Service Station Sled
NOTE: This procedure requires two people.
1. Remove the Top
Assembly Rear Cover.
2. Disconnect the Ink Hose
from the hose barb [A].
3. Disconnect the Wiper
Motor wire harness at the
connector [B].
Cut the (4) wire ties
securing the wire harness
to the Service Station
Sled [C].
4. Remove (4) screws
securing the Service
Station Base to the Sled
[D]. Remove the Service
Station Assembly.
5. Position the Service
Station Sled under the
Printhead Assembly.
6. Operator Side: Remove (2) screws securing the Support Strut
Bracket [E] to the Clamshell Frame.
7. Remove Top Assembly. Remove (4) screws securing the two Top Assembly
hinges to the Printer [F] (2 screws per hinge).
8. Release the Top Assembly Latch.
9. Carefully lift the Top Assembly off of the Printer. DO NOT pull or strain
ink hoses or wire harnesses. NOTE: You may have to detach the ink hoses
from the hose loom, note the order for reassembly. Put clean, dry rags on
the Printer to protect against damage and gently rest the Top Assembly
back on the Printer.
10. Carefully lift the Top Assembly so you can access and remove the Service
Station Slides (1 screw per side) [G] through the Printhead opening in the underside of the Top Assembly.
Try to keep the Assembly level to prevent any ink spills. You may have to have the other person hold the
Top Assembly to do this.
11.
Slide the Service Station Sled out from under the Printhead Assembly and lift it out of the Printer.
12. Install in reverse order. NOTE: Grooves on the
Slides face out toward the Operator and Non-
Operator Sides. The lower groove in the Slides fit
around the flange edge of the Top Assembly Base
Plate (Media Guide). The upper side of the Belt is
held between the groove in the top of the Slides and
the mounting ends of the Service Station Sled.
IMPORTANT: Make sure the Service Station is
installed parallel to the Printhead Locator
Assembly. Check this by lowering Printhead
Locator Assembly to its lowest point and pushing the Service Station Assembly up against it [see
arrows]. They should meet flush with no gaps at either end.

 Loading...


