SECTION 4
ADJUSTMENTS
38
Service Station Motor Drive Belt Tension Adjustment
1. Remove the Top Assembly
Rear Cover.
2. Open the Top Cover.
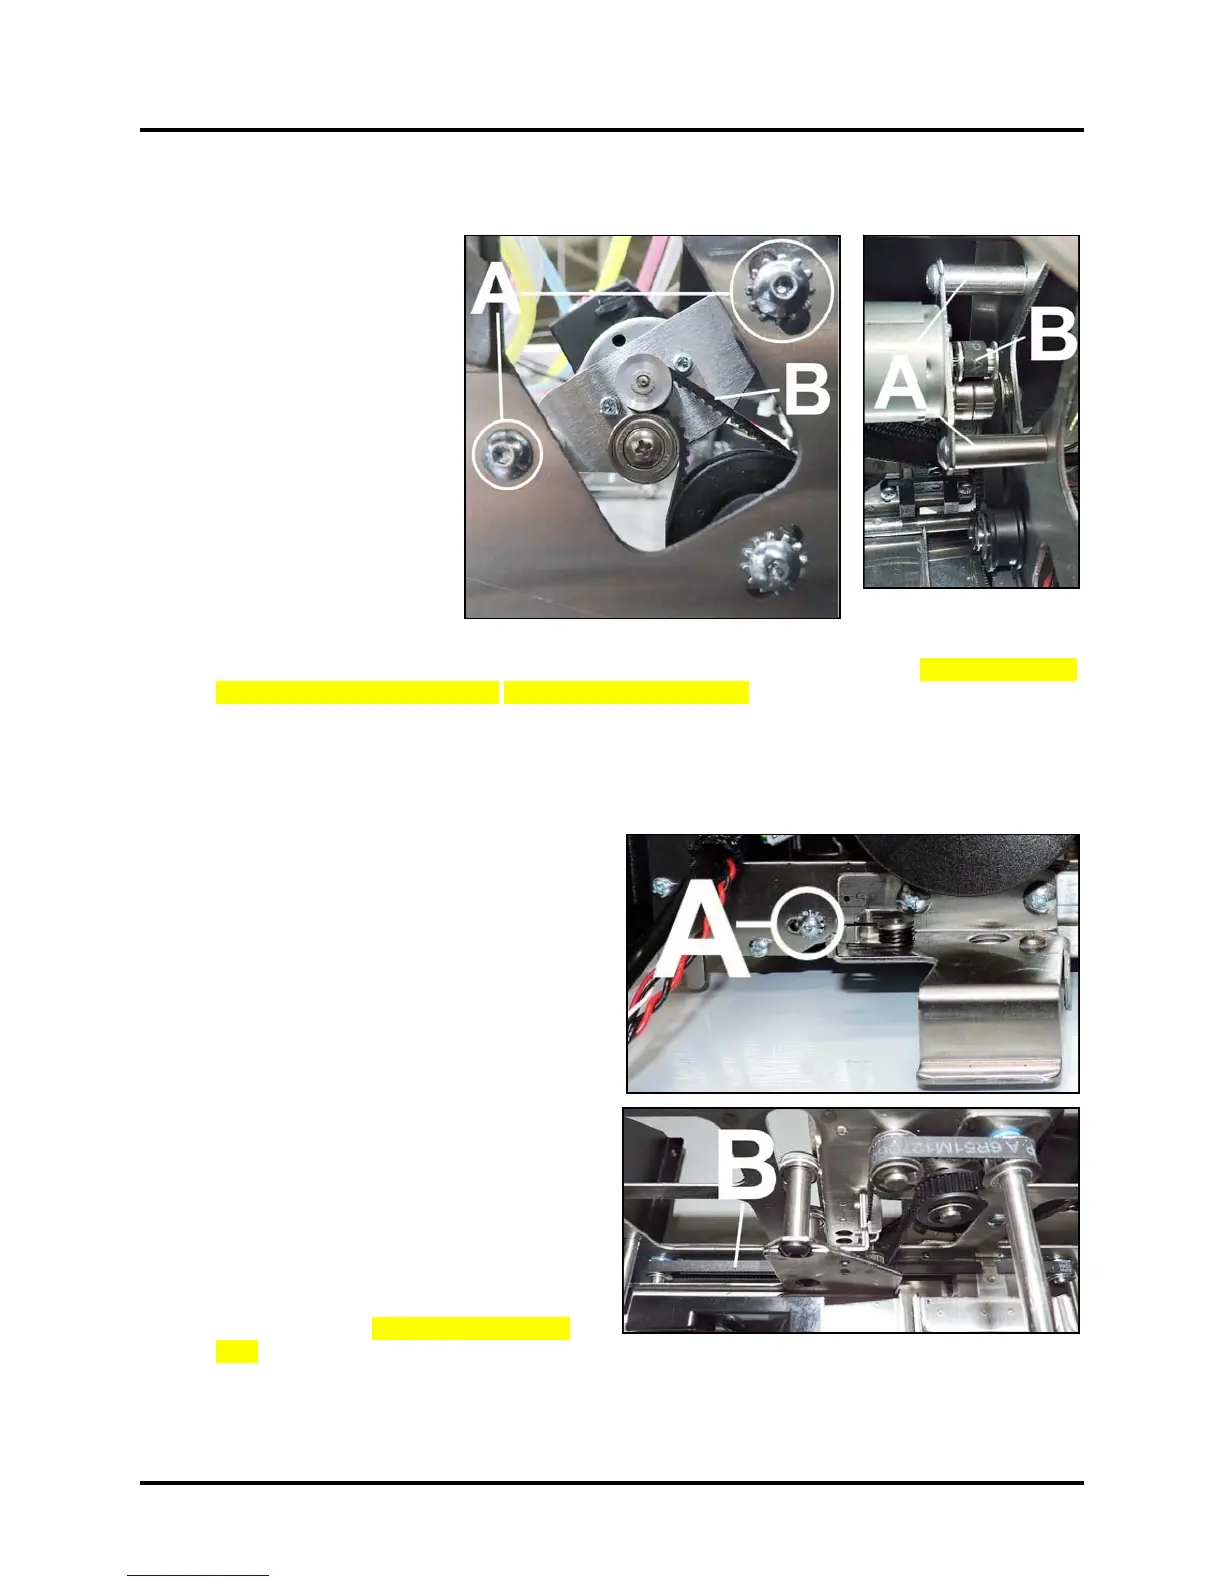
3. Loosen (2) screws [A]
securing the Service Station
Motor Assembly to the Top
Assembly Frame.
4. Move Idler Pulley Assembly
up or down to tension the
Motor Drive Belt [B].
When properly tensioned,
there should be about 1/8"
of deflection in the Belt.
Move the Belt back and
forth to reset the Belt
position and check for
additional slack. Recheck and retension the Belt as necessary.
NOTE: This adjustment is only an approximation, further adjustment may be necessary. See “Testing Belt
Tension” at the end of this section. System Test: Press Sled Test.
5. Tighten Idler Pulley screw.
6. Reinstall Control Panel Cover.
Service Station Positioning Belts Tension Adjustment
NOTE: To ensure proper Printer operation, it is
recommended that you check/adjust both Service
Station Positioning Belts at the same time.
1. Remove the Control Panel Cover and Top
Assembly Rear Cover.
2. Open the Top Cover.
Operator Side:
3. Loosen Service Station Positioning Belt Tension
Pulley [A] (1 screw).
4. Move Pulley Assembly right or
left to tension the Positioning Belt [B]. When
properly tensioned, there should be about 1/8"
of deflection in the Belt. Move the Belt back
and forth to reset the Belt position and check for
additional slack. Recheck and retension the Belt
as necessary.
NOTE: This adjustment is only an
approximation, further adjustment may be
necessary. See “Testing Belt Tension” at the
end of this section. System Test: Press Sled
Test.
5. Tighten Position Belt Tension Pulley screw.
6. Reinstall Control Panel Cover.

 Loading...


