SECTION 5
DISASSEMBLY AND ASSEMBLY
49
General Disassembly and Assembly
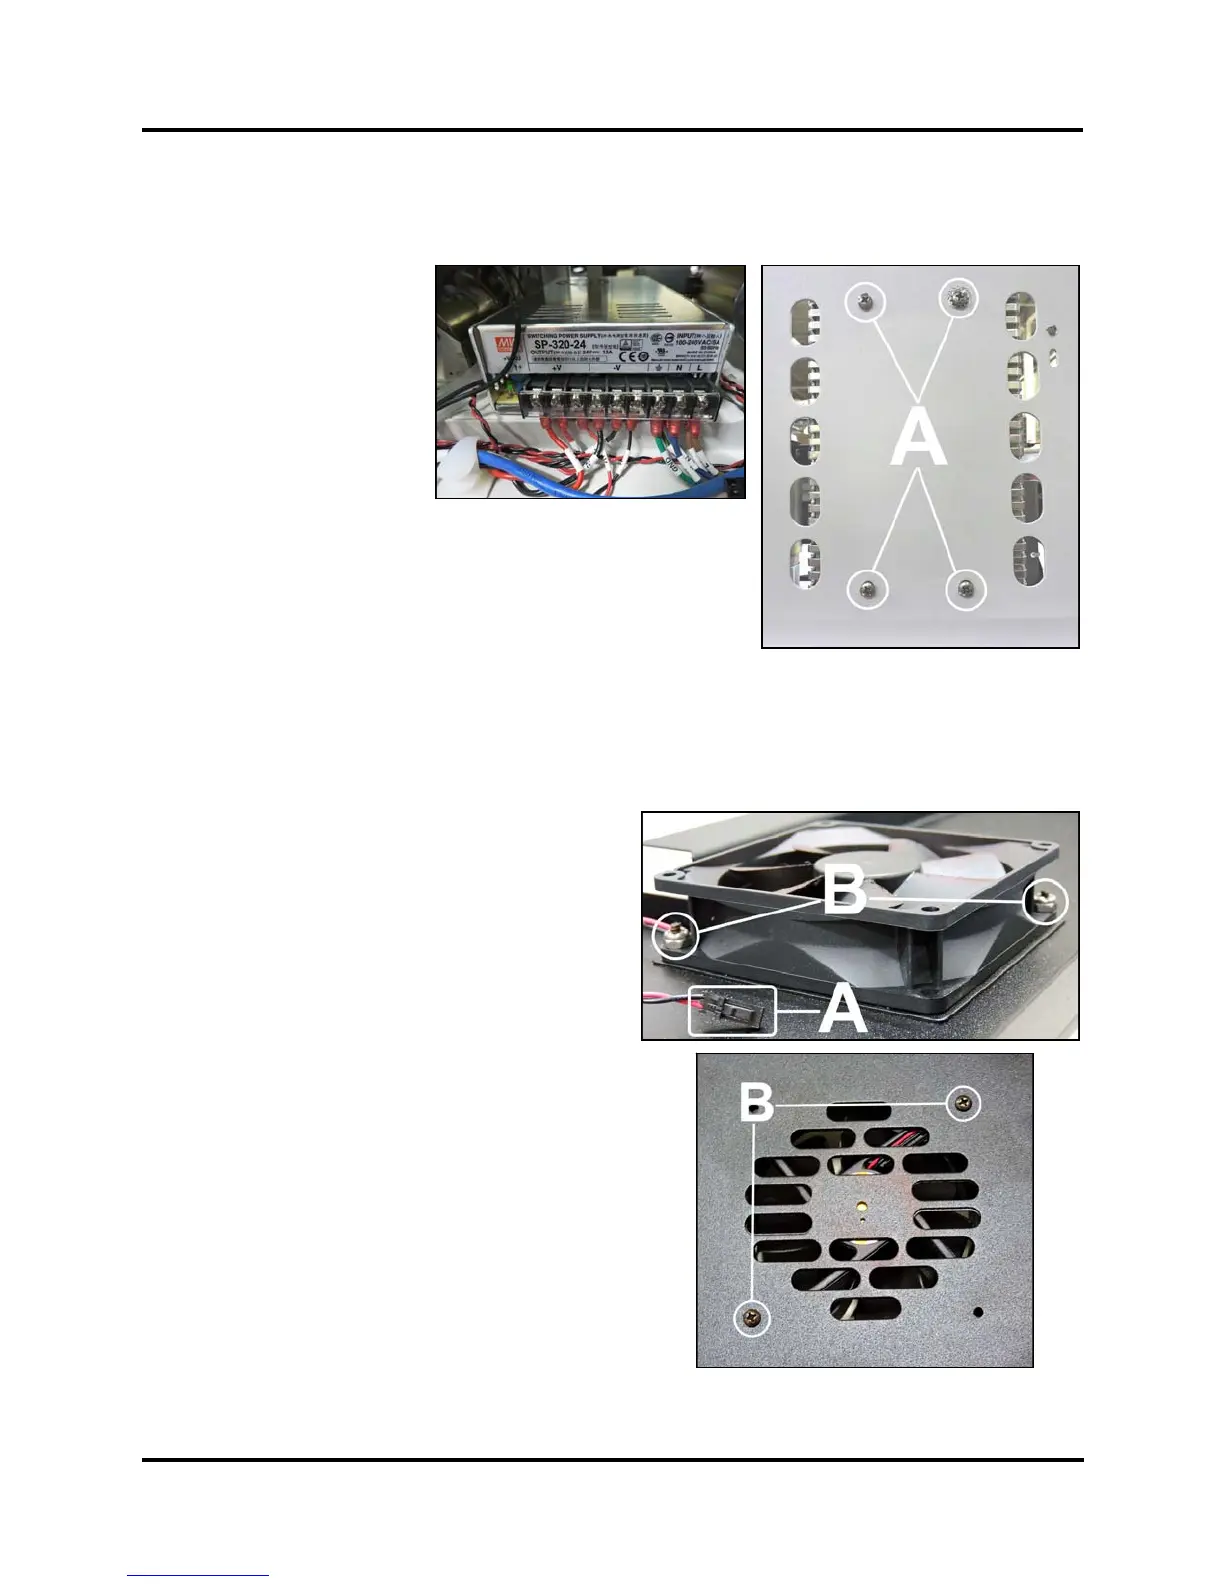
Replace 24V DC Power Supply
1. Remove Non-Operator
Side Cover.
2. Remove (4) mounting
screws and washer [A]
securing the Power Supply
(located under the Printer
Base). NOTE: Before
disconnecting Power
Supply, note where wires
are connected, then
disconnect wires.
Remove the Power Supply.
TIP: As you remove each wire, connect it to corresponding
terminal on new Power Supply.
3. Connect wires to correct terminals on new Power Supply.
4. Reinstall Power Supply with (2) mounting screws.
NOTE: Be sure to reinstall the washer and screw into the unpainted mounting hole in the Base.
5. Reinstall Outlet Port Assembly (3 screws).
Replace Side Fan Assembly
1. Remove Non-Operator Side Cover. Disconnect
Fan Wire Harness at connector [A].
2. Remove Side Fan Assembly (2 screws, 2 nuts) [B]
from the Side Cover.
3. Install Fan with (2) mounting screws and nuts.
4. Connect wire harness on new Side Fan Assembly
to correct connector.

 Loading...


