SECTION 4
ADJUSTMENTS
37
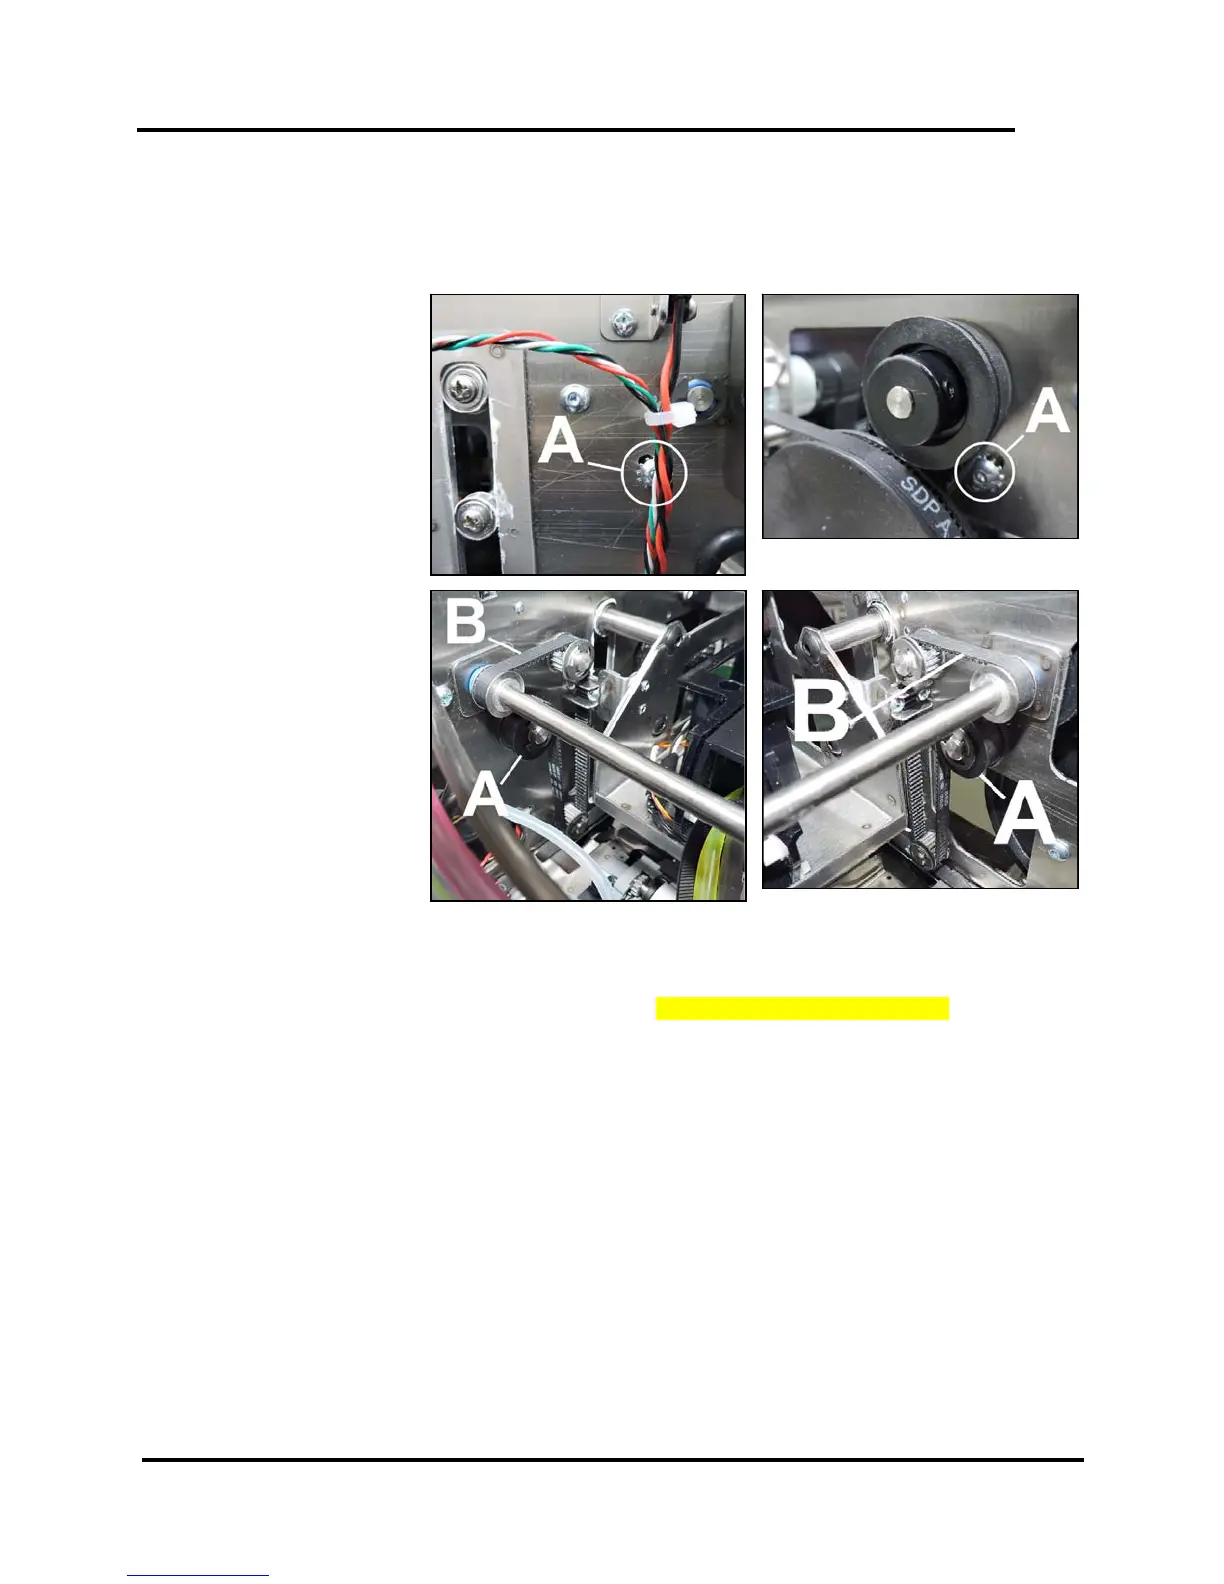
Printhead Lift Assembly Belts Tension Adjustment
NOTE: To ensure proper Printer operation, it is recommended that you check/adjust both Printhead Lift
Assembly Belts at the same time.
1. Remove the Control
Panel Cover.
Disconnect the
Touchscreen Ethernet
Cable if necessary.
Carefully set Control
Panel Cover Assembly
aside.
2. Non-Operator Side:
Remove Top Assembly
Rear Cover.
3. Open the Top Cover.
4. Loosen the
Idler/Tensioner Pulley
Assembly [A] (1 on
each side). This should
release tension on the
inner Lifter Belts.
5. Move Idler Pulley
Assembly up or down to
tension the Belt [B].
When properly
tensioned, there should
be about 1/8" of
deflection in the Belt.
Move the Belt back and forth to reset the Belt position and check for additional slack. Recheck and
retension the Belt as necessary.
NOTE: This adjustment is only an approximation, further adjustment may be necessary.
See “Testing Belt Tension” at the end of this section. System Test: Press Printhead Test.
6. Tighten Idler Pulley Assembly screw.
7. Reinstall Control Panel Cover.

 Loading...


