SECTION 5
DISASSEMBLY AND ASSEMBLY
102
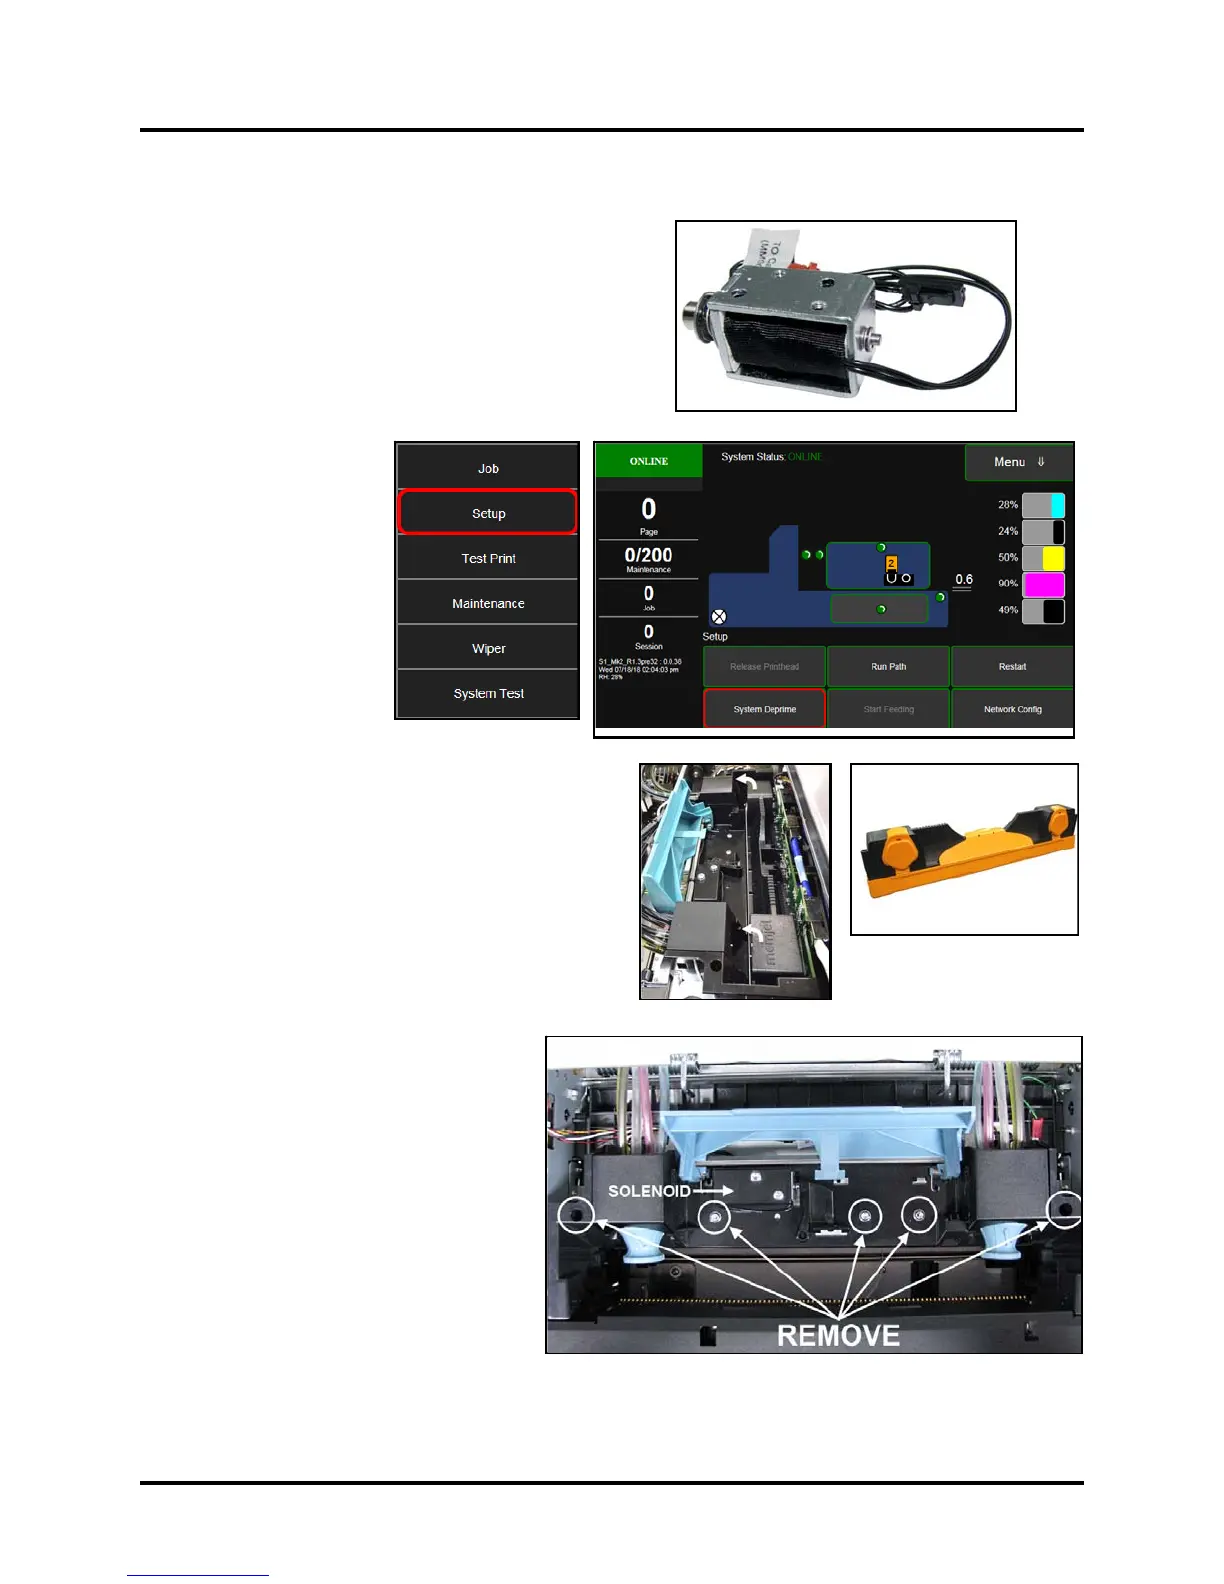
Replace Printhead Lever Latch Solenoid
To replace Lever Latch Solenoid:
1. Open Top Cover.
From the
Touchscreen, tap
“Setup” in the
Menu drop-down,
then tap “System
Deprime”. The
Printer pumps any
ink in system back
into Tanks. Then
the Printhead Latch
pops open.
2. Once the Latch pops up, press the Control Panel
Power button to shut down the Printer.
3. Lift Latch manually to access Solenoid and
Latch Support Base.
4. Remove Printhead Cartridge by tilting it toward
ink lines, then carefully lifting it out of Printhead
Compartment. Place in protective packaging cap.
5. Remove five (5) screws securing
Latch Support Base Assembly to
Printhead Lift Base.

 Loading...


