SECTION 5
DISASSEMBLY AND ASSEMBLY
78
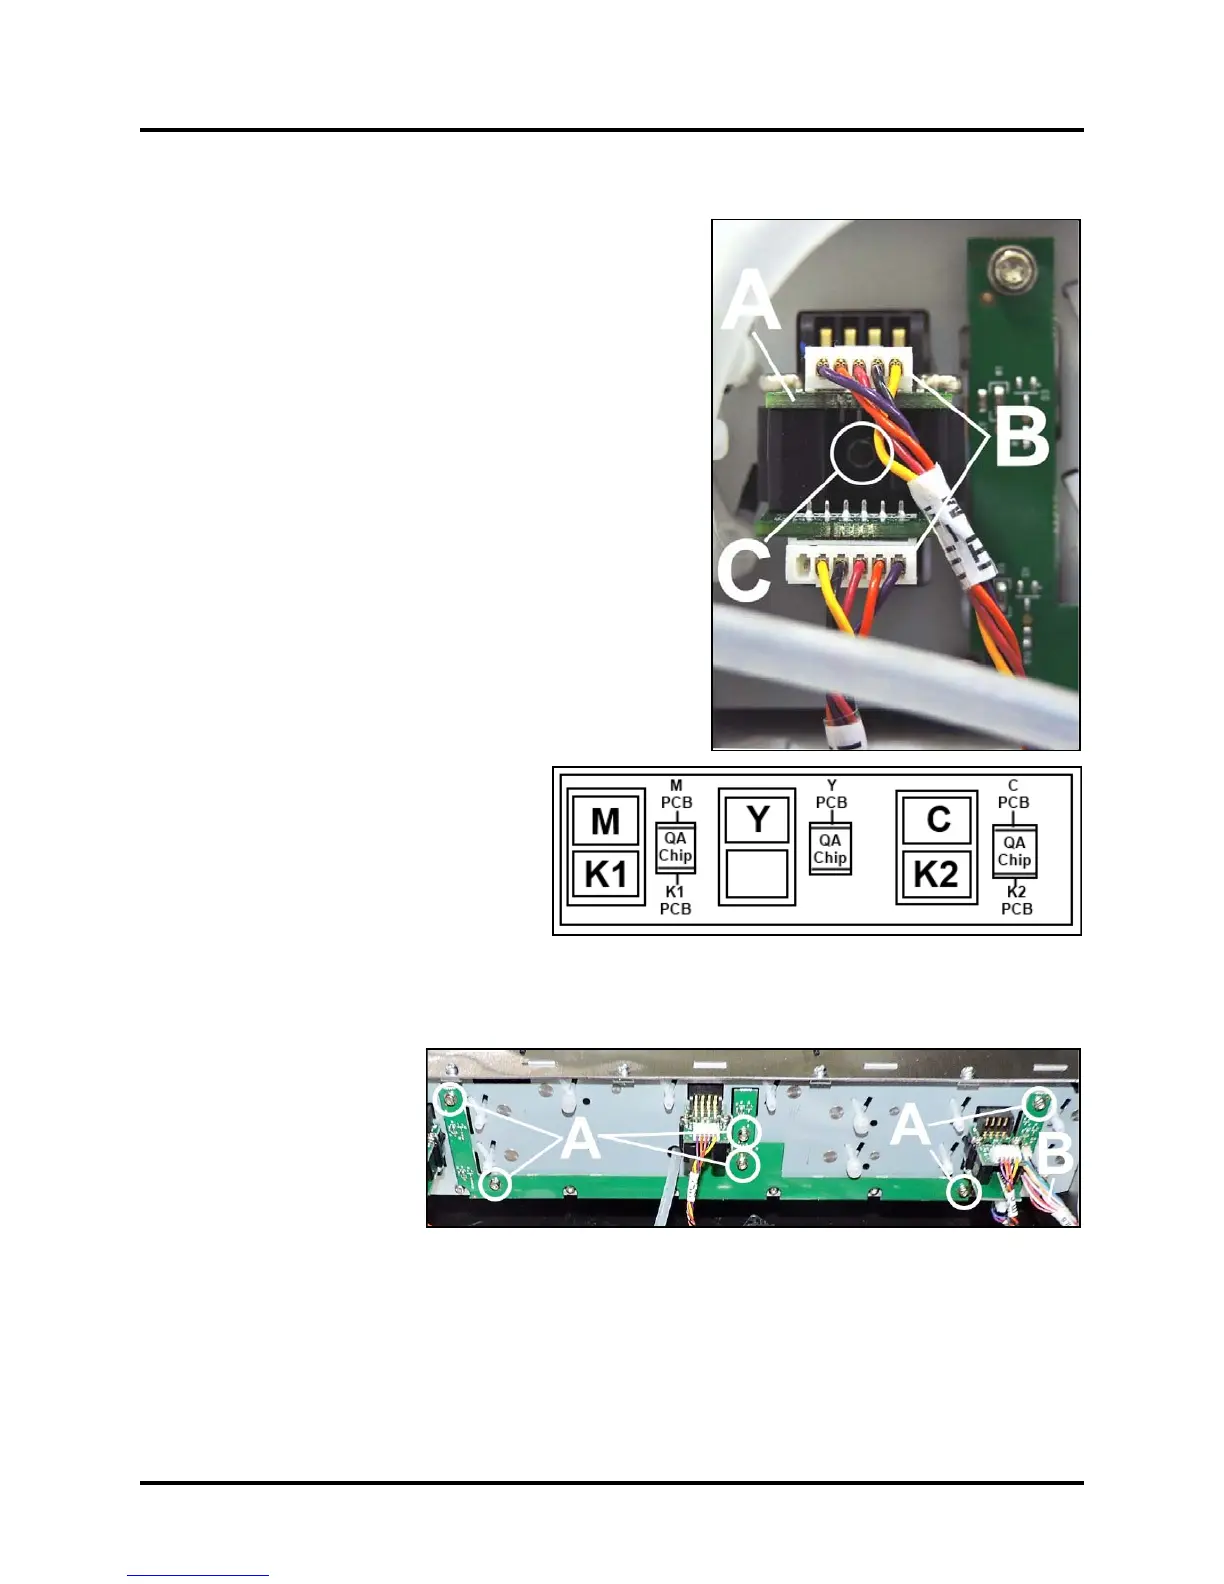
Replace QA Chip Assembly (3 per Printer)
1. Each QA Chip Assembly [A] is held in place by (1) screw
accessed through the center of Chip Assembly. Carefully
disconnect the wire harness(es) [B] from the Printed
Circuit Boards.
2. Remove mounting screw [C].
3. Install in reverse order. NOTE: Make sure wire
harnesses are plugged into correct Printed Circuit Board.
Replace Ink Tank Level PCA
1. Remove (6) mounting
screws [A].
2. Disconnect wiring
harness [B].
3. Install in reverse
order.
Buffer Boxes and QA Chip Assemblies

 Loading...


