SECTION 5
DISASSEMBLY AND ASSEMBLY
94
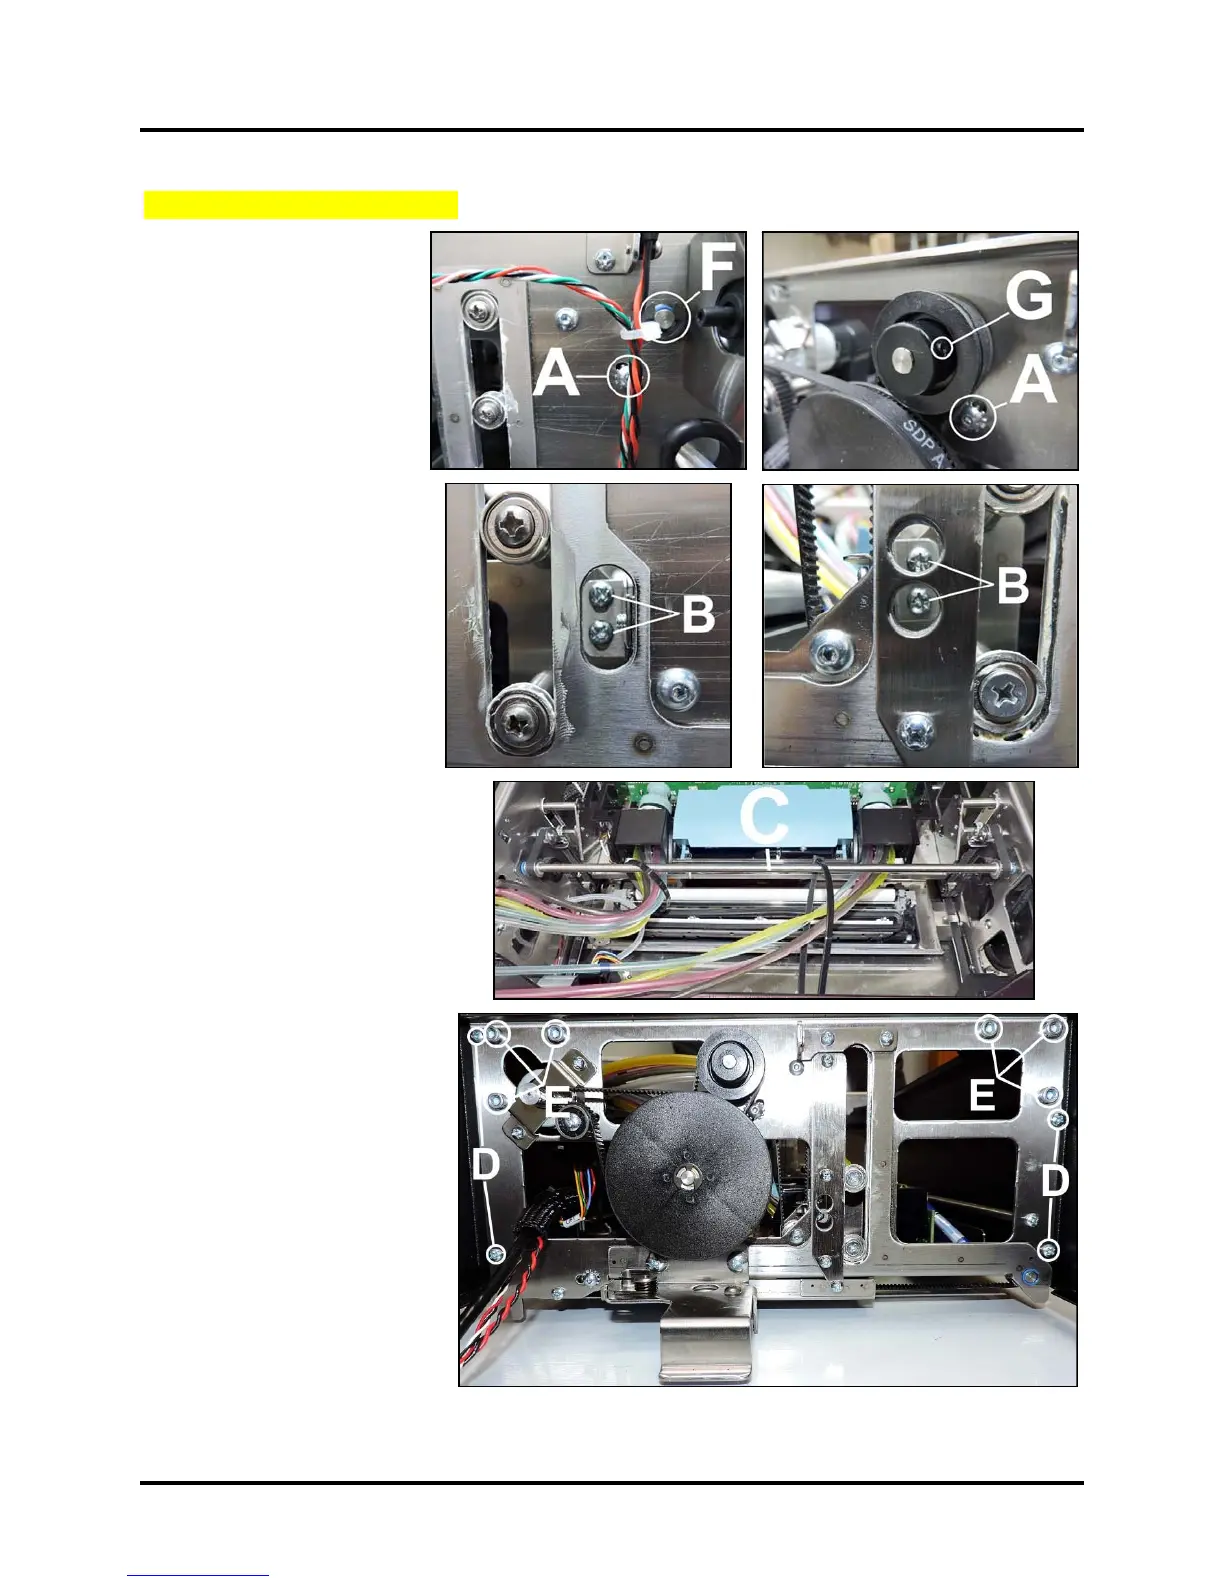
Remove Printhead Lifter Belts
1. Open the Top Cover.
Move the Printhead Lift
Assembly to its lowest
position.
2. Control Panel Side:
Remove the Control
Panel Cover.
3. Non-Operator Side:
Remove the Top
Assembly Rear Cover.
4. Loosen Tensioner
Assembly screw [A]
(1 each side). This should
release tension on the
inner Lifter Belts.
5. Through the access holes
in the Top Assembly
Frame, remove (4) screws
[B] (2 on each side)
securing the Lift Belt
Clamp Brackets to the
Lift Assembly.
Remove the Lift Assembly
Drive Shaft [C]:
6. Control Panel Side:
Remove (4) screws securing the
Top Assembly Side Panels [D]
(2 each side).
Loosen (6) screws securing the
Top Supports [E].
(3 screws per side.)
7. Remove E-clip [F] from
Non-Operator side of the
Lift Motor Drive Shaft.
8. Remove the Lift Motor
Drive Pulley (and Belt) [G]
on Operator Side.
9. Pull the Side Frame away
from the Top Assembly
enough to release the Drive
Shaft Assembly.

 Loading...


