SECTION 5
DISASSEMBLY AND ASSEMBLY
72
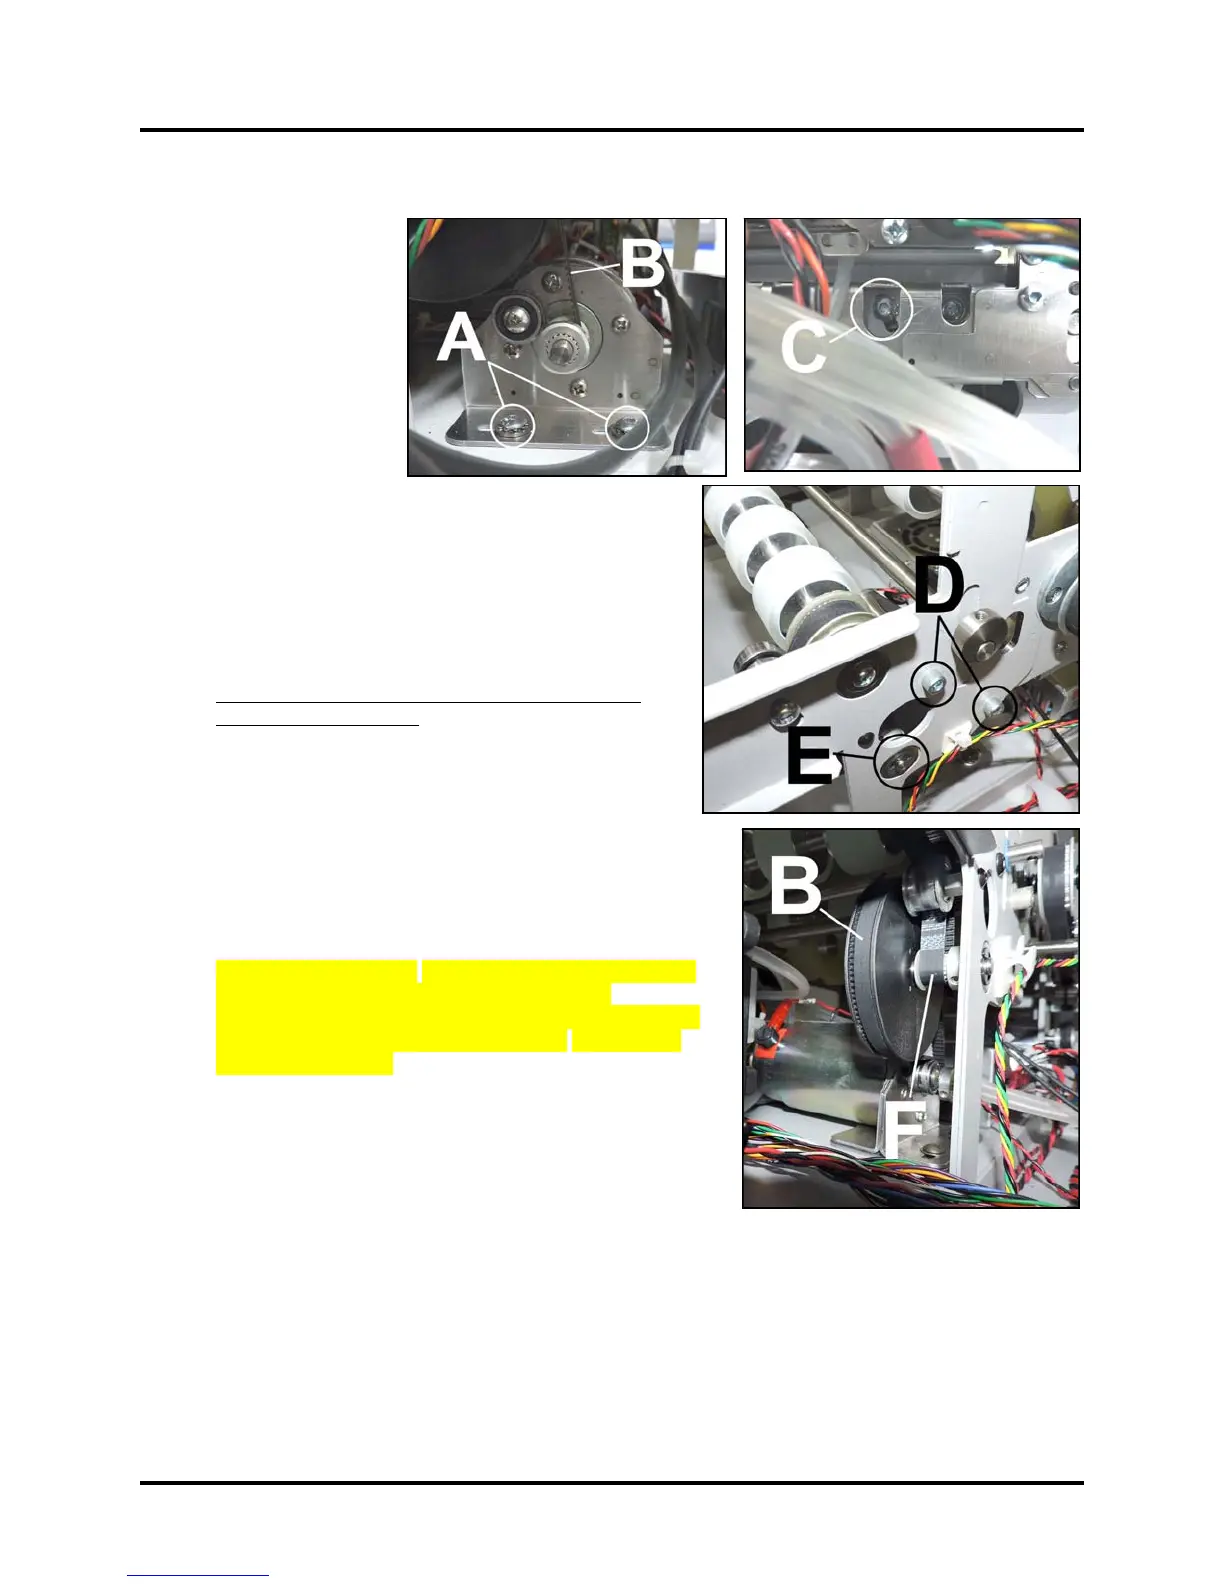
Replace Paper Path Drive Motor and Roller Belts
IMPORTANT: Before
turning Printer power OFF,
raise the Media Thickness
Adjustment Assembly to its
highest position to align
access holes with fasteners.
Turn Printer OFF.
1. Remove Non-
Operator Side Cover.
2. Open the Ink Tank
Door and raise the
Top Assembly.
3. Remove the Paper Path Plate.
4. Loosen the Paper Path Motor mounting screws [A] to
release tension on the Paper Path Motor Drive Belt [B].
5. Loosen the Idler/Tensioner Roller [C] to release tension
on the Paper Path Rollers Belt.
6. Remove (2) screws [D] securing the large Paper Path
Pulley Assembly Bracket to the Side Frame. (Located on
the Non-Operator Side). Remove the C-Clip [E] holding
the Pulley Shaft to the Side Frame.
7. Disengage and remove the Paper Path Motor Drive Belt
[B] and the Paper Path Rollers Belt [F] from the Paper
Path Pulley Assembly on the Paper Path.
8. Remove the Paper Path Motor Drive Belt.
9. To replace the Paper Path Rollers Belt: Remove the Paper
Path Rollers. See “Replace Paper Path Rollers”.
10. Install in reverse order. NOTE: Check/adjust tension on
the Belts. See “Paper Path Roller Belt Tension
Adjustment” and “Paper Path Motor Drive Belt Tension
Adjustment” in the Adjustments Section. System Test:
Press Printzone Test.

 Loading...


