2KZ/2K0
1-5-20
1-5-9 Optical section
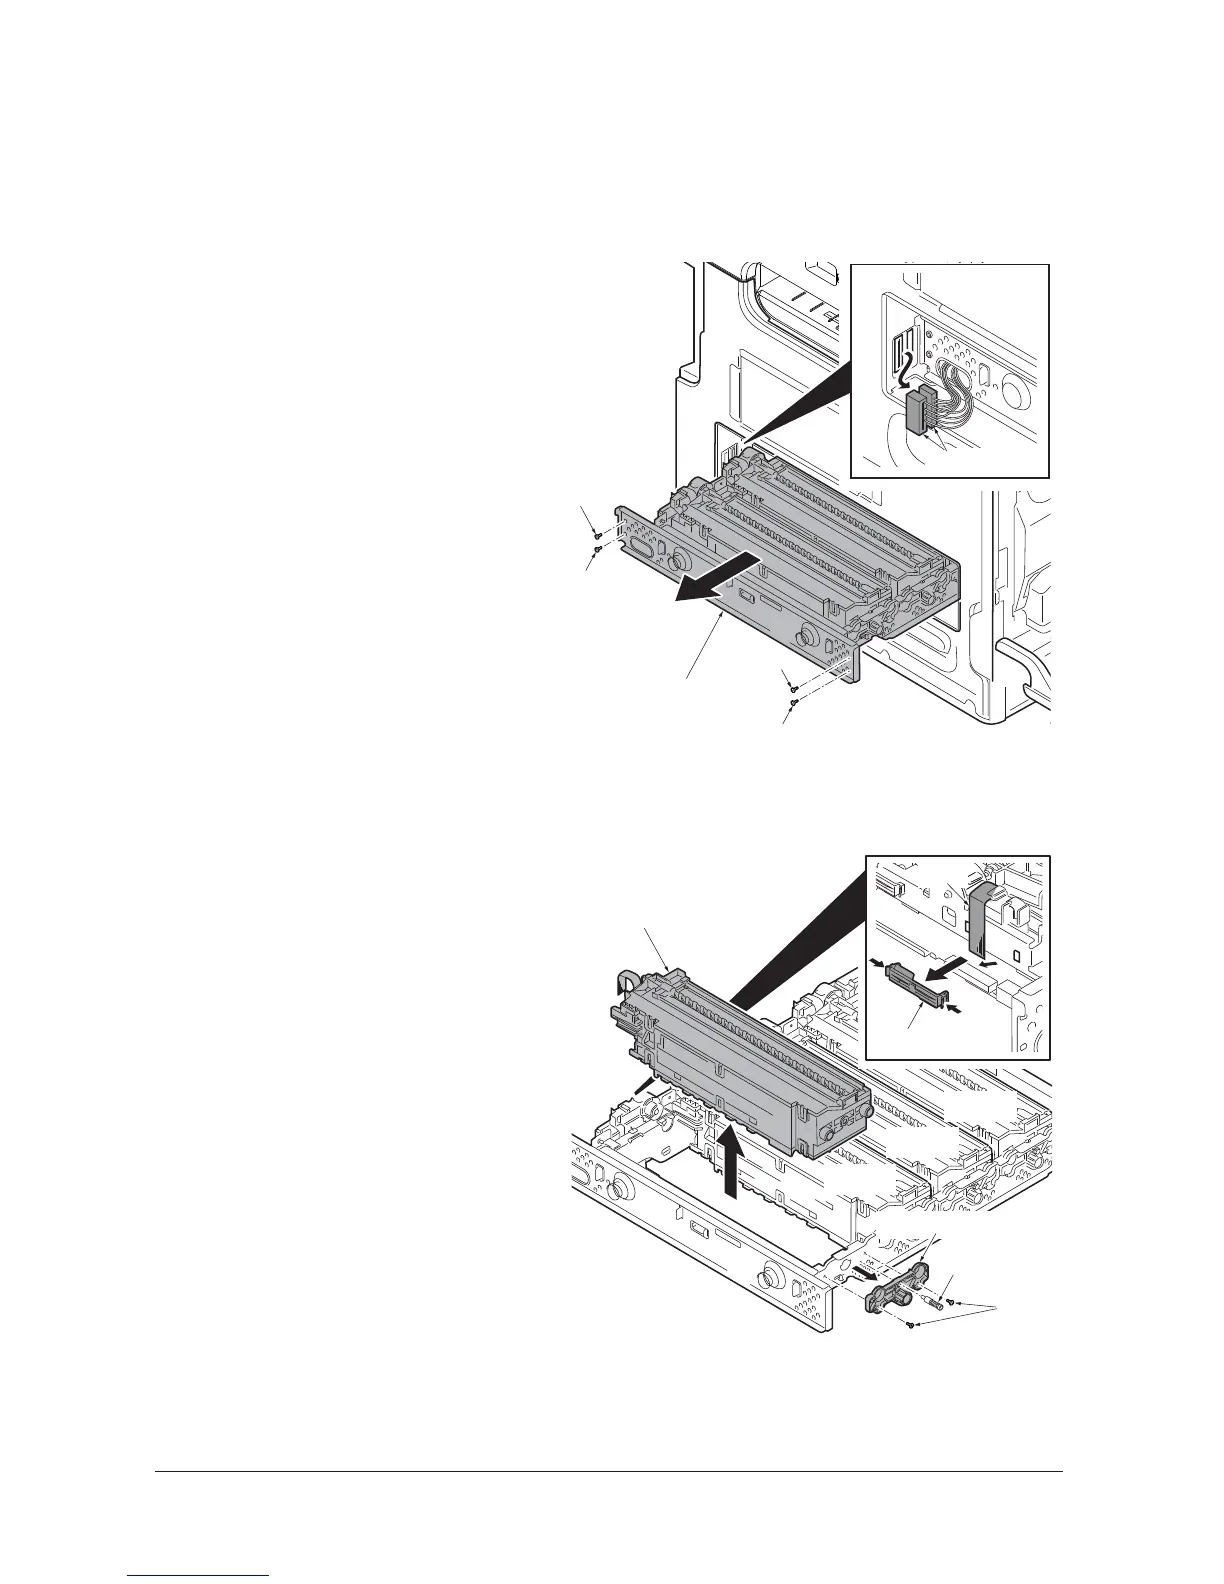
(1) Detaching and refitting the laser scanner unit
Procedure
1. Remove the cassette.
(See page 1-5-10)
2. Remove the rear cover and left lower
cover.(See page 1-5-5,1-5-6)
3. Remove two connectors.
4. Remove four screws and then remove
the laser scanner unit assy by pulling it
forwards.
Figure 1-5-35
5. Release the clamp and then remove the
FFC from the connector.
6. Remove two screws.
7. Remove the pin and spring and then
remove the unit holder Y.
8. Lift the laser scanner unit Y upwards
and then remove the laser scanner unit
Y (LSU-Y).
9. Similarly, remove the laser scanner unit
C/M/K(LSU-C/M/K).
10. Check or replace the laser scanner unit
and refit all the removed parts.
Figure 1-5-36
Screw
Screw
Screw
Screw
Laser scanner
unit assy
Connectors
Screw
Pin & Spring
Clamp
FFC
LSU-Y
Unit holder Y
LSU-C
LSU-K
LSU-M
Service Manual Y113010-4
Service Manual Y113010-4
 Loading...