OMICRON 171
Off-service diagnostic methods
17.2.5 Contact Resistance test
The Contact Resistance test measures the static resistance of the circuit breaker’s main contacts.
Note: To increase the accuracy of the measurement results for the both-side grounded circuit breakers,
you can compensate for the resistance of the ground loop by making two measurements with the circuit
breaker closed and open. To compensate for the resistance of the ground loop, select the
Compensate ground loop resistance check box (see Table 17-35: "Settings of the Contact
Resistance test" on page 174).
Connection
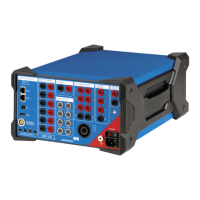
To connect the test object to CIBANO 500:
1. Make sure that all cable connectors are clean and dry before being tightly connected.
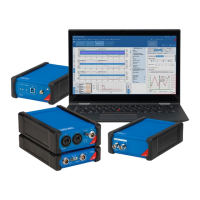
2. Connect the CB MC2 to CIBANO 500 with the EtherCAT
®
cable.
3. Hook up the CB MC2 to the first or the first two interrupter(s) of the circuit breaker.
4. Connect the CB MC2 to the main contact of the circuit breaker with the delivered cables and clamps.
5. Repeat steps 2 to 4 for all interrupters you want to test.
6. In Primary Test Manager, open the Contact Resistance test.
WARNING
Death or severe injury caused by high voltage or current possible
► Do not use external power sources for the circuit breaker’s main contacts.
► During the test, supply the circuit breaker’s main contacts only with CIBANO 500.
WARNING
Death or severe injury caused by high voltage or current possible
► Do not connect anything to the circuit breaker under test without grounding the circuit breaker.
► Always ground the circuit breaker on both ends on all phases and close the circuit breaker to
have proper grounding between the interrupters.
WARNING
Death or severe injury caused by high voltage or current possible
► Do not connect the EtherCAT
®
cables to the CB MC2 module before they are connected to
CIBANO 500.
► Connect the EtherCAT
®
cables first to CIBANO 500 and then to the CB MC2 module.
Tips & Tricks: The delivered Kelvin clamp is the perfect solution for connecting to a massive conductor
like a copper busbar or similar. If you cannot connect in this way, use the Kelvin clamp as a normal
current clamp only for current injection (6 mm connector) and use a separate crocodile clamp for
voltage sensing. Then connect the voltage sense closer to the circuit breaker contact than the current
clamp.
Because sometimes it is difficult to connect to the center point between two interrupters by using the
Kelvin clamp, one pair of Y-clamps is shipped with each CB MC2 module. With the Y-clamps you can
connect alternatively, even cutting through paint with the clamp. In this case connect the voltage sense
clamp on the other side of the central housing opposite to the current injection clamp.
 Loading...