2 Place the Main Disconnect Switch in the OFF position.
3 Remove the Rear Skin.
Refer to 6-11-1 Removing and Replacing Skins on page 6-17 for more information.
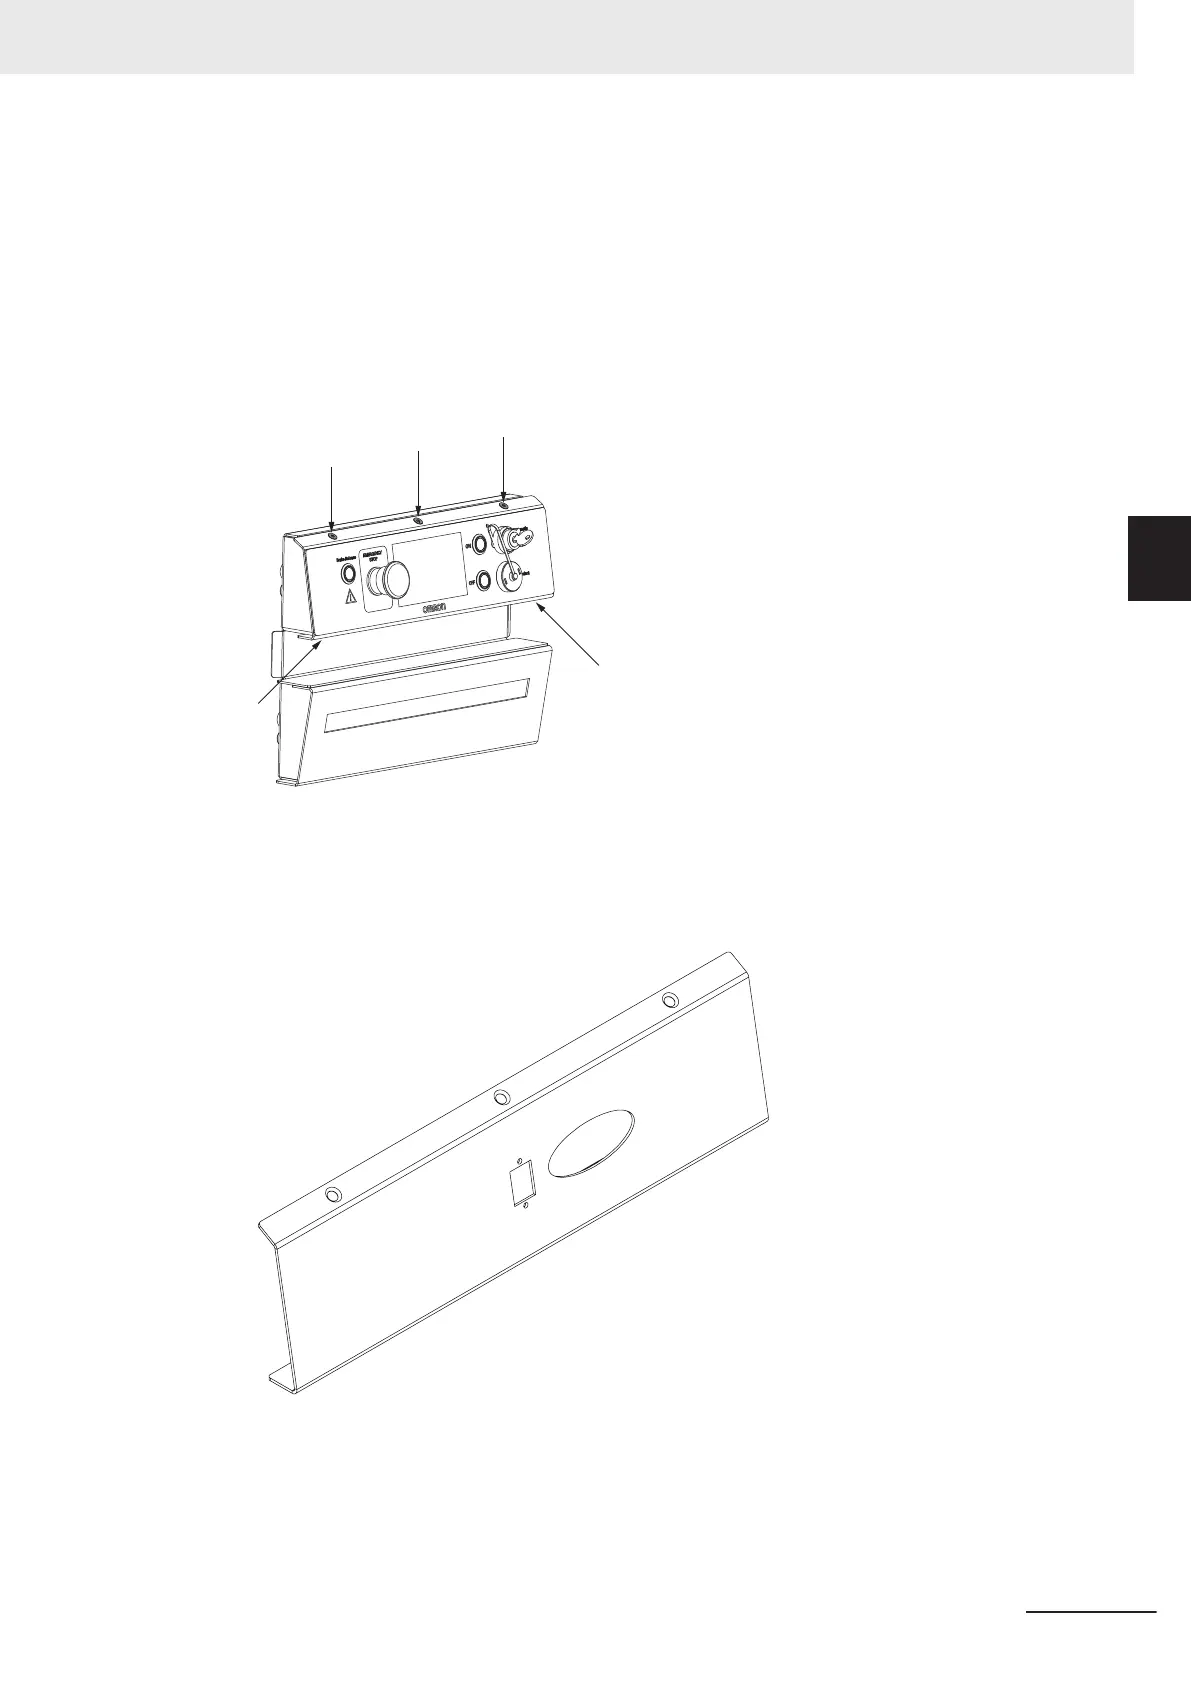
4
Disconnect the ribbon cable and the Ethernet cable from the rear of the Operator Panel.
5
Remove the five M5 screws using the T25 star bit from the following locations on the Rear
Skin.
6
Remove the Operator Panel from the Rear Skin and set it aside.
7
Attach the edge guard strip around the oval hole on the blanking plate to prevent cable chaff-
ing.
8 Install the Passthrough connector on the rectangular hole on the blanking plate using the M3
screws and nuts.
3 Installation
3-49
AMR (Autonomous Mobile Robot) MD-series Platform User's Manual (I681)
3-14 Operator Panel Relocation
3
3-14-2 Operator Panel Relocation Procedure