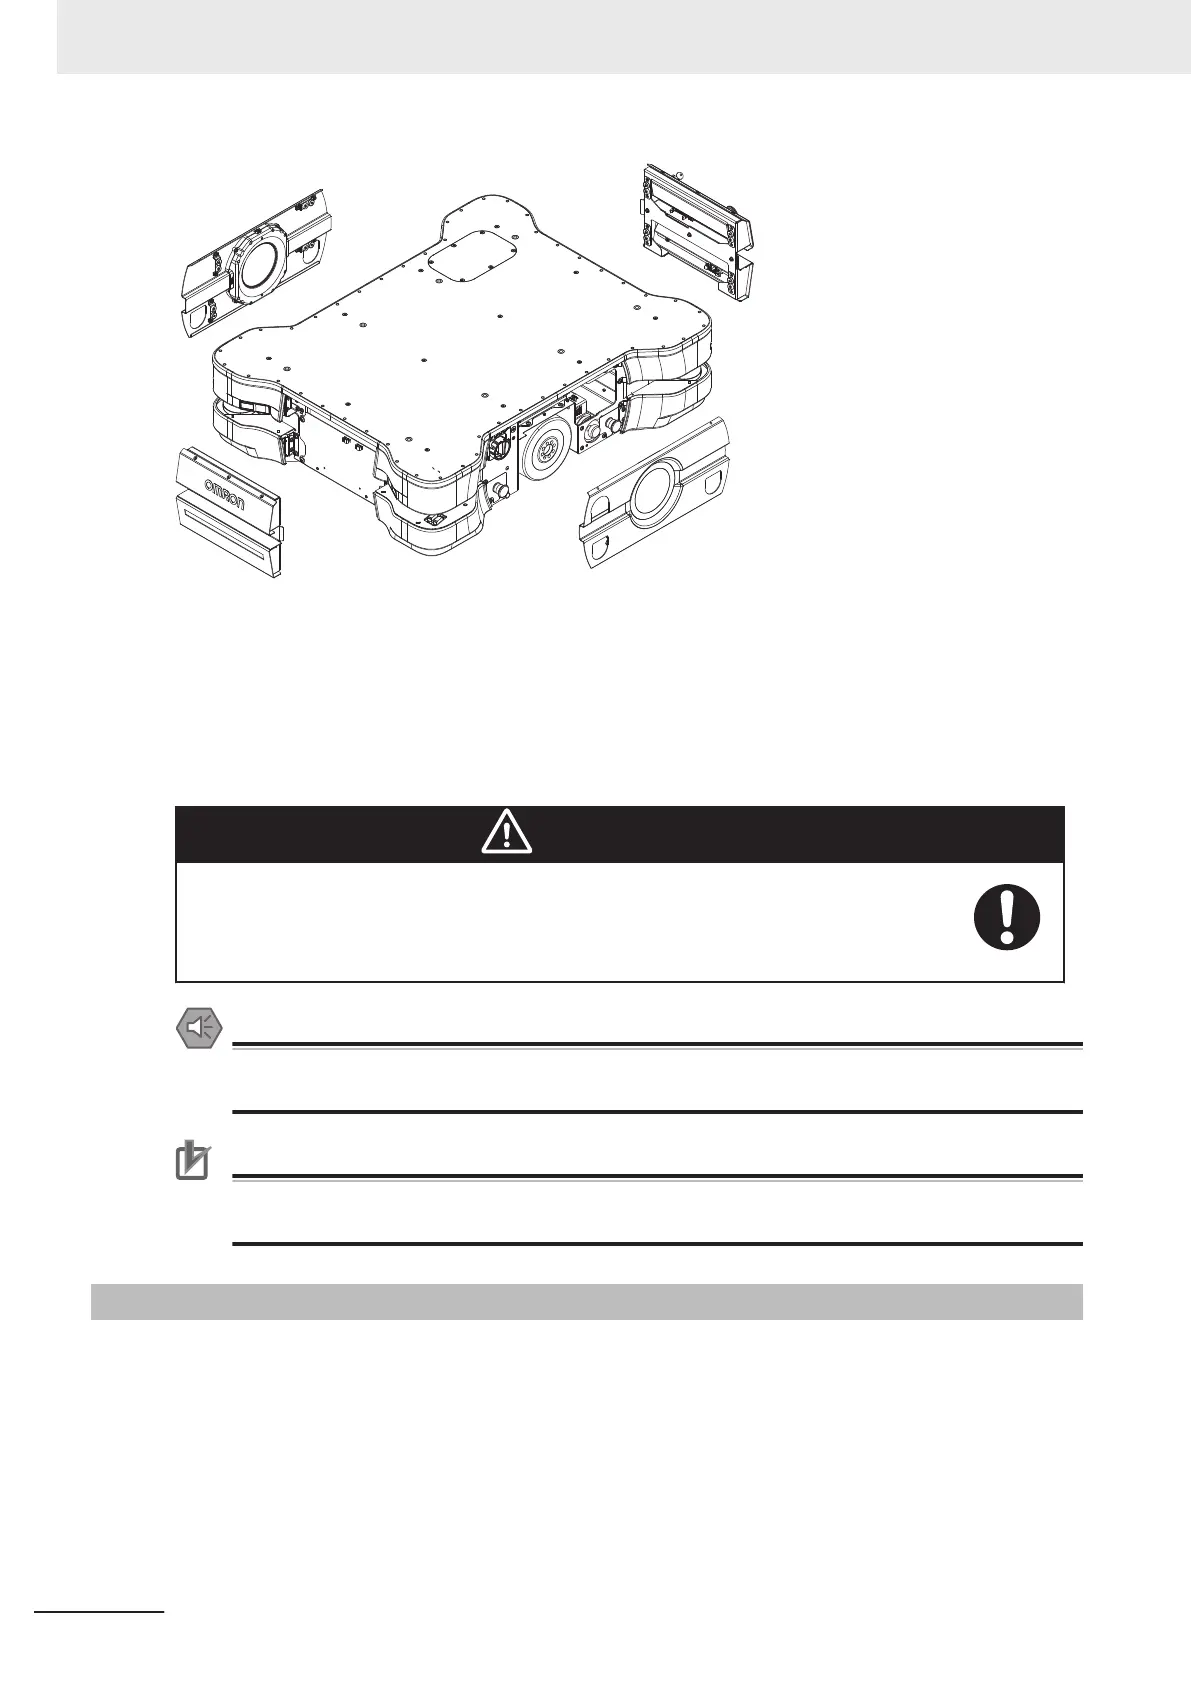
Make the following considerations when removing or replacing skins.
• No tools are required for skin removal. Skins are fastened to the AMR chassis with magnets.
• Right-side and left-side skins are not symmetrical.
• All skins have cables that need to be disconnected when removing. Preserve cable routing and con-
nections replacing skins.
• Pull skins from the bottom when removing.
• Ensure skins are aligned and straight after fastening them.
WARNING
The motor and motor assemblies will be exposed when the side skins are removed,
exposing potential pinch points. Take necessary precautions when moving an AMR
without its skins attached. The rear and top of the AMR also pose pinch hazards when
the rear skin and the top plate are removed.
Precautions for Safe Use
After you remove or replace the skins, you must make sure that the light strips and discs are
operational once the AMR is powered back ON.
Precautions for Correct Use
After removing the skin panels, place them inner-side down so that the outer surfaces do not
get scratched.
6-11-2
Removing and Replacing Operator Panel
Use this procedure to remove and replace the Operator Panel.
The following items and tools are required for this procedure:
• Replacement Operator Panel Assembly (part number 73150-000F)
• T25 star bit
1 Turn the AMR OFF.
2 Place the Main Disconnect Switch in the OFF position.
6 Maintenance
6-18
AMR (Autonomous Mobile Robot) MD-series Platform User's Manual (I681)
 Loading...