3 Place the HAPS sensor in the following position and then insert two M3 x 8 screws using a T10
star bit.
Apply a torque of 1 N-m.
4 Plug the M12 connector on the cable into the HAPS sensor.
5 Replace the front and right skins to complete this procedure.
3-7-2
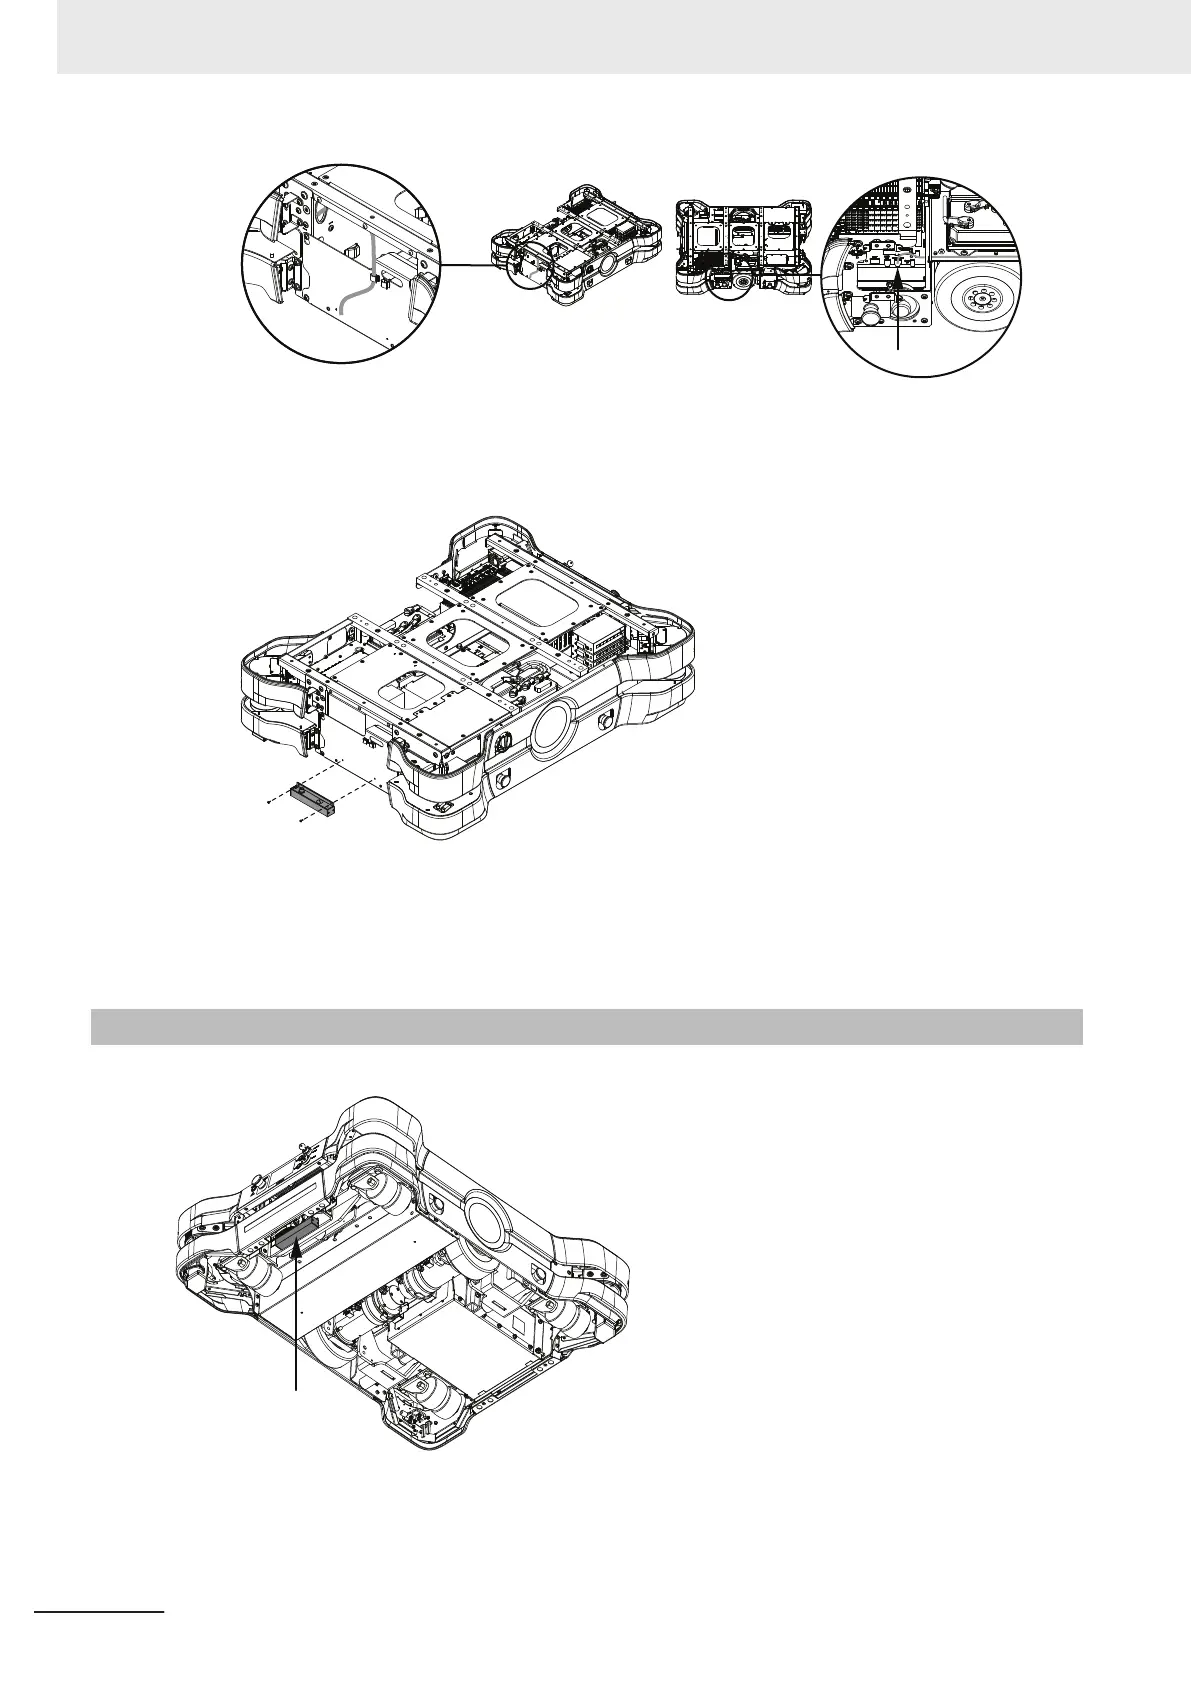
Rear HAPS Sensor Installation
Use the following procedure to install a HAPS sensor on the rear of the AMR.
Make the following considerations before attempting this procedure.
• The rear and right skins will need to be removed during this procedure.
• Cable routing is easier when the Top Plate and payload structure are not present. Removing the Top
Plate and payload structure is not required.
3 Installation
3-30
AMR (Autonomous Mobile Robot) MD-series Platform User's Manual (I681)
 Loading...