6 Use the handle to pull the battery out of the battery compartment. Do not drop the battery while
removing it.
7
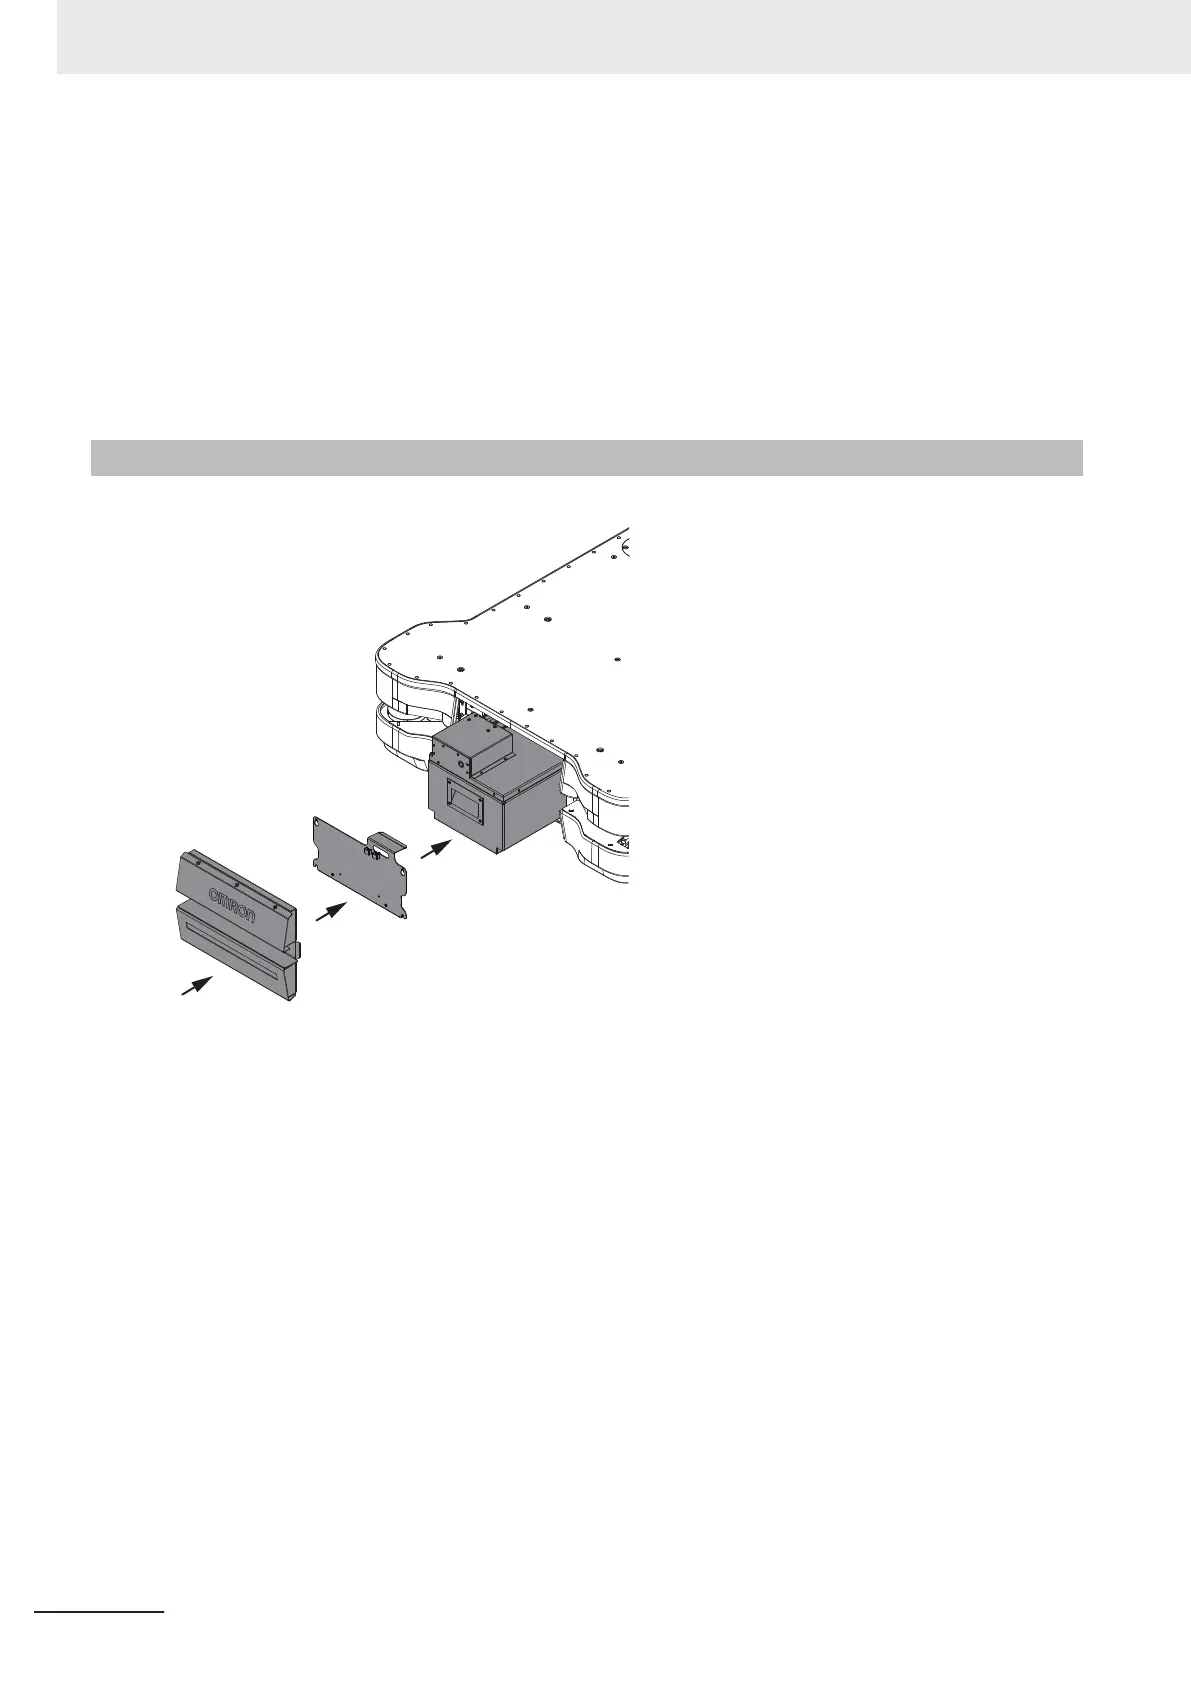
Align the battery compartment cover over the screws and slide it down to fit it in place.
8
Tighten the four M6 screws to a torque of 9 N-m.
9
Replace the Front Skin to complete this procedure.
3-3-2
Battery Installation Procedure
Use the following procedure to install a battery into the AMR.
The following tools are required for this procedure.
• T30 star bit
• Torque wrench
1 Turn the AMR OFF.
2 Place the Main Disconnect Switch in the OFF position.
3 Remove the Front Skin and then disconnect all cables.
Refer to 6-11-1 Removing and Replacing Skins on page 6-17 for more information.
4 Use a T30 star bit to loosen the four captive M6 screws.
3 Installation
3-14
AMR (Autonomous Mobile Robot) MD-series Platform User's Manual (I681)
 Loading...


