87
Polyend Tracker+ Manual
NOTES
Sequencing Steps
5
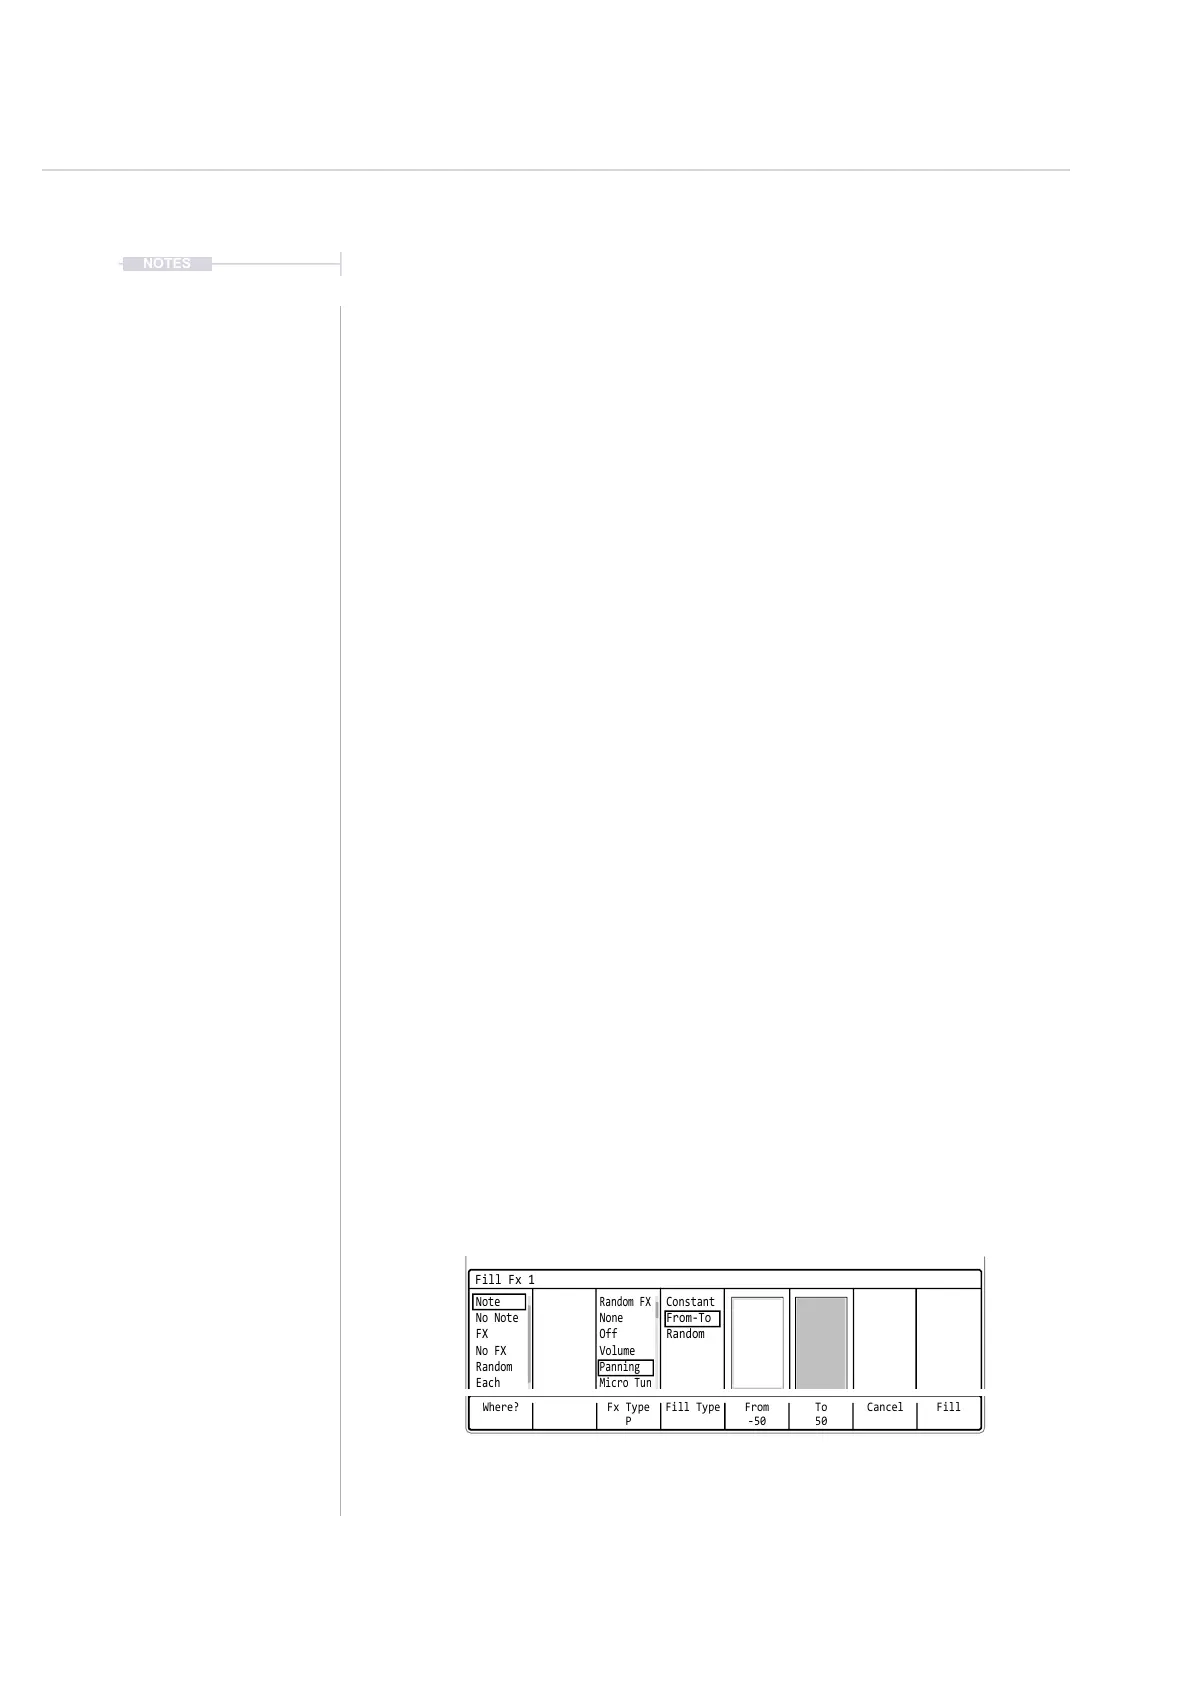
▌ ADDING THE PAN VARIATION USING FILL
1. Following from the previous example; In [Pattern] with [Rec] Mode On,
ensure the previous step range is still selected.
2. Press [FX2]. This selects the effect column FX2 which is highlighted
solid red.
3. Press [Fill] Screen Button. This will open the Fill utility pop-up window.
The display will now be different as the ll utility is now FX, not Note Fill.
4. Press [Where?] - First Screen button. Repeat presses will cycle through
the options. Also, with the ‘Where?’ section highlighted, [Up], [Down] or
Turning (Jog) will select options.
5. Select in the bounding box ‘Note’. This option will select all steps that
have a note set. This is effectively the range of notes recently created.
6. Press [Fx Type], 3
rd
Screen button. Repeat presses will cycle through
the options or [Up] or [Down] or (Jog). Select ‘Panning’, as the effect to
ll into the selected range.
7. Press [Fill Type], 4
th
Screen button. Repeat presses will cycle through
the options. Select ‘From-To’ to allow a range of pan values to be lled.
8. Hold [From], 5
th
Screen button + [PAD] or Turn (Jog) to assign a value.
Set this to -50.
9. Hold [To], 6
th
Screen button + [PAD] or Turn (Jog) to assign a value. Set
this to 50.
10. Press [Fill], 8
th
Screen Button. This will activate the ll command and
populate the selected range. This will create a percussive pattern which
will pan left to right in the stereo image. The values are automatically
assigned in equal intervals across the range.
Where? Fx Type
P
To
50
Fill Type CancelFrom
-50
Fill
Fill Fx 1
Note
Random FX
Constant
No Note
None
From-To
FX
Off
Random
No FX
Volume
Random
Panning
Each
Micro Tun