Section 05 ELECTRICAL
Sub-Section 03 (IGNITION TIMING)
05-03-1
IGNITION TIMING 3
NIPPONDENSO CDI SYSTEM (WITHOUT TRIGGER COIL)
277 Engine Type
The 277 engine type uses a single coil ignition
system. Refer to CDI SYSTEM 03-05 for more in-
formations.
This section is mainly divided in 2 parts, the first
one using a Top Dead Center gauge
to verify the
magneto flywheel timing mark position
. The
second one using a stroboscopic timing light
to
check ignition timing
.
Flywheel timing mark position verification is re-
quired to:
1. Troubleshoot a missing or broken magneto fly-
wheel Woodruff key.
2. Troubleshoot a magneto flywheel correspond-
ing to a different engine type.
3. Scribe the timing mark on a new service mag-
neto flywheel.
Always verify magneto flywheel timing mark posi-
tion before checking ignition timing.
Verifying Magneto Flywheel Timing
Mark Position.
1. Disconnect spark plug wire and remove spark
plug.
2. Install and adjust TDC gauge on engine as
follows:
– Rotate magneto flywheel clockwise until piston
is just Before Top Dead Center.
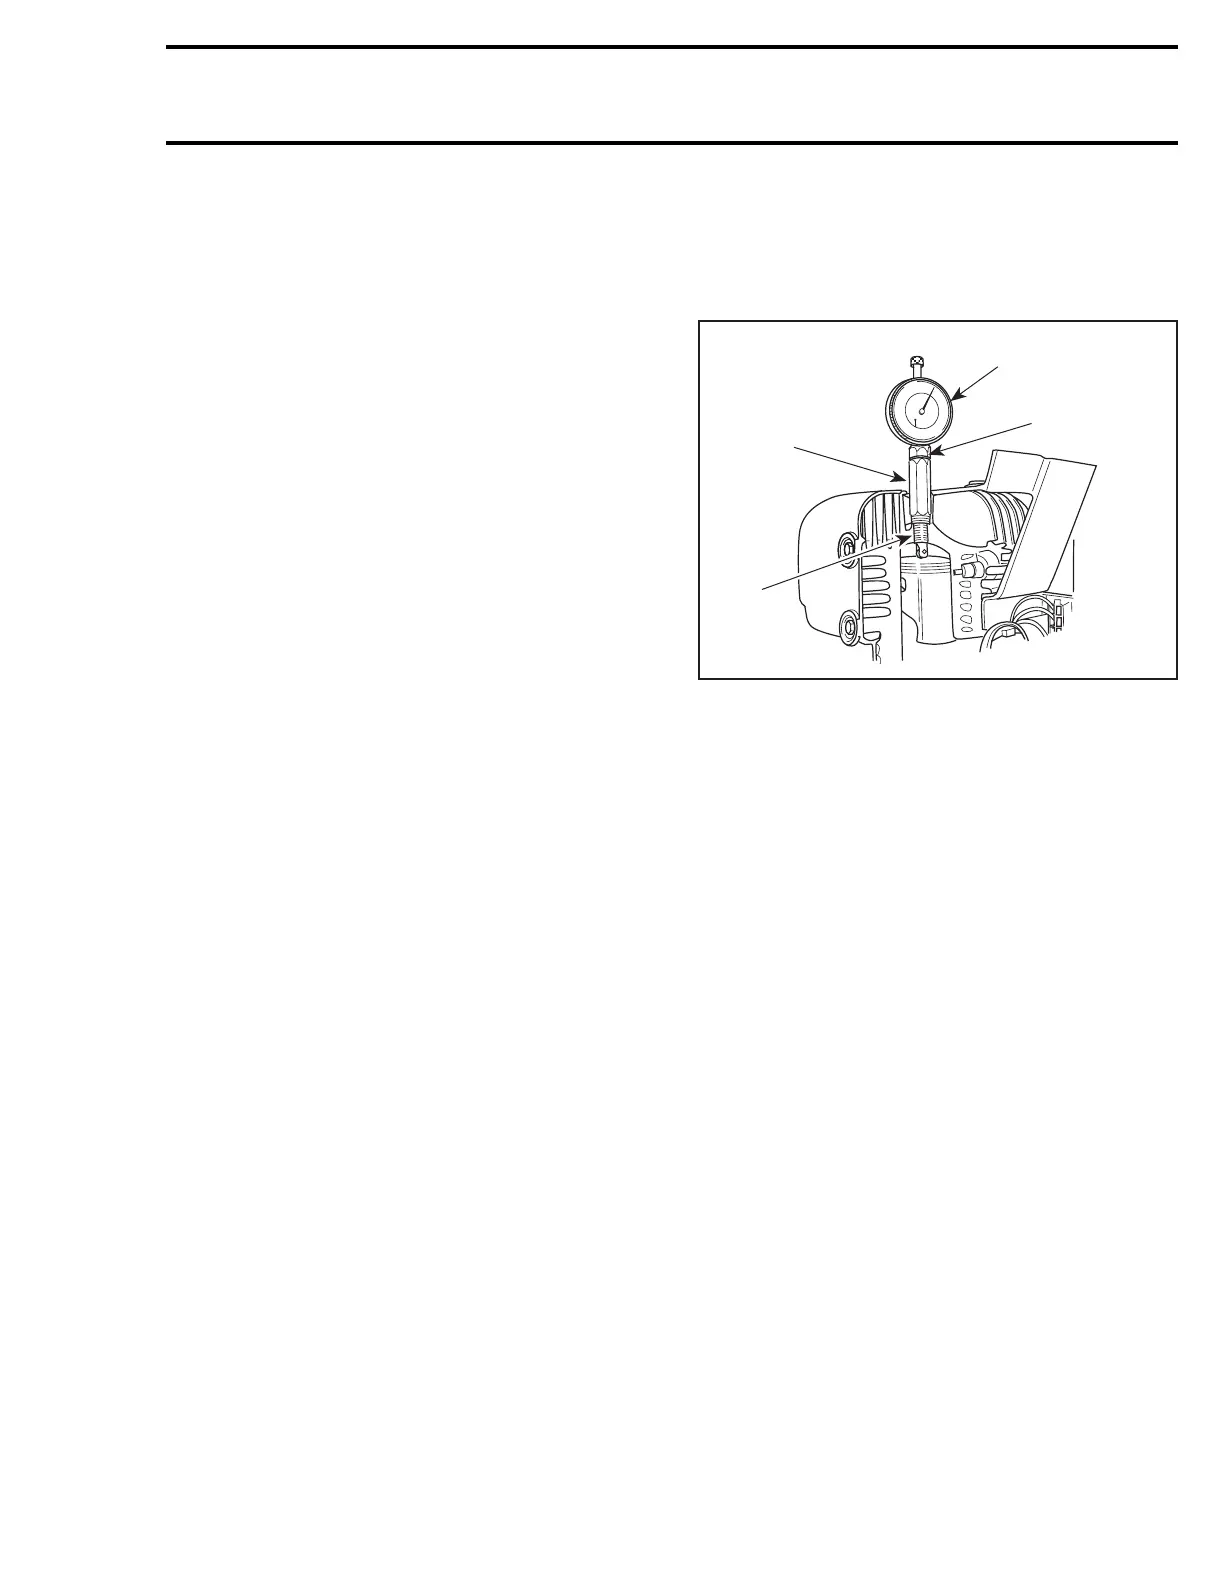
1. Outer ring
2. Adaptor lock nut
3. Roller lock nut
4. Adaptor
– Loosen adaptor lock nut then holding gauge
with dial face toward magneto, screw adaptor
in spark plug hole.
– Slide gauge far enough into adaptor to obtain a
reading then finger tighten adaptor lock nut.
– Rotate magneto flywheel clockwise until piston
is at Top Dead Center.
– Unlock outer ring of dial and turn it until “0” (ze-
ro) on dial aligns with pointer.
– Lock outer ring in position.
3. From this point, rotate magneto flywheel back
1/4 turn then rotate it clockwise to reach the
specified position. Refer to TECHNICAL DATA
09-02.
Check if yellow fin aligns with mark on fan cowl.
0
90
80
70
60
50
40
10
20
30
A03E01A
3
4
1
2