Section 06 REAR SUSPENSION
Sub-Section 04 (DRIVE AXLE)
06-04-7
1. Chaincase
2. Spacer
3. Same quantity
– Double-check drive axle axial play as described
above.
– Modify total shim thickness as required.
– Reinstall track and suspension. Adjust track
tension and alignment.
NOTE :
Center the track suspension to en-
sure that the alignment check made in the
next step is accurate.
– To center, grasp the track suspension and move
it sideways, left and right. Position the track
suspension at the midpoint of its sideways
movement.
– Check track front alignment by measuring the
gap, on each side between guide cleat and the
slider shoe, behind the suspension front axle as
shown.
1. Distance between guide cleat and slider shoe
2. Suspension front axle
If the difference between each side exceeds 3
mm (1/8 in), redistribute drive axle shims as
follows :
INSTALLATION
4, Speedometer Drive Insert
If the drive axle to be installed is a new part and
the vehicle is equipped with a speedometer, a cor-
rect size speedometer drive insert must be in-
stalled into the axle end. Ensure that insert is flush
with end of axle.
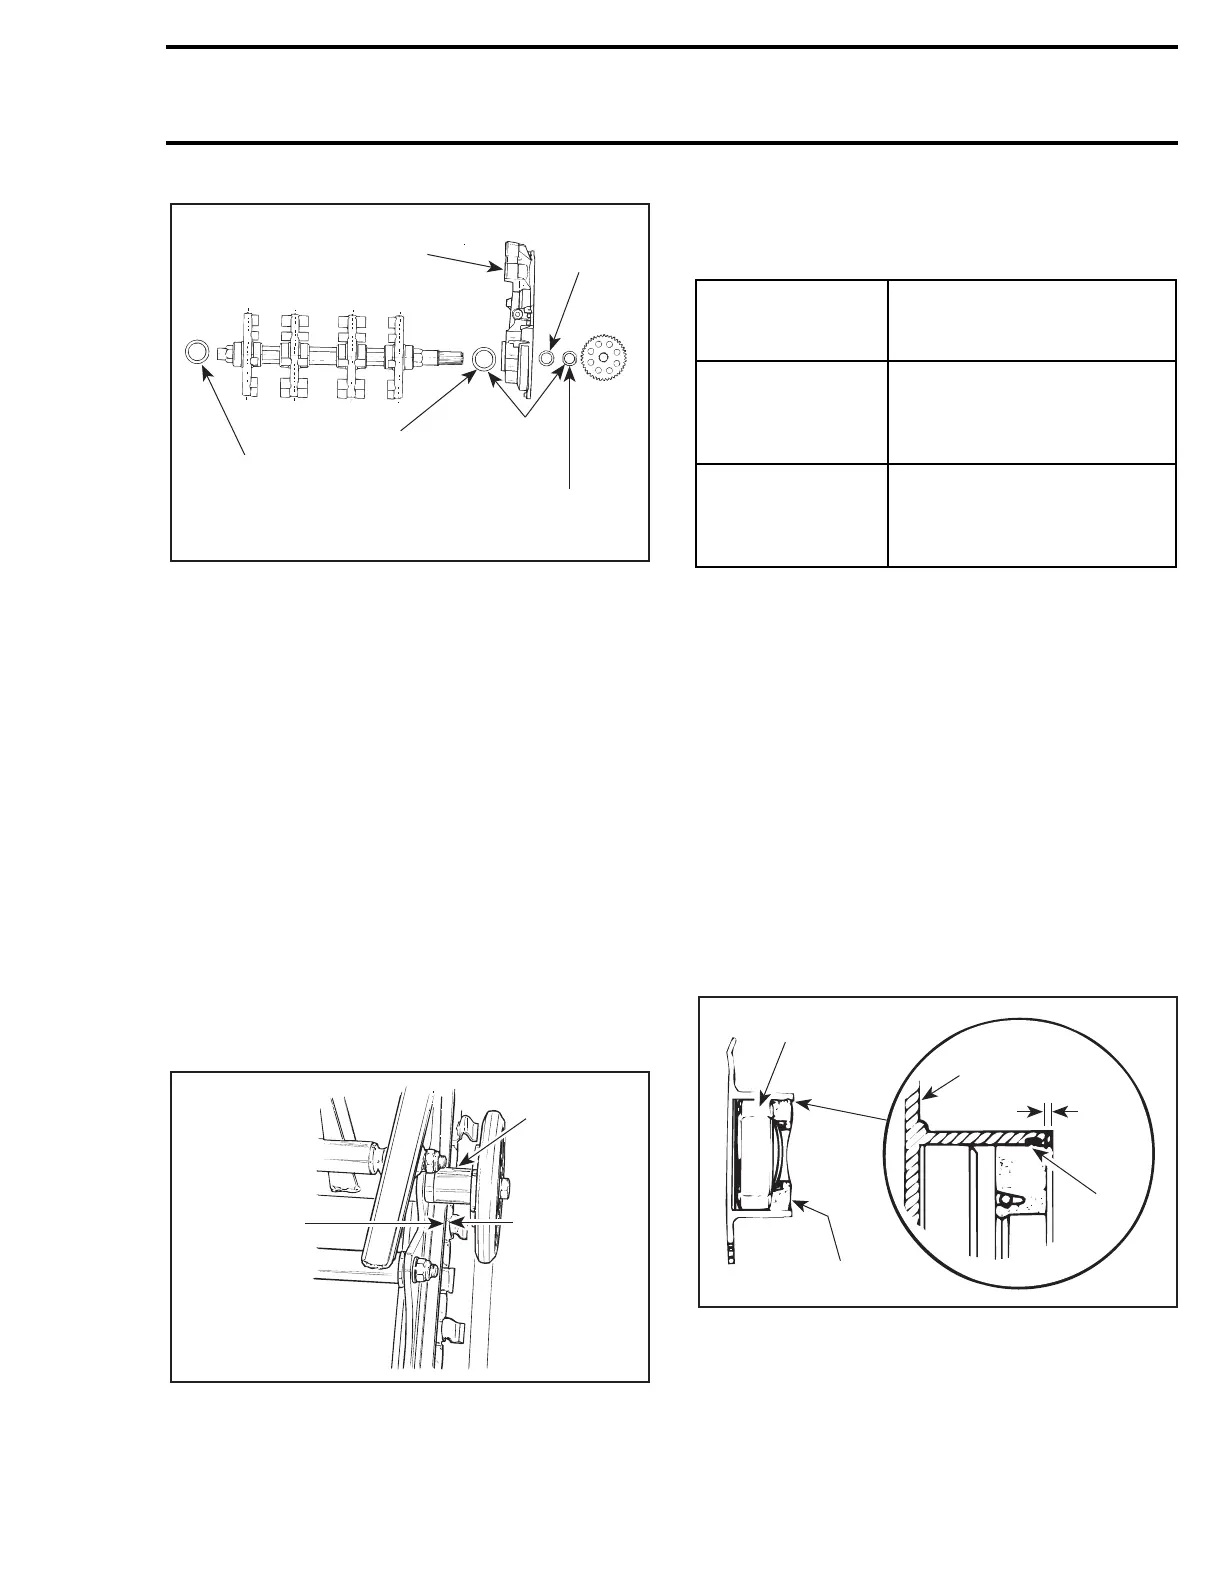
Position drive axle assembly into location. Install
end bearing housing. Install spacer (if applicable)
between bearing and lower chaincase sprocket.
Install chaincase and position seals (if applicable),
making sure that a gap of approximately 2 mm (1/16
in) exists between end of bearing housing and
each seal.
SIDE VIEW
1. Bearing
2. Seal
3. Housing
4. Seal lip
A. 2 mm approx.
A01D0BA
1
2
3
506 0414 00
414 6053 00
501 0205 00
A01D0AA
2
1
DIFFERENCE
BETWEEN
EACH SIDE
DRIVE AXLE SHIM
REDISTRIBUTION
3 to 4.5 mm
(1/8 to 3/16 in)
Remove 1 shim from larger
gap side.
Add 1 shim on smaller gap
side.
4.5 to 6 mm
(3/16 to 1/4 in)
Remove 2 shims from larger
gap side.
Add 2 shims on smaller gap
side.
A00F0GA
A
3
1
2
4