Section 06 REAR SUSPENSION
Sub-Section 04 (DRIVE AXLE)
06-04-6
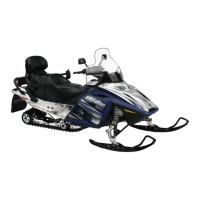
AXIAL PLAY ADJUSTMENT
TOP VIEW
1. Countershaft
2. Shim position on end bearing housing side
3. Shim position on chaincase side
4. Drive axle
5. Axial play
6. Shim between sprocket and spacer
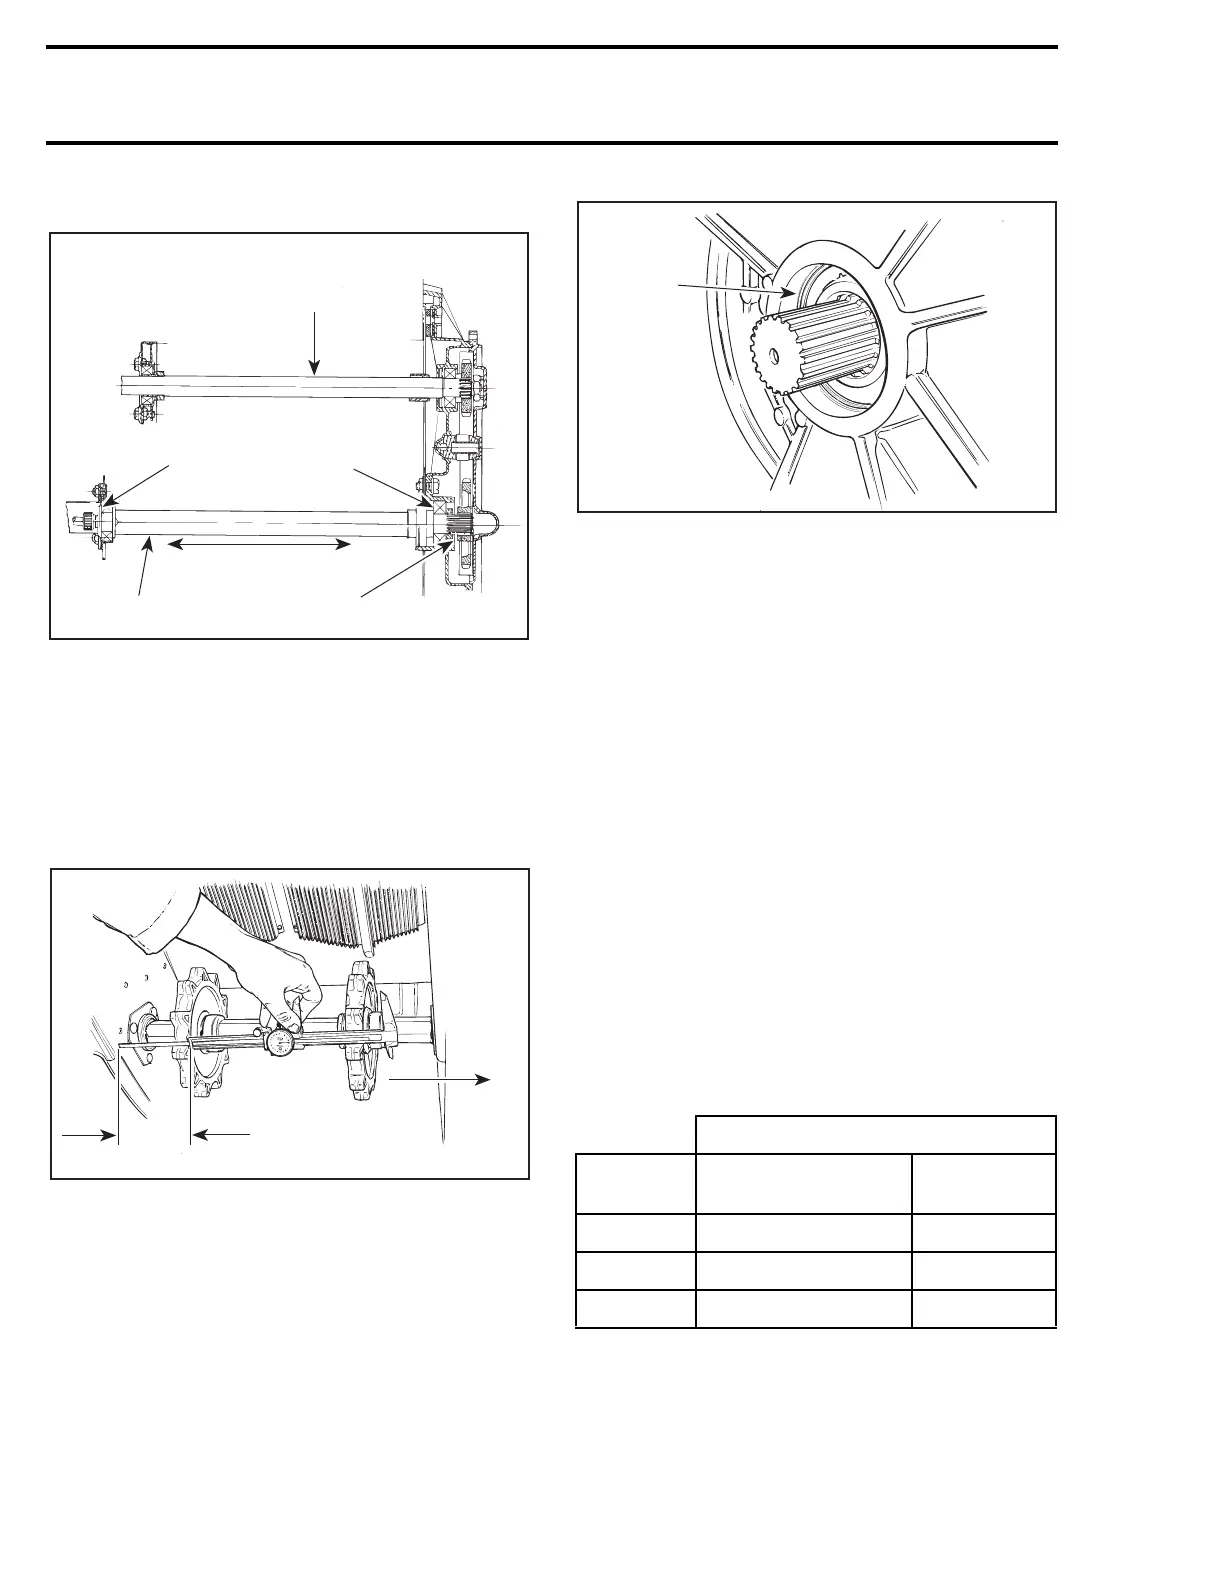
– Push the drive axle toward chaincase and take
note of the distance between the sprocket and
tunnel.
TYPICAL
1. Distance between sprocket and tunnel
2. Drive axle pushed toward chaincase
CAUTION : Be sure drive axle bearing
makes full contact all around the shoulder
of the bearing bore.
1. No gap all around
– Pull drive axle toward the end bearing housing
and take note of the measurement between
sprocket and tunnel.
The drive axle axial play is the difference between
these 2 measurements.
– Repeat this procedure 2 or 3 times to obtain an
accurate measurement.
The allowable drive axle axial play is 0 to 1.5 mm
(0 to .060 in).
The drive axle axial play, as calculated above,
should be within the allowable axial play, add
shim(s) accordingly.
– Remove drive axle, install required shim(s) as
per the
shim position
chart, reinstall drive axle
without the suspension and track.
SHIM POSITION
Shim position is important to maintain proper
sprocket alignment.
CAUTION : Install shim(s) following the
pattern shown in the chart.
When installing shims between the chaincase
and the drive axle bearing, there must be same
quantity of shims between the drive chain sprock-
et and spacer.
A01D04A
1
3
2
4
5
6
A01D08A
2
1
SHIM POSITION AND QUANTITY
SHIM(S)
REQUIRED
END BEARING
HOUSING SIDE
CHAINCASE
SIDE
11
21 1
32 1
A01D09A
1