- Signals to/from cards which include both inputs and outputs then display input (@ or >) or output ($@ or $DC)
-
Signals are then appended with their module number (as defined in the !9>;*B5 display – See Page 5-25), hyphenated
with the individual signal number, apart from MADI signals which simply have their channel number appended.
For example, the fourth AES input on the second Alpha-Link stagebox will be listed as <@81(@.
Other MADI IO is named !?31<" followed by the channel number, which is set by the console according to the
MADI link being used (See Page 5-25).
When you are sure of a signal’s connection to the outside world, you may give it a more obvious name
(eg. "93, )95!9>5, ):
MORSE router Sources and Destinations will appear in the list in blue, indicating that it is not possible to rename these
signals from the console.
‰ Touch an entry in the D<<#1=5 list, enter a new name in the QWERTY pop-up which appears, and press $ .
With the #1=5 << box lit, renaming one input will automatically add the numeral 1 to the given name and
simultaneously rename all subsequent inputs of that type with incrementing numbers.
The (3A922<5 column shows how the name will appear in the 8-character scribble strip displays on the console and the
81A column shows how the names will appear in the 4-character Master Channel displays – both are automatically
derived from the D<<#1=5 column, but these may individually be edited for better clarity and less ambiguity if required.
Note that renaming the Full Name will result in both shortened versions being renamed. It is therefore important to
settle on the Full Name before editing the shortened versions.
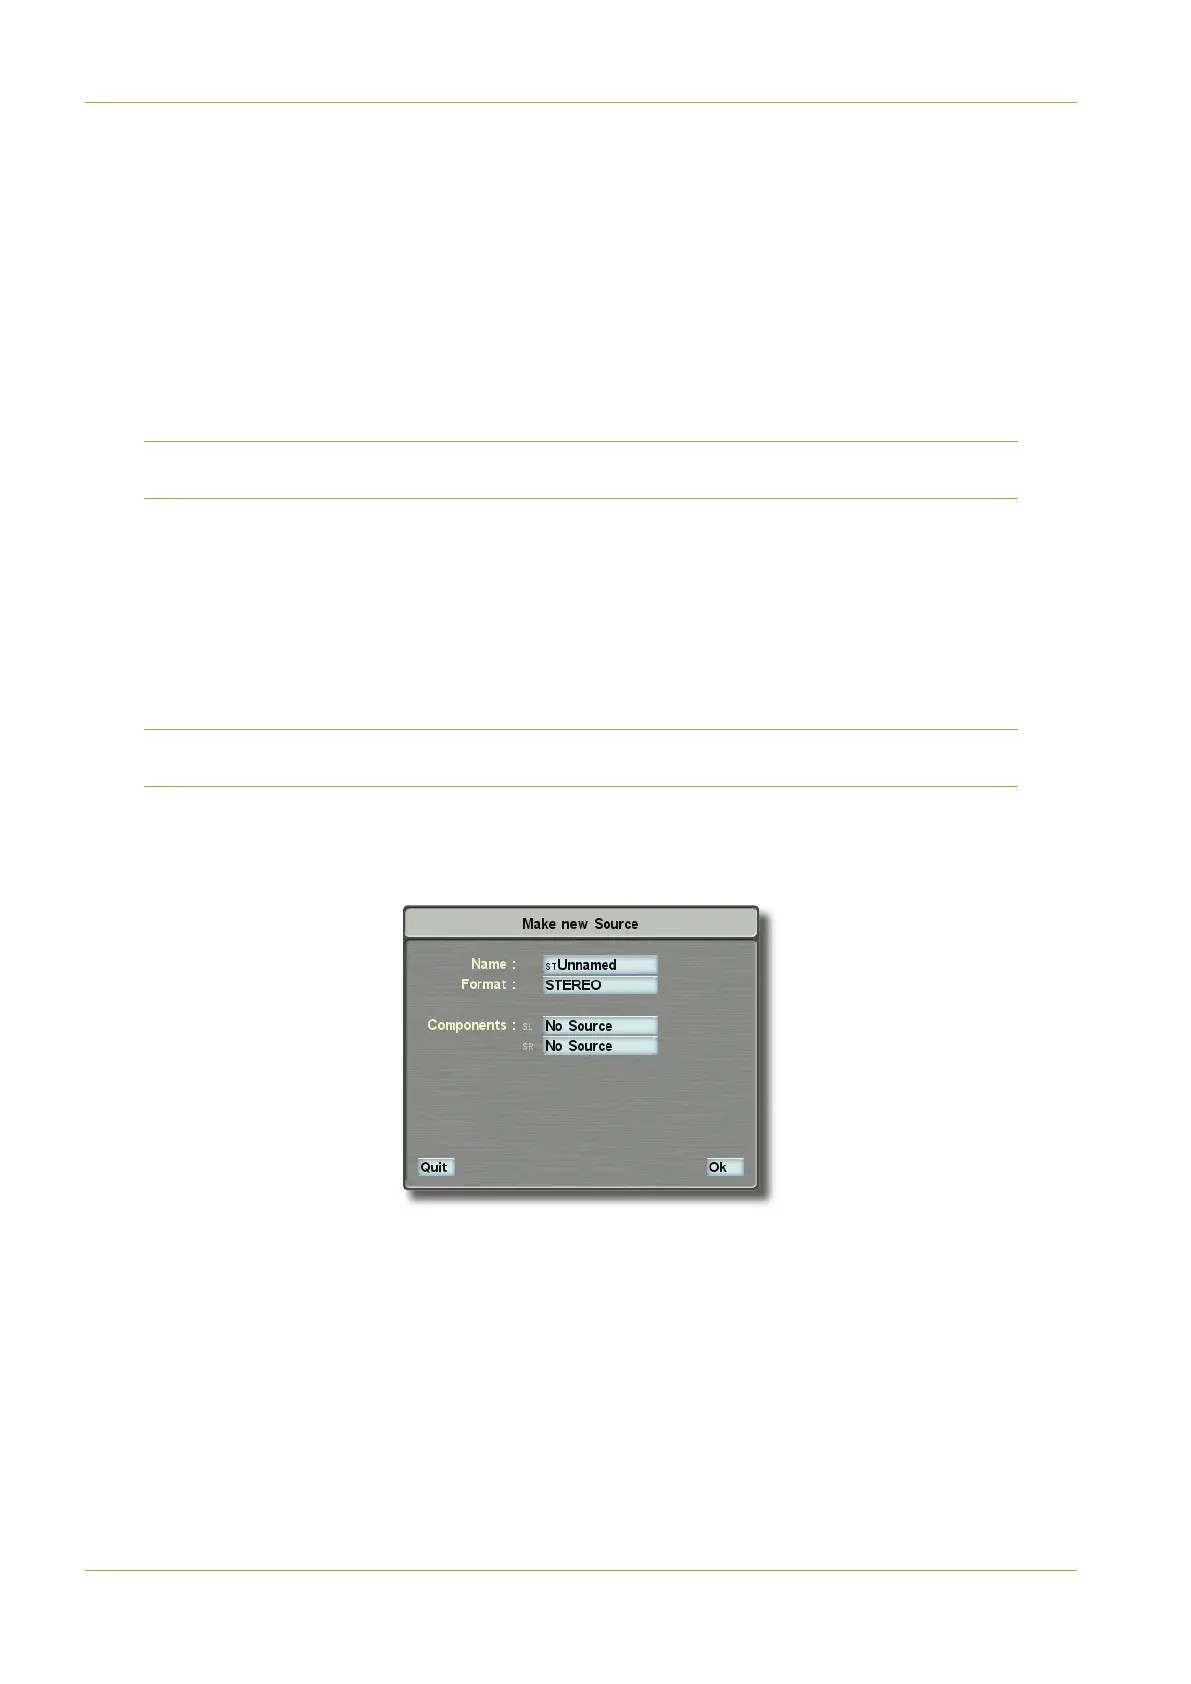
You may bundle sources together to allow a neater arrangement of associated channels:
‰ To make a new IO bundle like this, select A51C5#5F$ and a pop-up appears:
Select the box next to the #1=5 legend and enter a suitable title for the bundle, then press the box next to the ?A=1C
legend and choose from "$#$, ()'$ or – this will set the number of sources you can choose under the
?=@?>5>CB legend, simply press each component in turn and choose the appropriate physical input according to your
wiring.
Page 5-18 | Section 5: System Administration C10 HD Installation Manual
Route Menu