PDW-700/V1 (E)
7-27
7-6. Service Action After Replacing the
CCD Unit
This section describes the required actions for replacing
the CCD unit.
n
Save the settings of the menu contents in the Memory
Stick before performing the actions after replacement.
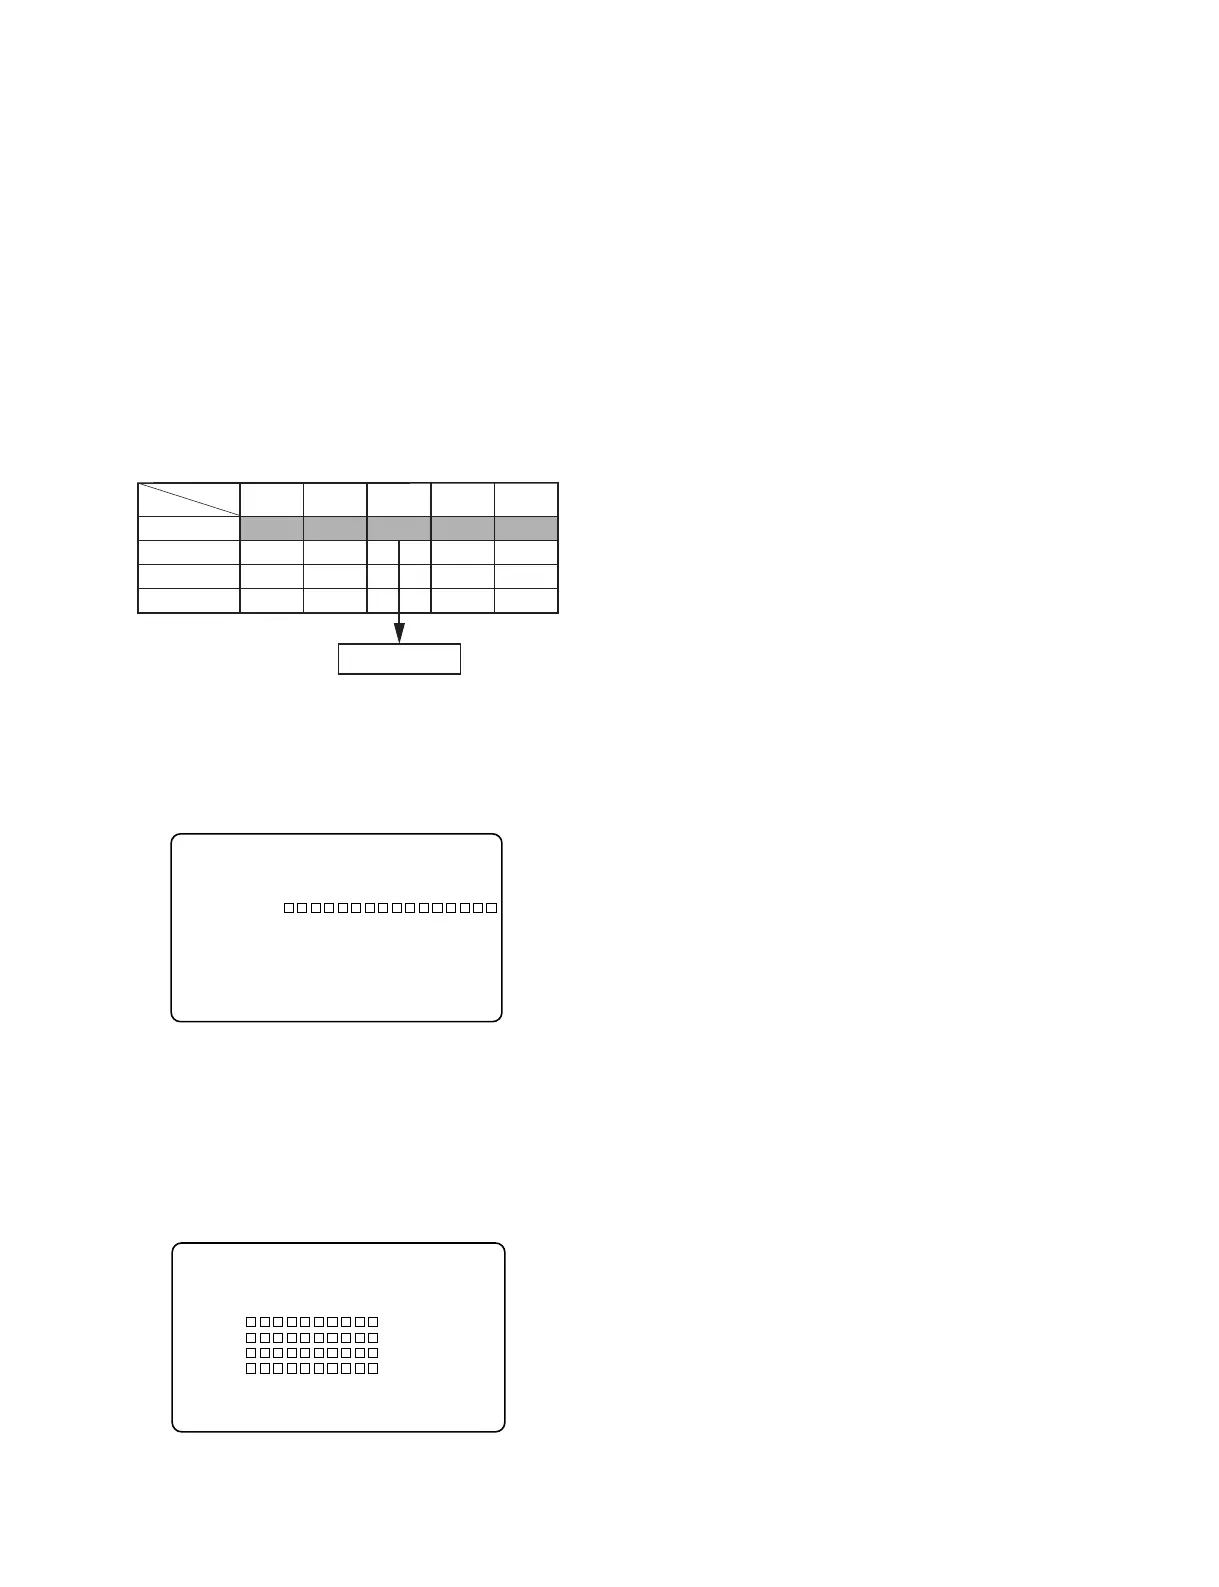
Saving menu settings
Save the menu settings in a Memory Stick
1. Insert a memory stick.
2. Set the MENU ON/OFF switch to the ON position.
3. Let the ALL FILE page of the FILE menu appear on
the screen and press the MENU knob.
4. Select F.ID and set the file ID.
5. Select ALL FILE SAVE and execute it by pressing the
MENU knob.
6. When the cursor is moved to the file selection display,
select the destination file where the file is going to be
saved and press the MENU knob. (When saving a new
file, select NEW FILE.)
USER PAINT FILE
OPERA
TION
MAINTE
NANCE
ALL FILE SAVE
USER layer
SERVICE layer
PRESET layer
FACTORY layer
USER layer
Menu
Memory stick
?F03
O
ALL FILE TOP
ALL FILE LOAD : EXEC
ALL FILE SAVE : EXEC
F.ID :
ALL PRESET : EXEC
STORE ALL PRESET: EXEC
CLEAR ALL PRESET: EXEC
3 SEC CLR PRESET: OFF
NETWORK DATA : OFF
7. Confirm that the screen returns to the ALL FILE
display and the message “COMPLETE!” appears
indicating that the saving is complete.
Service Action after replacement
1. Reset them using the SERVICE menu.
Refer to “4-9. SERVICE Menu” for the details on
SERVICE menus.
(1) Open the switch cover with the power of the main unit
turned on, and turn on the MENU ON/OFF switch.
The menu appears on the viewfinder screen regardless
of the ON/OFF state of the DISPLAY switch on the
viewfinder.
(2) Select “SERVICE” from the TOP menu, and press the
MENU knob.
2. Perform the following adjustments.
. VCO CONT frequency adjustment
. VA gain adjustment
. Black shading adjustment
. White shading adjustment
. Black set adjustment
(After BLACK BALANCE is displayed, press and
hold the AUTO W/B BAL switch toward BLACK
until BLACK SET is displayed again.)
. Flare adjustment
. Perform RPN ALL PRESET.
. Perform AUTO CONCEAL.
. Perform AUTO CONCEAL2.
3. Restore the DIP switch on the AT-177 board to exit
the service mode. (Refer to section 4-9.)
4. Turn on the power of the camera.
5. Perform ALL FILE LOAD and load the saved ALL
FILE.
P00 ALL SAVE ESC
MEMORY STICK ACCESS
DISPLAY MODE : ALL
001. 00/00/00
002. 00/00/00
003. 00/00/00
004. 00/00/00
005.NEW FILE