9-9
PDW-700/V1 (E)
C
4. On the menu, adjust as follows.
MENU: SERVICE
PAGE: BLACK/FLARE
ITEM: R FLARE
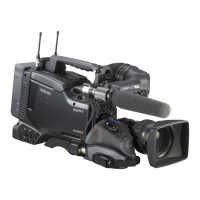
Spec.: Minimize the carrier leakage at portion C.
(R-ch)
5. On the menu, adjust as follows.
MENU: SERVICE
PAGE: BLACK/FLARE
ITEM: B FLARE
Spec.: Minimize the carrier leakage at portion C.
(B-ch)
6. Repeat steps 4 and 5 several times and minimize the
carrier leakage at portion C.
9-2-7. Flare Adjustment
Fixtures and Equipment:
. SD waveform monitor
. Grayscale chart (16:9)
Preparation:
. Connect an SD waveform monitor to the TEST OUT
connector.
. OUTPUT/DCC switch (inside panel) → CAM/ON
. On the menu, set as follows.
MENU: SERVICE
PAGE: BLACK/FLARE
ITEM: TEST OUT SELECT → VBS
. Shoot a grayscale chart in the full underscanned monitor
frame.
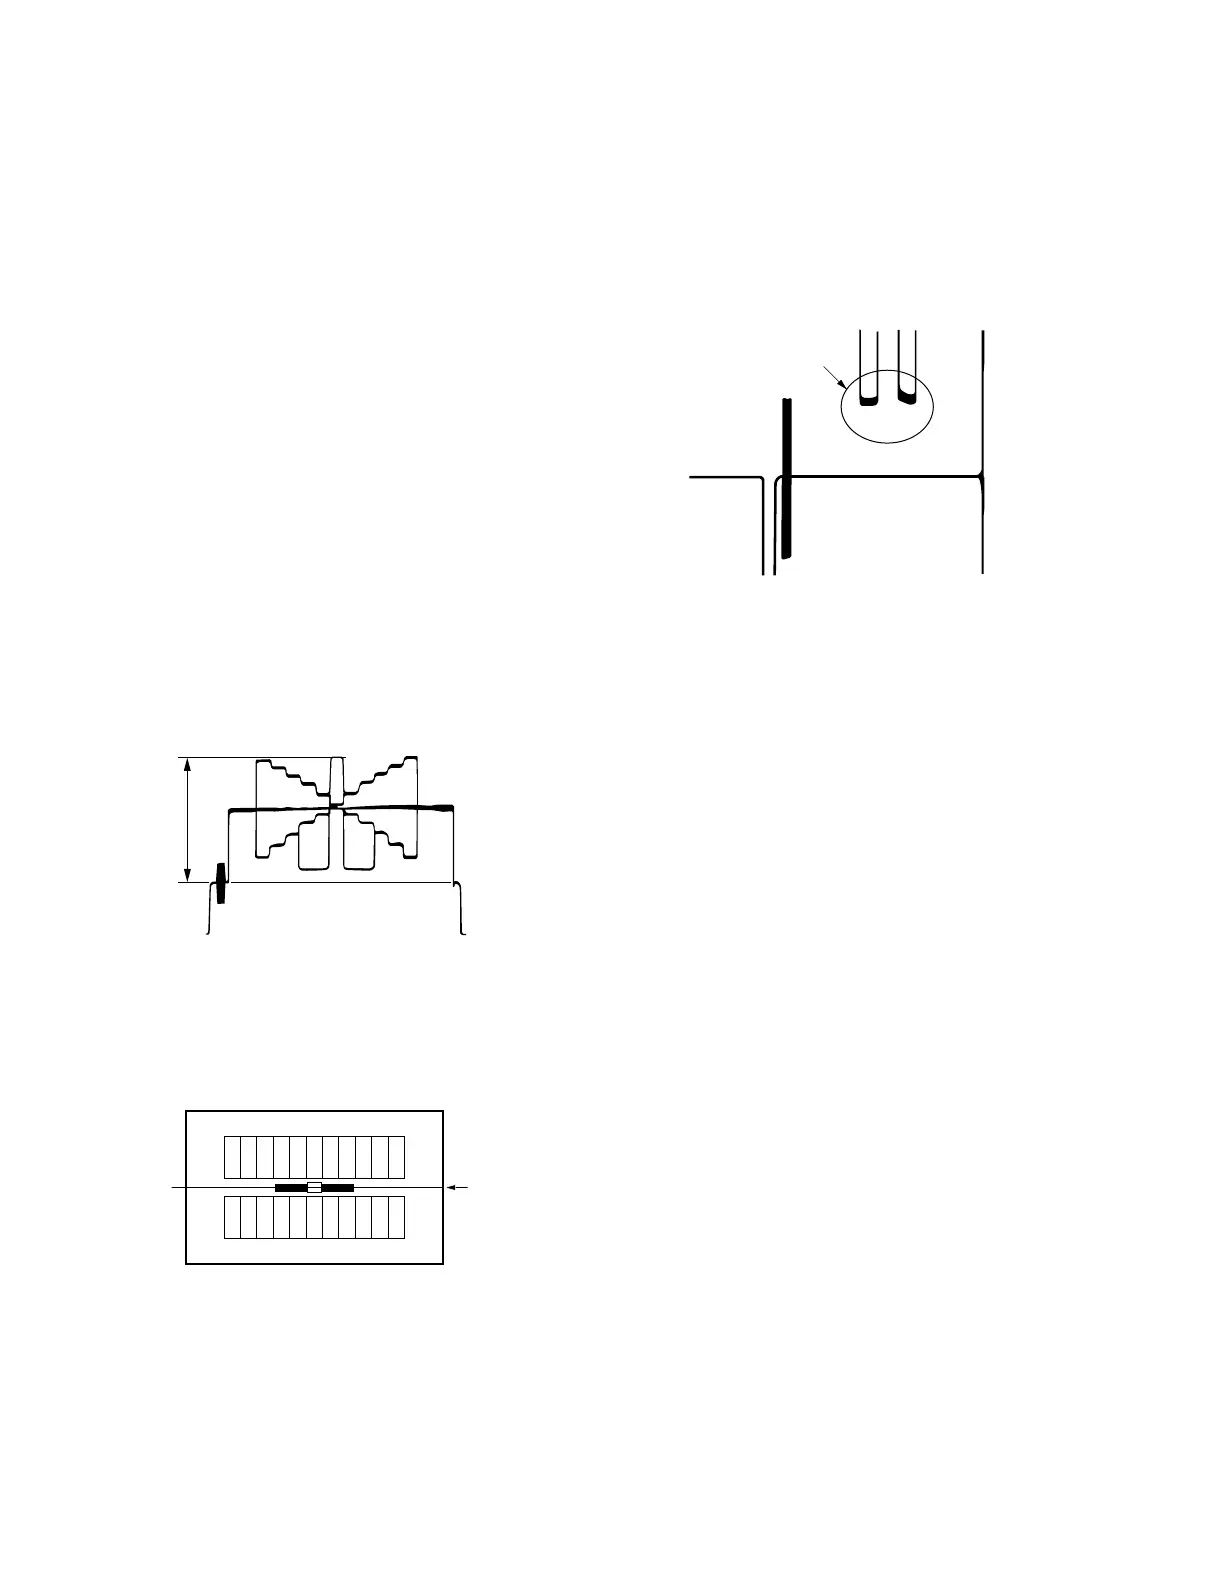
Adjustment Procedure:
1. Lens IRIS: Open the lens iris by one step from the
reference setting A.
Spec.: A = 100 ± 2 IRE (NTSC)
700 ± 14 mV (PAL)
2. On the menu, set as follows.
MENU: SERVICE
PAGE: BLACK/FLARE
ITEM: G FLARE → 0
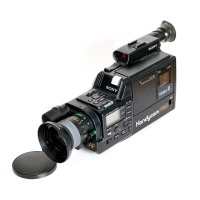
3. Select center portion by using the waveform monitor.
A