PDW-700/V1 (E)
7-34
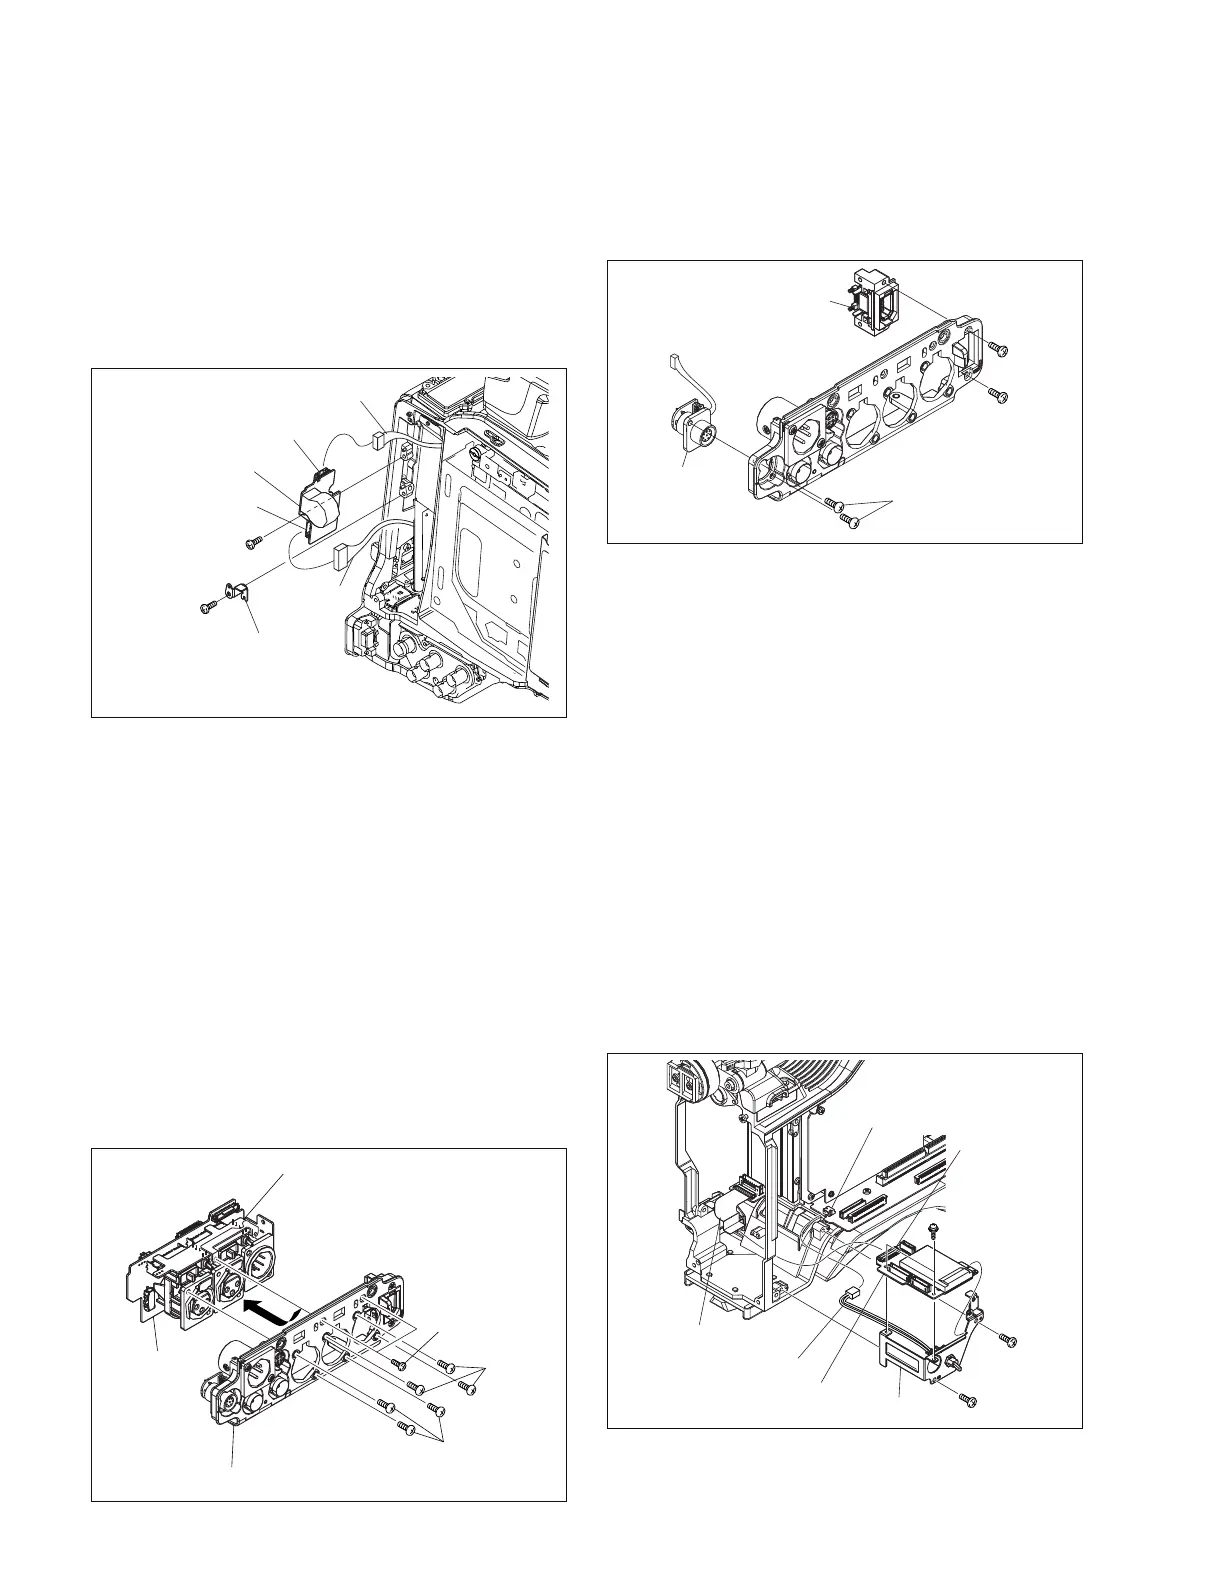
7-7-12. PS-731 Board
1. Remove the outside panel. (Refer to Section 1-7-1.)
2. Disconnect the harness from the connector (CN1) on
the PS-731 board.
3. Remove the screw, and remove the bracket a .
4. Remove the screw, and disconnect the harness from
the connector (CN2) , then remove the PS-731 board.
B2.6 x 5
B2.6 x 5
Bracket a
Harness
Harness
PS-731 board
CN2
CN1
AXM-38
board
SW-1352 board
Connector panel
P2.6 x 6
P2.6 x 6
B2 x 5
B2 x 5
B2 x 5
P2.6 x 6
RM-216 board
CN-2948 board
B2.6 x 5
MS bracket
MS-86 board
Harness
Flexible card wire
CN2
(MB-1111 board)
CN1
B2.6 x 5
PSW2 x 5
5. Reinstall the removed parts by reversing steps 1 to 4 of
removal.
7-7-13. AXM-38 Board, CN-2948 Board, SW-
1352 Board and RM-216 Board
1. Remove the outside panel. (Refer to Section 1-7-1.)
2. Remove the inside panel. (Refer to Section 1-7-3.)
3. Remove the connector cover. (Refer to Section 1-7-7.)
4. Remove the connector panel. (Refer to Section 1-7-8.)
5. Remove the two screws (B2 x 5) and six screws (P2.6
x 6) .
6. Remove the AXM-38 board and SW-1352 board in the
direction of arrow.
7. Remove the two screws (B2 x 5), and remove the CN-
2948 board.
8. Remove the two screws (P2.6 x 6), and remove the
RM-216 board.
9. Reinstall the removed parts by reversing steps 1 to 8 of
removal.
7-7-14. MS-86 Board
1. Remove the outside panel. (Refer to Section 1-7-1.)
2. Remove the inside panel. (Refer to Section 1-7-3.)
3. Remove the front panel. (Refer to Section 1-7-5.)
4. Remove the DCP-44 board. (Refer to Section 7-7-2.)
5. Disconnect the flexible card wire from the connector
(CN1) on the MS-86 board.
6. Remove the two screws (B2.6 x 5) , and remove the
MS-86 bracket.
7. Disconnect the harness from the connector (CN2) on
the MB-1111 board.
8. Remove the two screws (PSW2 x 5) , and remove the
MS-86 board.
9. Reinstall the removed parts by reversing steps 1 to 8 of
removal.