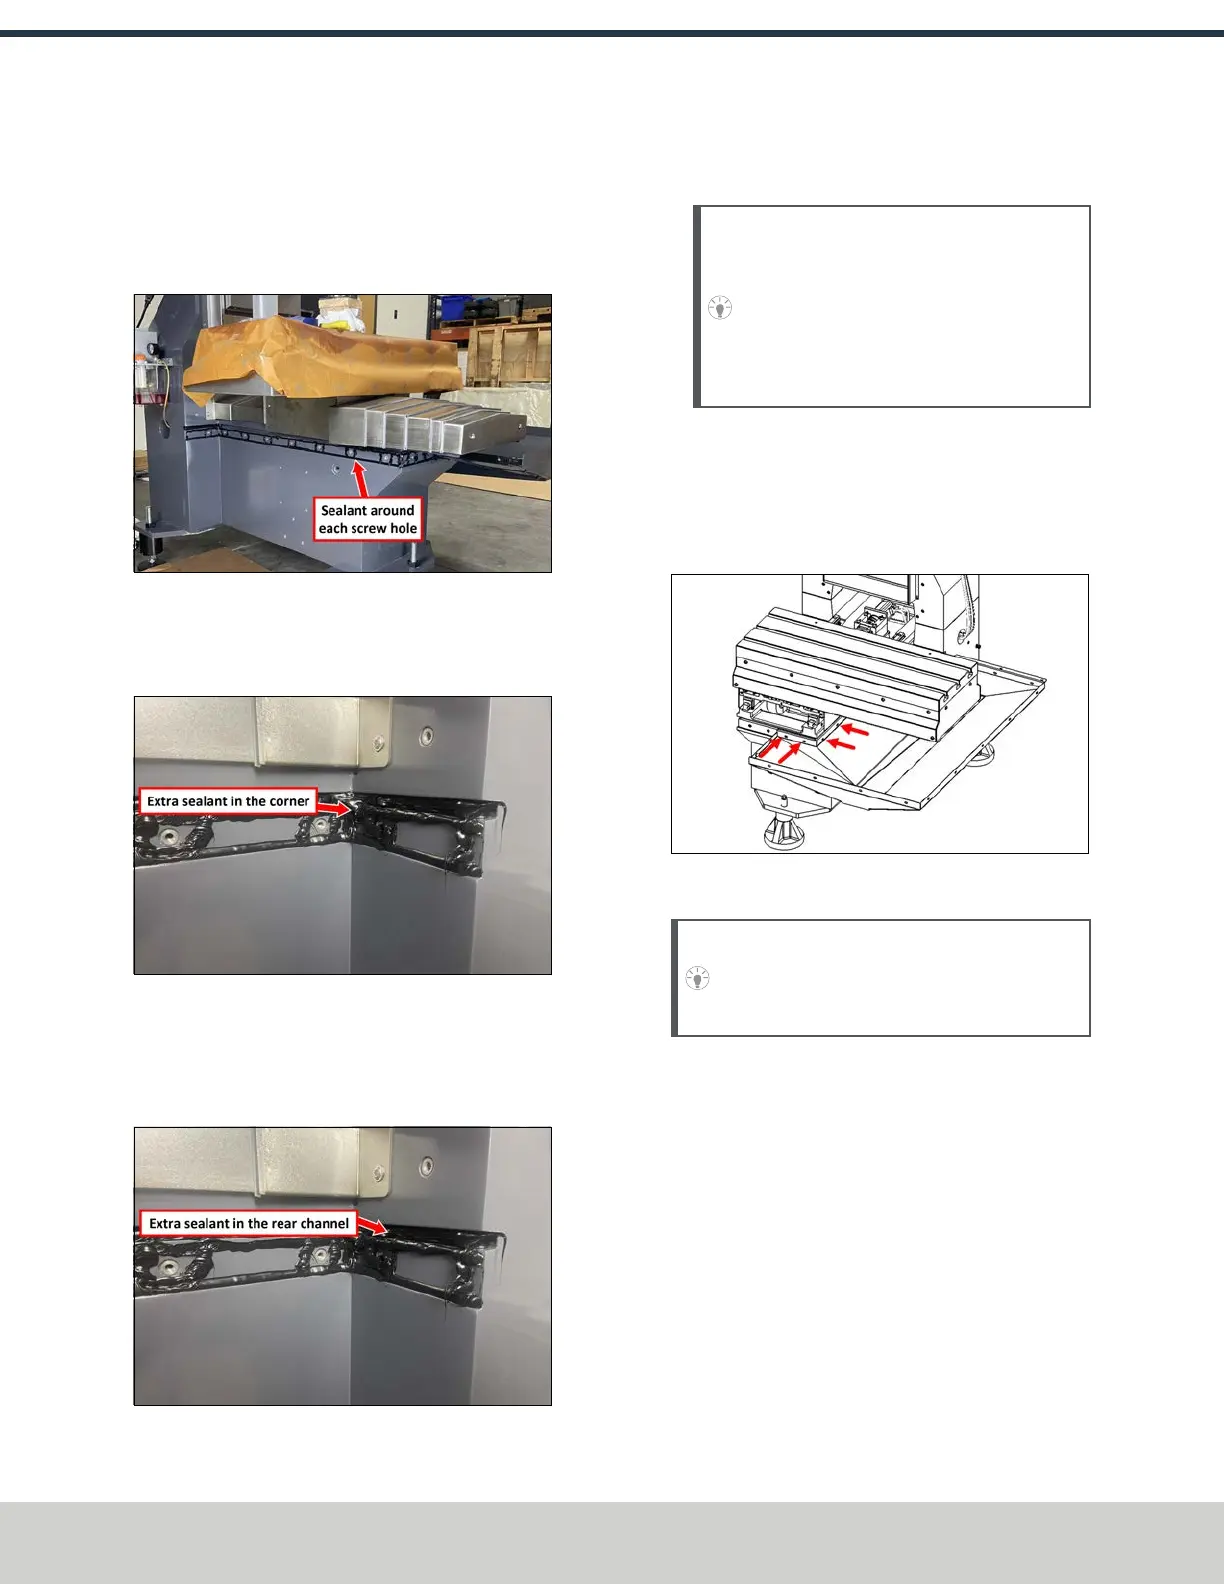
4. Set the chip trays aside. Before you mount the chip trays
to the mill’s base casting, you must apply a bead of
sealant to the following areas:
l Upper edge and around each of the screw holes in
base casting.
Figure 4-8: Example of sealant applied on the base
casting.
l Add additional sealant to each corner of the base
casting.
Figure 4-9: Example of additional sealant in the
corner.
l Completely fill in the channel on the horizontal
surface of the top edge, as shown in the following
image.
Figure 4-10: Example of additional sealant in the
rear channel.
Tip! We recommend having a box of shop
rags and denatured alcohol nearby as you
install any enclosure components onto areas
of the machine where you've applied
sealant. Denatured alcohol helps to clean
any excess sealant from the machine.
5. Fasten the front and inner face of the right chip tray’s
top edge to the mill's base casting using nine M6 × 1.0 -
12 screws. Don't install a screw onto the machine
column — you'll need to use that hole to install another
enclosure panel later in this procedure.
Figure 4-11: Installing the right chip tray onto the
mill's base casting.
Tip! To help with screw hole alignment, you
may need to gently lift the chip tray up as you
install the screws.
©Tormach® 2024
Specifications subject to change without notice.
Page 44 UM10811: 1500MX Operator's Manual (Version 0424A)
For the most recent version, see tormach.com/support
4: INSTALLATION