Figure 4-158: Grommet over the washdown bulkhead
fitting hole.
2. Identify the hose nozzle bracket (PN51621) and one M6
× 1 - 12 flanged button head cap screw (PN 38206)
included in this kit. Mount the bracket to the underside
of the top right enclosure panel with a 4 mm hex
wrench. Make sure to align the large hole in the bracket
with the hole in the top right enclosure panel.
Figure 4-159: Hose nozzle bracket mounted to the top
right enclosure panel.
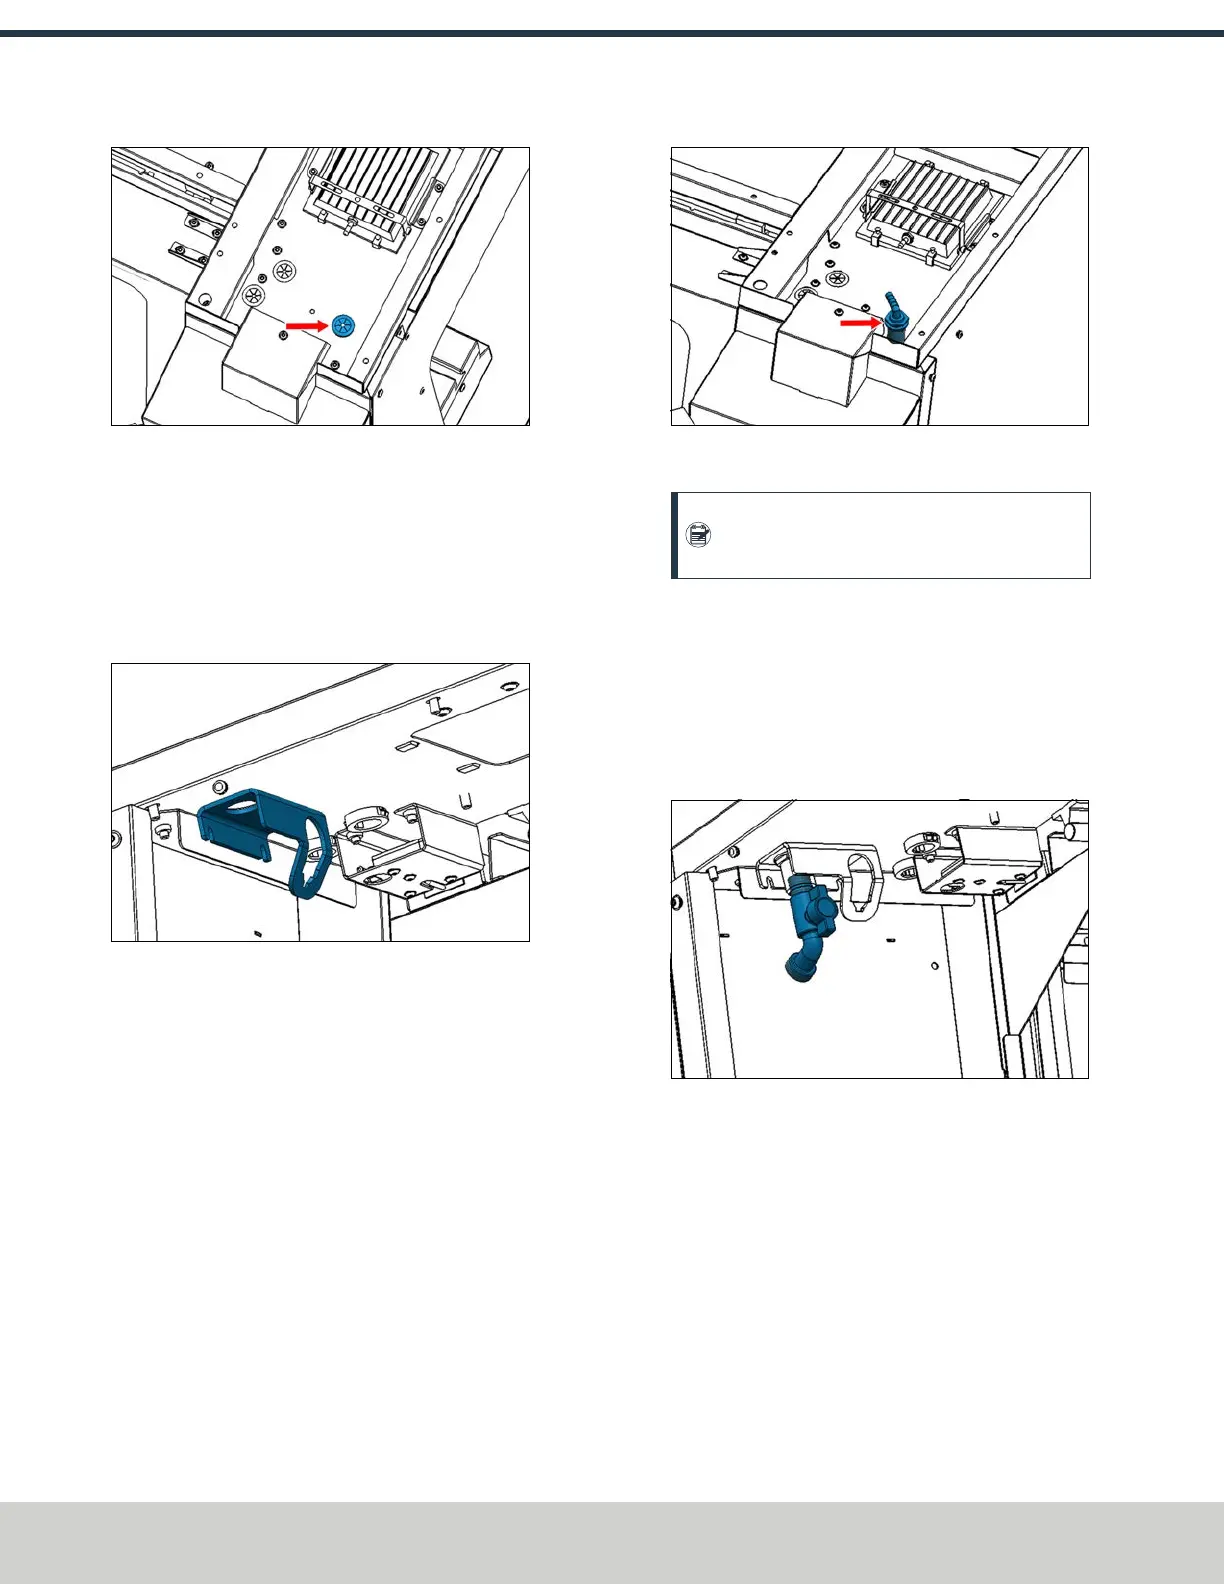
3. Identify the bulkhead fitting included in this kit. Remove
the locking nut from the bulkhead fitting, and install the
fitting into the hole in the top of the enclosure panel
with the elbow fitting on top of the enclosure. Turn the
elbow fitting so that it's pointing at a 45 degree angle
toward the spindle and the back of the machine. Then,
re-install and tighten the locking nut onto the bulkhead
fitting with a 30 mm wrench.
Figure 4-160: Fitting installed into the hole on the top
of the enclosure panel.
Note: You can use a1-1/8 in. socket wrench as
a replacement for a 30 mm wrench.
4. Identify the hose bibb fitting included in this kit. Apply
thread sealant tape to its threads. Then, tighten the hose
bibb into the bulkhead fitting with a 32 mm wrench on
top of the enclosure and an 8 mm hex wrench inserted
into the end of the hose bibb. Tighten until the outlet of
the hose bibb is pointing toward the front of the
enclosure.
Figure 4-161: Bibb fitting instealled into the bulkhead
fitting.
©Tormach® 2024
Specifications subject to change without notice.
Page 84 UM10811: 1500MX Operator's Manual (Version 0424A)
For the most recent version, see tormach.com/support
4: INSTALLATION