4: INSTALLATION
Install the microARC 6 in the Machine
WARNING! Electrical Shock Hazard: You must power
off the machine before making any electrical
connections. If you don't, there's a risk of
electrocution or shock.
1. Power off the machine and the PathPilot controller.
a. Push in the machine's red Emergency Stop button,
which removes power to motion control.
b. From the PathPilot interface, select Exit.
c. Turn the Main Disconnect switch to OFF on the side
of the electrical cabinet.
2. If you haven't yet done so, clean off the machine table.
3. Install the handle onto the microARC with the included
hardware and a 6 mm hex wrench.
4. Identify the T-slot alignment pin (PN 51851) included in
this kit. Install it onto the bottom of the microARC with
its screw (PN 51839) and a 2 mm hex wrench.
Figure 4-214: T-slot alignment pin installed.
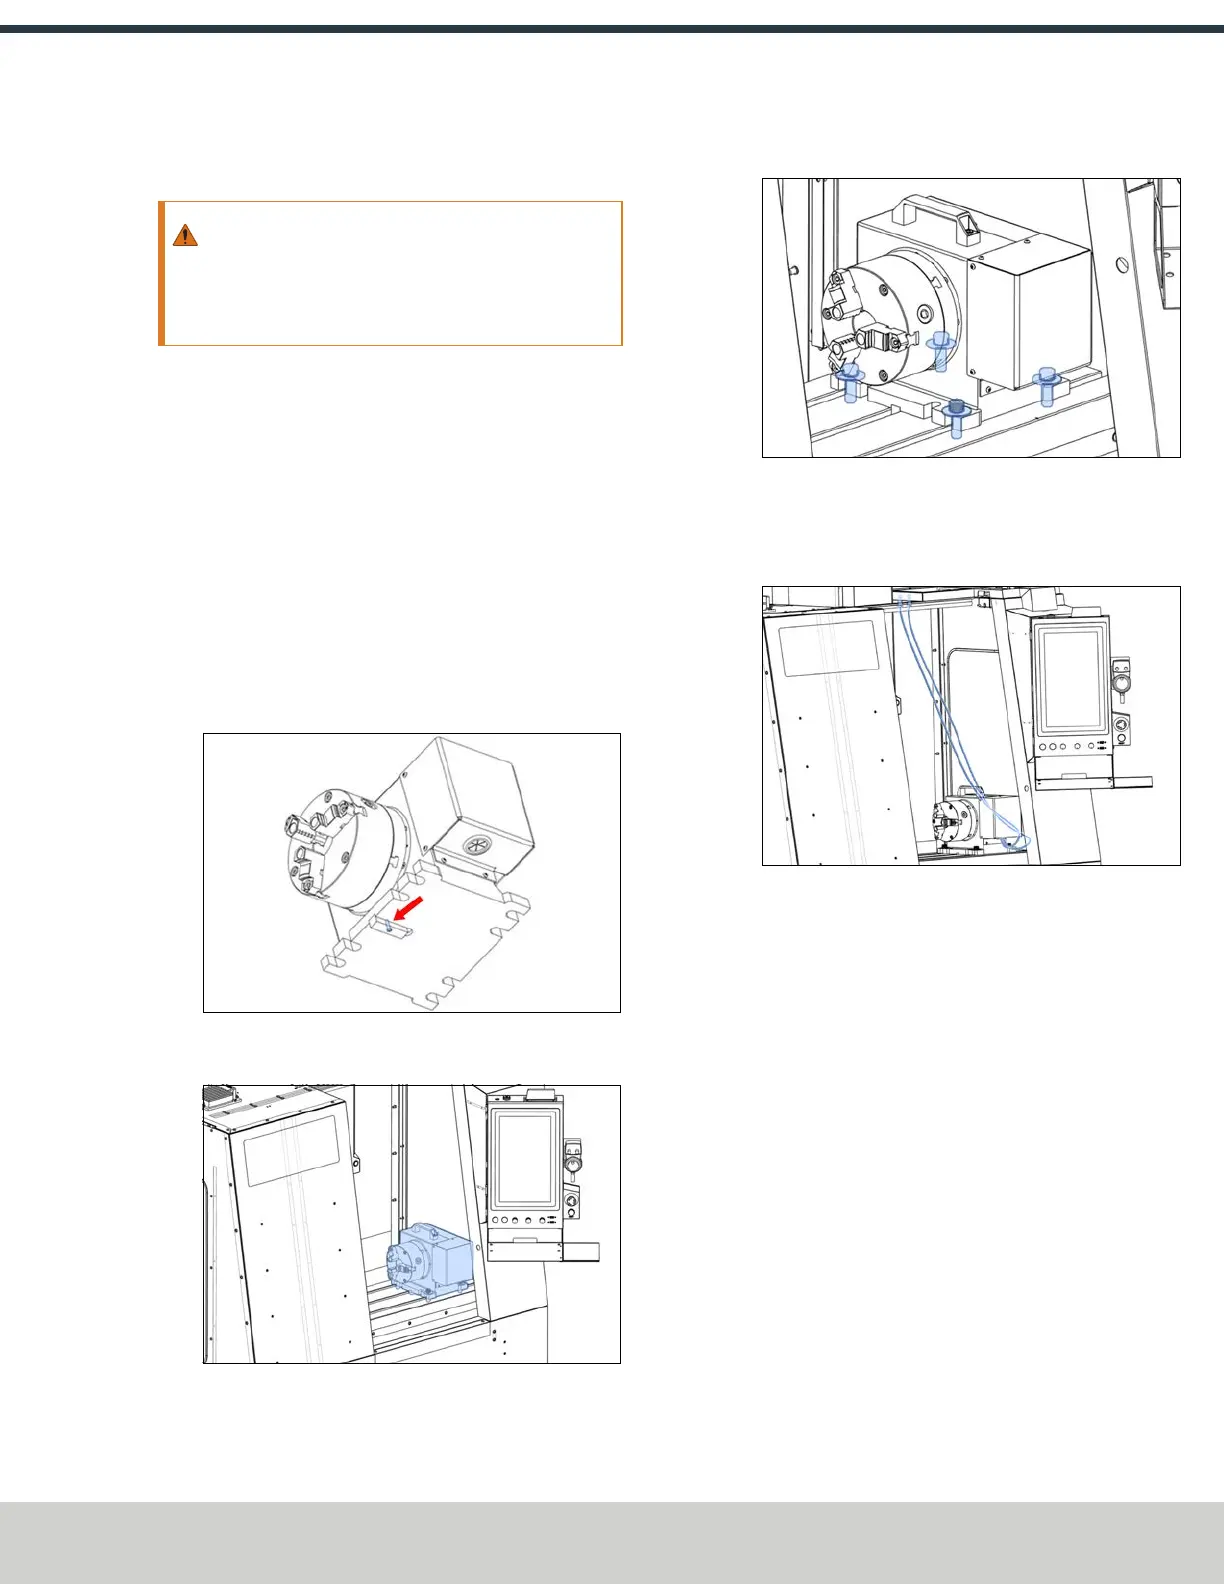
5. Place the microARC 6 on the machine table.
Figure 4-215: microARC on the machine table.
6. Secure the microARC to the machine table with the
mounting hardware and a 3/8 in. hex wrench.
Figure 4-216: microARC secured to the machine table.
7. Connect the loose ends of the power and encoder cables
to the connectors on the microARC. Align the red dot on
the cable and the connector.
Figure 4-217: Power and encoder cables connected to
the bulkhead connectors.
8. Power on the machine and the PathPilot controller.
a. Turn the Main Disconnect switch to ONon the side of
the electrical cabinet.
b. Twist out the machine's red Emergency Stop button,
which enables movement to the machine axes and
the spindle.
c. Press the Reset button.
d. Bring the machine out of reset and reference it.
©Tormach® 2024
Specifications subject to change without notice.
Page 97 UM10811: 1500MX Operator's Manual (Version 0424A)
For the most recent version, see tormach.com/support