Setting up the print image 101
20 Setting up the print image
20.1 Setting the pad
20.1.1 Horizontal pad position
See Chapter 13 "Pad Assembly Screw Fastening" on page 43 or 14 "Pad Assembly Mag-
netic Holder" on page 53.
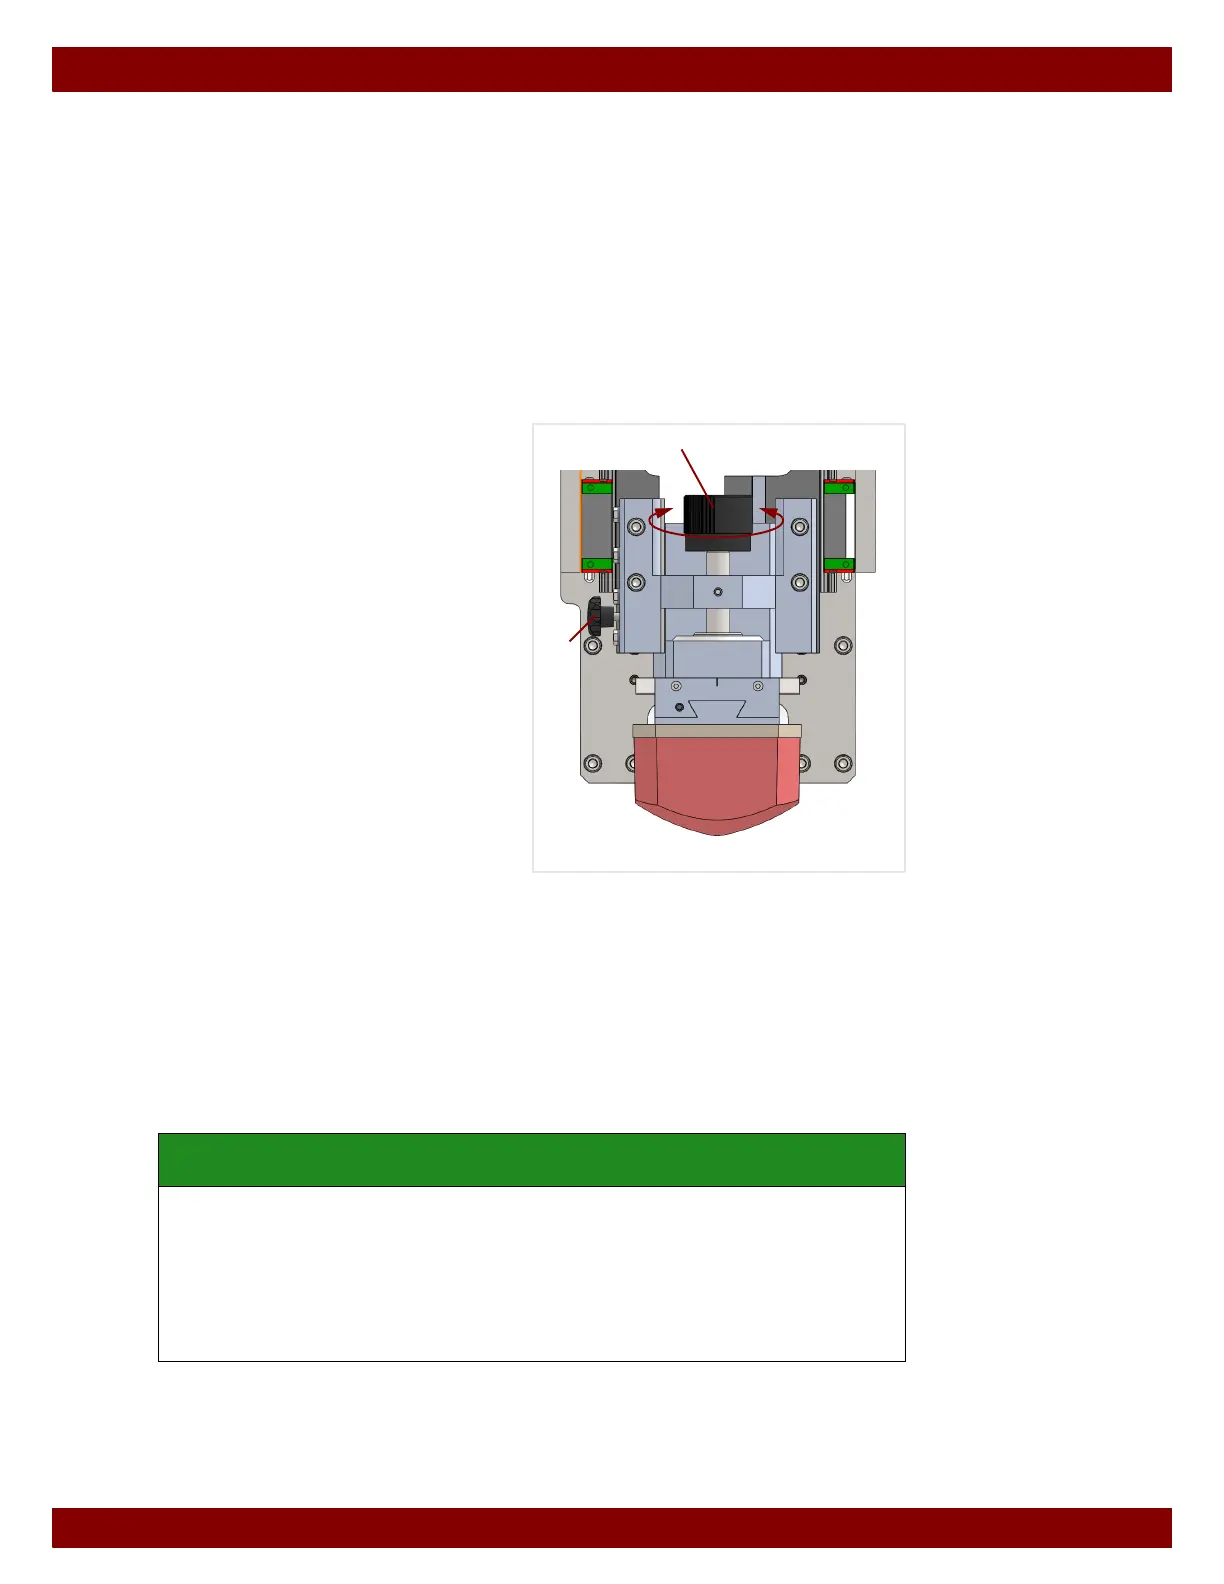
20.1.2 Vertical pad position
For an optimum printing result, the pad should only deform on the cliché to such an extent
that it can just absorb the print image.
The vertical pad position (height of the pad) can be set by turning the pad spindle.
Unfasten the pad spindle fixing by turning
the star knob
B counterclockwise.
Set the pad position by turning the hand
wheel
C.
Clockwise turn: move pad downwards.
Counterclockwise turn: move pad upwards.
After completing the adjustments fasten the
pad spindle again by turning the star
knob
B clockwise.
Control options
• Rub cliché with a thinner and carry out a pad stroke on the cliché (see Chapter 25
"Manual Mode" on page 121). The imprint of the pad is visible on the cliché. A check
can be made to see whether the pad reaches the complete print image. The pad
stroke must be carried out before the film of thinners on the cliché has evaporated.
• After ink absorption, the underside of the pad can be viewed with a mirror. A check can
be made to see whether the ink of the complete print image has been absorbed from
the cliché.
SAFETY INSTRUCTION
An excessively low pad position can damage the pad or other machine components.
• When carrying out a test print, start with a pad height that is too high.
• The pad position can be slowly lowered to the required position.
• Adjusting the vertical pad position also changes the height of the printing position.
For this reason the vertical pad position should be set before the workpiece position
is set.
B
C