Connecting Fluid and Drain Lines 37
2
Connecting Fluid Lines
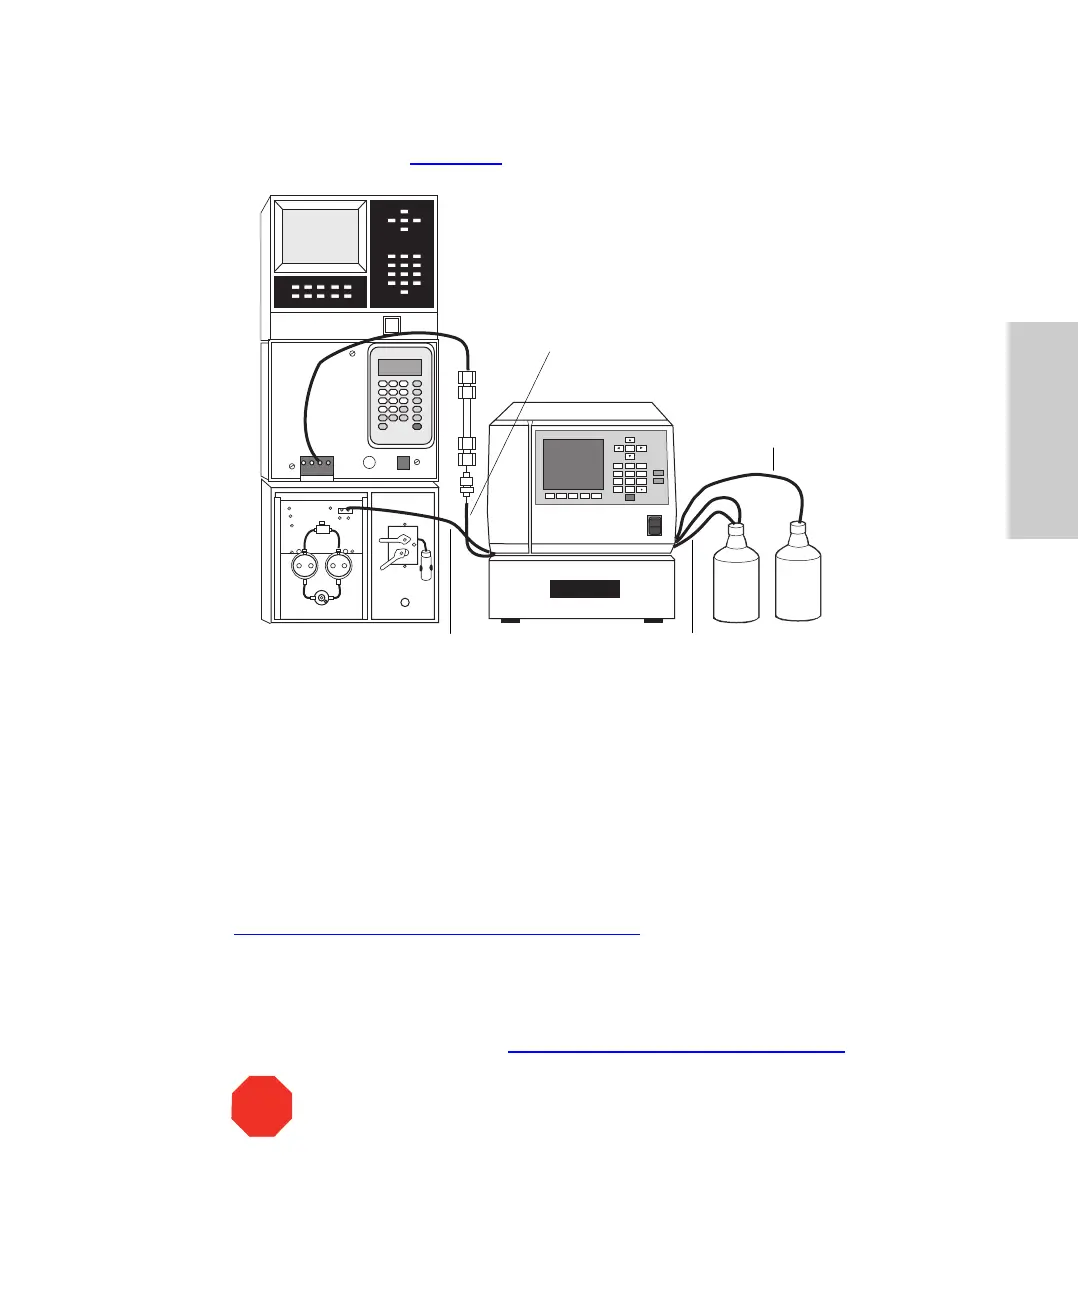
To connect the fluid lines (Figure 2-2):
Figure 2-2 Fluid Line Connections
1. Cut the plastic tie securing the coil of tubing located at the rear of the autosampler.
The coil consists of yellow, clear, and green tubing.
2. Fill a flask with a filtered solution of 90 percent methanol/10 percent water. Use this
solution for the needle wash during installation. Place the flask at bench level, and
put the end of the green line in the solution.
Note: For details on selecting a needle wash solution for a specific sample, refer to
Section 4.3,
Selecting a Needle Wash Solvent.
3. Place the ends of the yellow (needle wash waste), and clear (purge waste) lines in
appropriate containers.
4. Connect the blue line to the pump. Do not connect the red line to the column inlet
until you flush the system (see Section 3.3,
Flushing the Autosampler).
STOP
Attention: Ensure that the red and blue fluid lines are in the side panel
slots and not pinched between the cover and side panels.
1
2
3
4
56
7
8
9
0
Home
Clear
Enter
CAROUSEL
Engage
Release
Yellow and Clear
Lines to Waste
Blue Line to Pump
Green Line to Needle
Wash Solvent
Red Line to Column