Installation 38
2
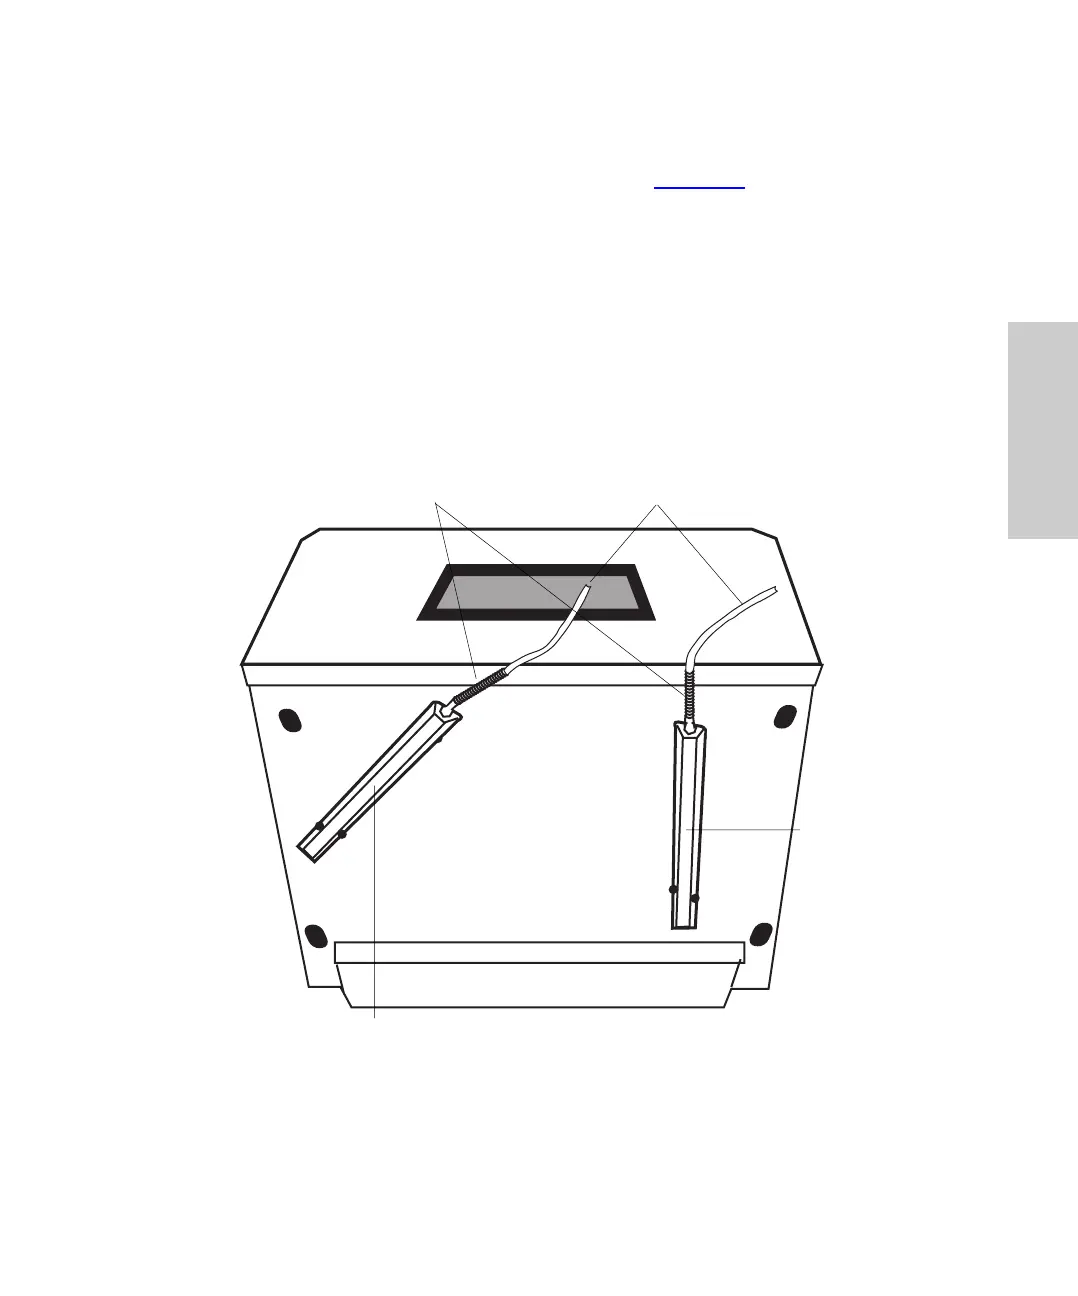
Installing Drain Lines
Using parts from the 717plus Autosampler Startup Kit, connect the two drain lines to the
drain pans located on the bottom of the autosampler (Figure 2-3
) as follows:
1. Place an appropriate waste container for solvent and sample leaks below bench
level.
2. Cut a length of 1/4-inch tubing long enough to reach the waste container from the
autosampler.
3. Slip the tubing strain relief onto the tubing and push it onto the fitting for the solvent
drain pan (located on left side).
4. Use the elbows to facilitate bends in the tubing.
5. If you have a heater/cooler, connect a drain line for condensation/defrosting
following steps 1 through 4.
Figure 2-3 Drain Line Connections
Solvent/Sample
Drain Pan
Defrost
Drain Pan
Bottom View
Strain Relief 1/4-Inch Tubing