Changing the Hardware Configuration 53
2
• Auxiliary loop from 717plus Autosampler Startup Kit
• Union from 717plus Autosampler Startup Kit
To install the loop:
1. From the 717plus front panel, set system flow to 0 mL/min.
2. Turn off the autosampler, disconnect the power cord, and remove the autosampler
cover (see Section 2.6.1,
Removing/Replacing the 717plus Cover).
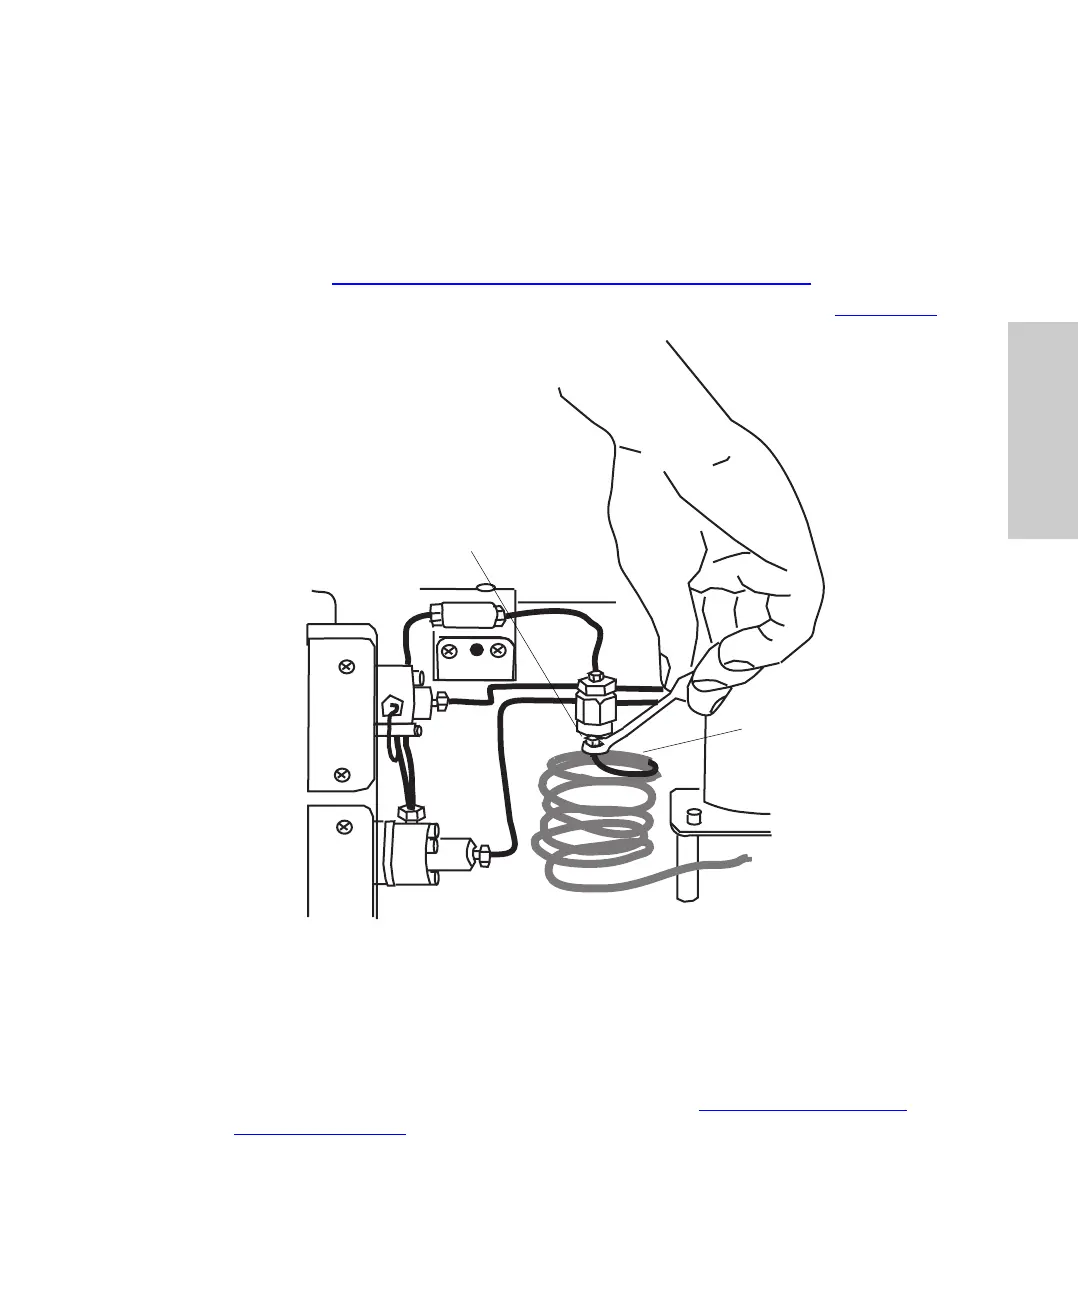
3. Disconnect the sample loop at the filter using the 5/16-inch wrench (Figure 2-11
).
Figure 2-11 Disconnecting the Sample Loop
4. Connect the auxiliary loop to the filter.
5. Using a union from the Startup Kit, connect the auxiliary loop to the sample loop.
6. Replace the cover, reconnect the power cord, and turn on the autosampler.
7. Complete the configuration procedures discussed in Section 3.6.3,
Entering
Hardware Changes.
Sample Loop
Disconnect at outlet side of
in-line filter.