Chapter 1 Overview
Using the front and rear panels
8 WCDMA Options Version 6.20
Section 6 – Numeric keys
The numeric keys are mainly used to enter values on entry fields.
Section 7 – Cursor keys
The L
EFT and RIGHT cursor keys are used to select the required entry field of a
menu. A selected entry field is inverted and therefore easily visible on-screen.
With the help of the U
P and DOWN cursor keys, values on entry fields can be
changed.
Section 8 – Selection key
The selection key is actually more a wheel. It is used to quickly change values on
entry fields.
Section 9 – Connectors
The connectors on the front panel provide the interfaces for the mobile under
test.
The connection of a mobile is outlined in section Cabling.
The detailed description of all connectors on both the front and back panel of the
4400 can be found in section Connectors.
Section 10 – Floppy drive
As with all floppy drives, the floppy disk will only fit in one direction. Please insert
the floppy disk carefully. Do not use any force as this could damage both, the
floppy disk and the floppy drive.
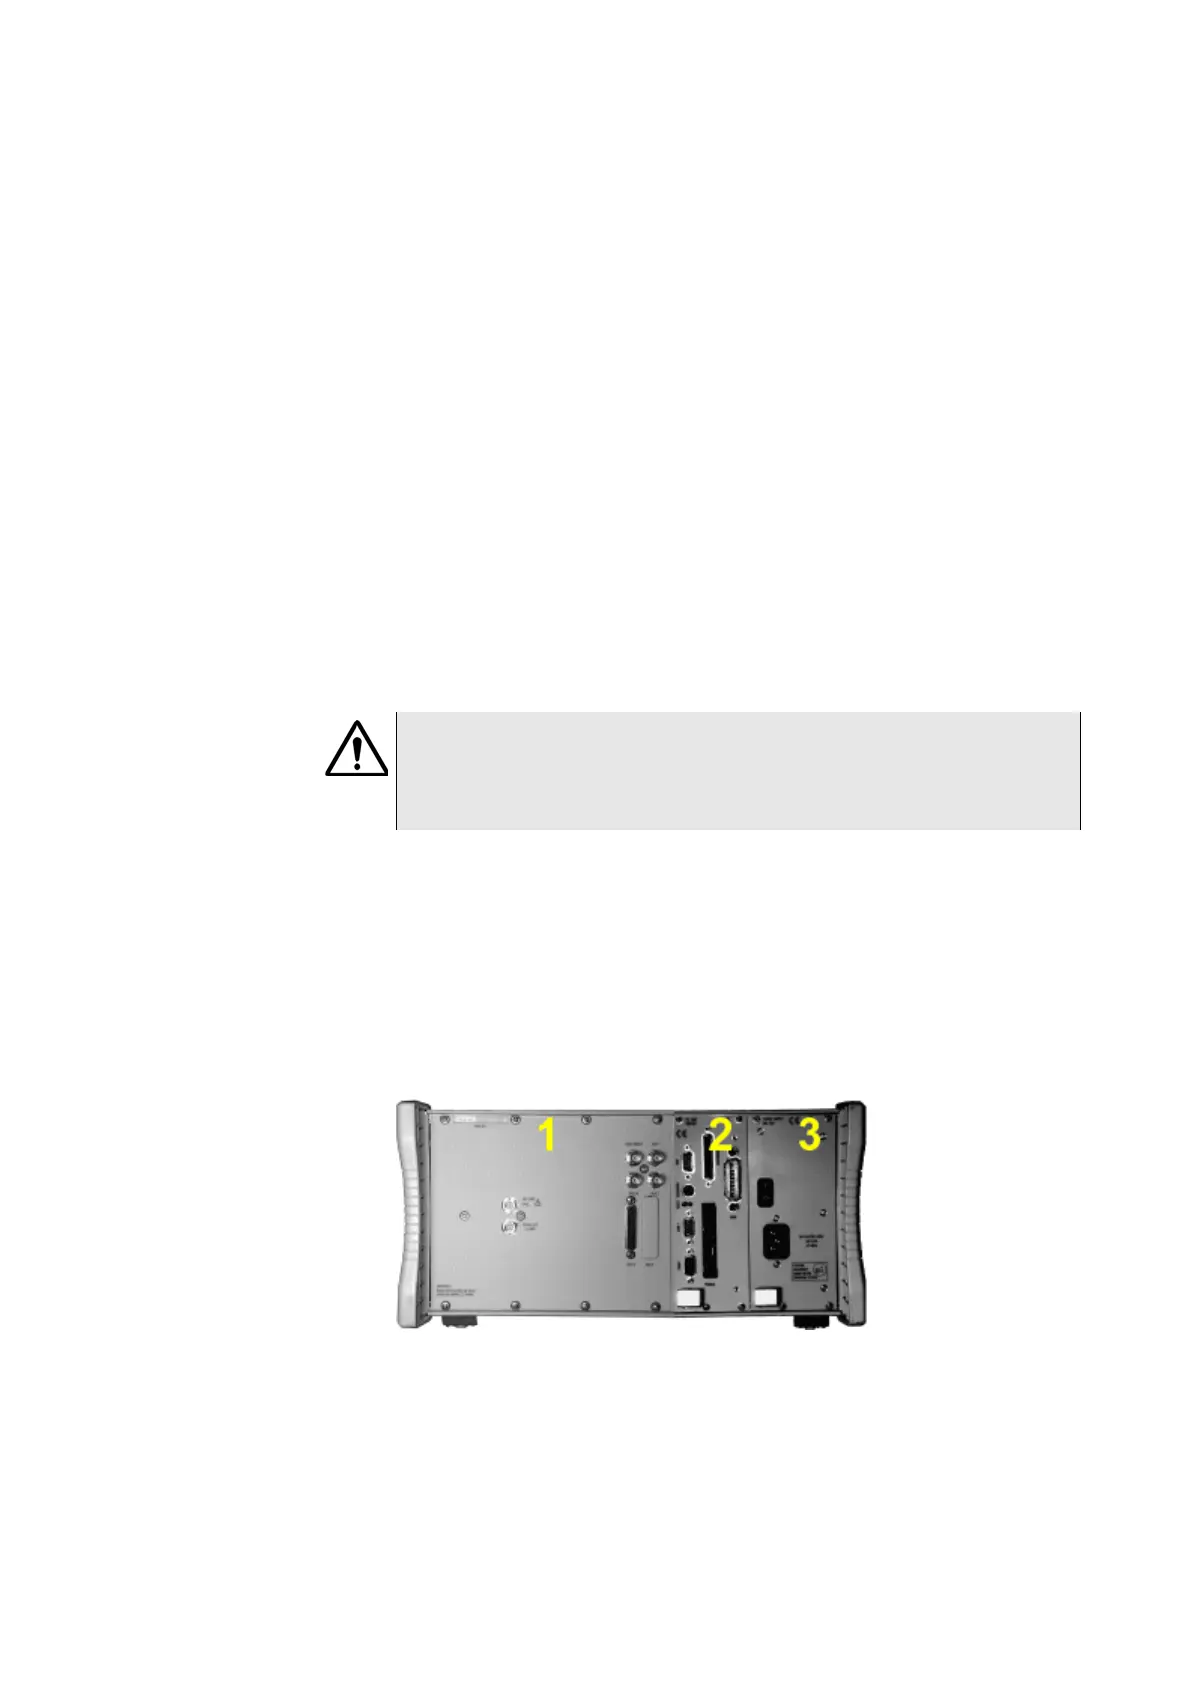
Rear panel The rear panel of the 4400 is subdivided into three main sections.
Section 1 – The RF/IF/AF section
The RF/IF/AF section provides several interfaces that may support your tests.
Most of these interfaces are related to synchronization and triggering.
Section Connectors gives a detailed overview of all the connectors, their func-
tionality and technical specifications.
HAZARD
Before connecting any equipment, please make sure that the maximum input
levels of the connectors are not exceeded. Otherwise, the highly sensitive
stages of the 4400 might be destroyed immediately.