Maintenance3403−1/A1
Winterthur Gas & Diesel Ltd.
6/ 6
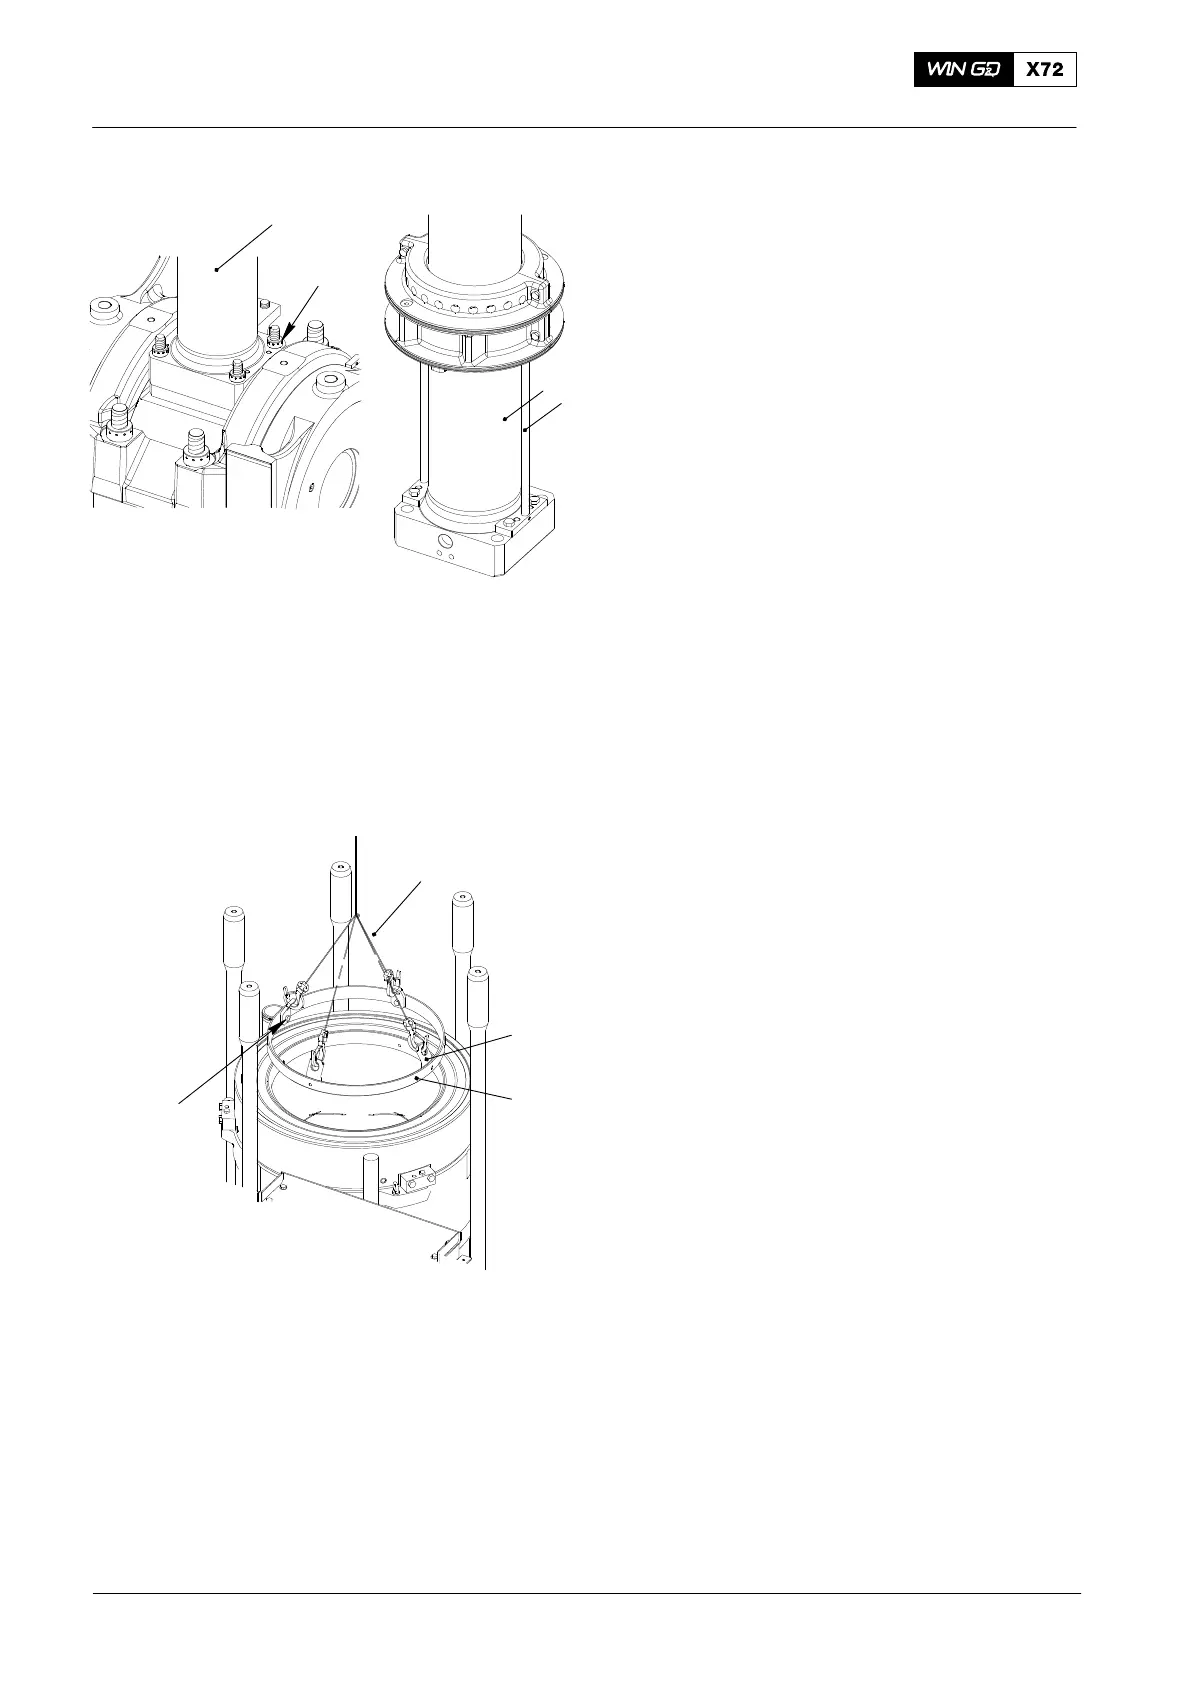
26) Remove the distance holders (94230,
Fig.13).
27) Tighten the round nuts (2) on the piston
rod foot (1). Refer to the procedure in
9403−4, paragraph 3.
28) Make sure that the cylinder liner and
the antipolishing ring are clean and in a
satisfactory condition.
29) Put oil on the surfaces of the
antipolishing ring.
30) Attach the four plates (1, Fig.14) to the
antipolishing ring (2) with the four
screws (3).
31) Connect the crane hook to the lifting
tool (94209).
32) Operate the crane to put the
antipolishing ring (2) into the cylinder
liner.
33) Remove the lifting tool (94209).
34) Remove all tools and equipment from
the work area.
2015
Piston: Removal and Installation
WCH02599
2
1
94230
1
Fig. 13
Fig. 14
1
2
3
94209
WCH02609