Maintenance
5556−2/A1
Winterthur Gas & Diesel Ltd.
3/ 4
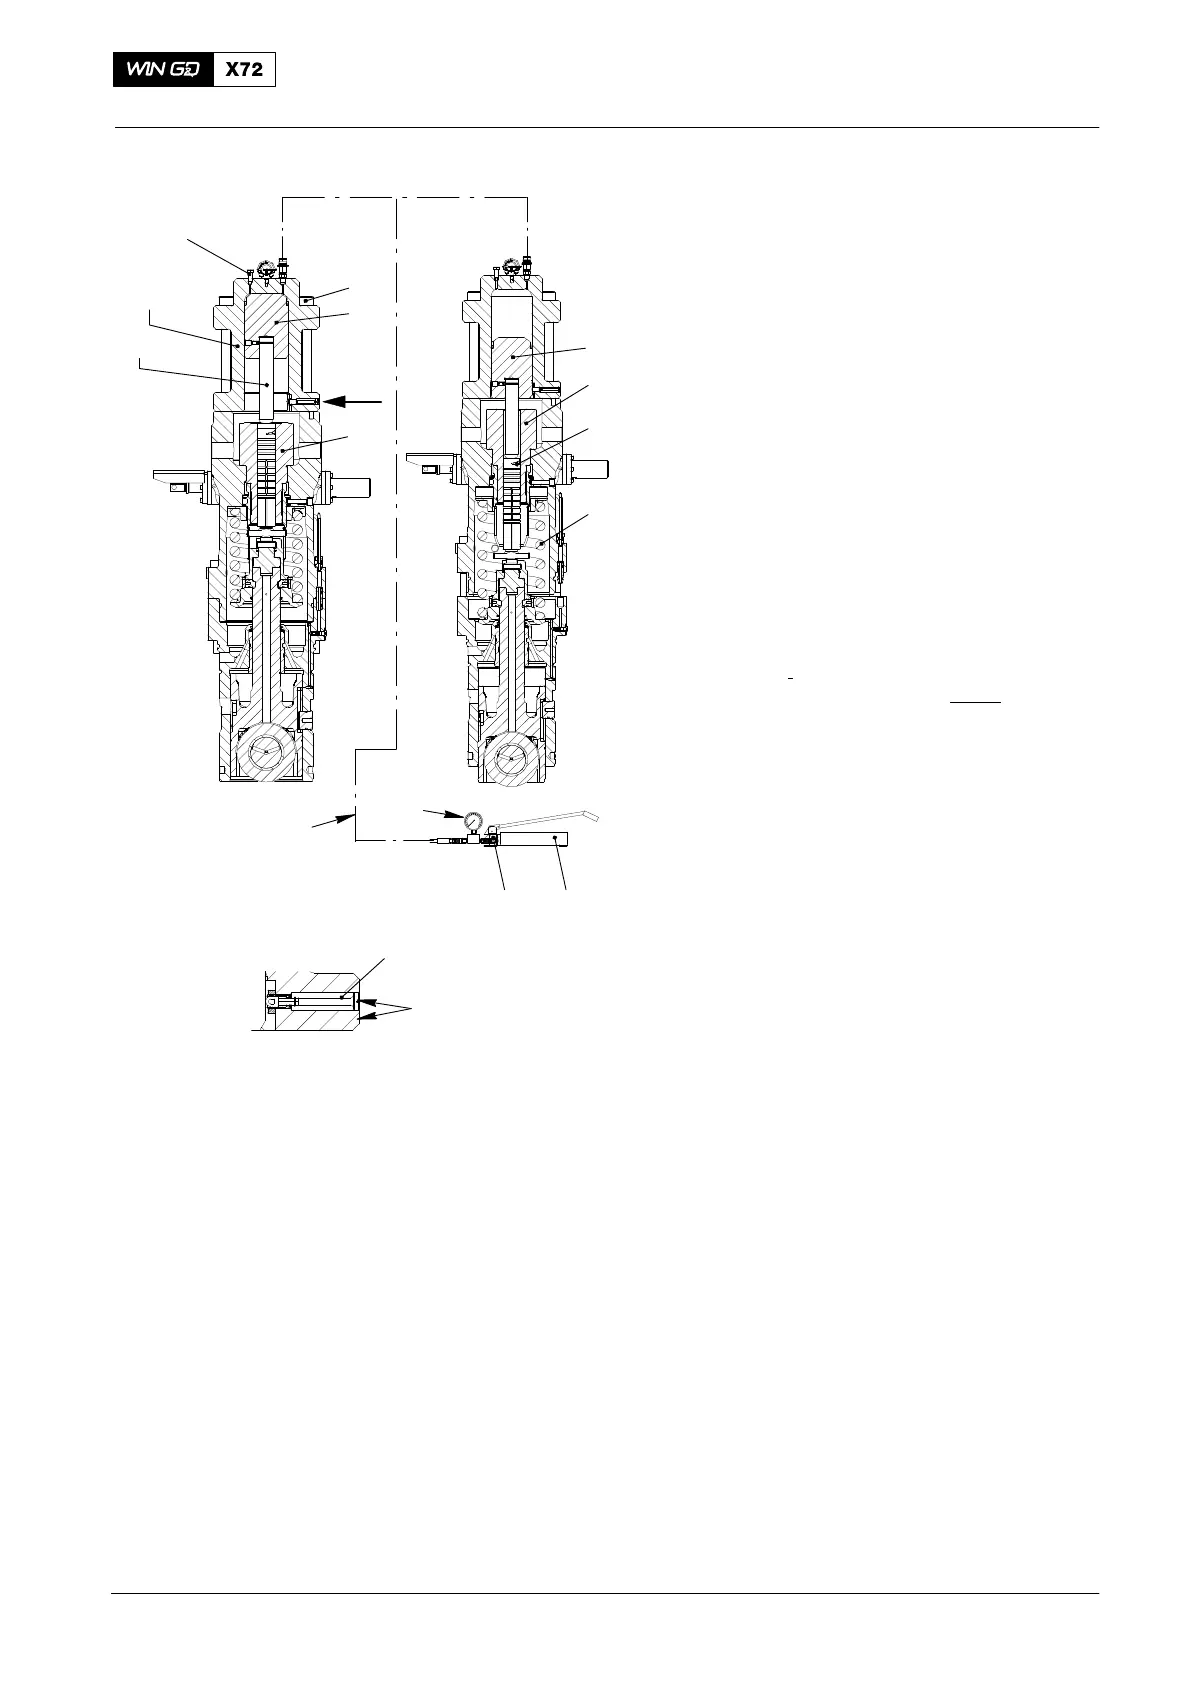
4. Removal with Tool
94595B
Note: Some internal parts of the fuel
pump can look different.
1) Connect the hydraulic ram (94595,
Fig. 4) to the HP oil pump (94931).
2) Close the relief valve (5).
3) Make sure that the vent screw (10) is
open.
4) Operate the HP oil pump (94931) until
oil that has no air flows from the vent
screw (10).
5) Close the vent screw (10).
Note: During step 6), make sure that you
keep a clearance of between
10
mm and 15 mm between the
nuts (3Fig. 3 (view II − II
) and the
bottom housing (2).
6) Slowly operate the HP oil pump until:
D The compression spring (4, Fig. 4)
pushes the pump plunger (2) out
of the cylinder (7), or
D The indicator (6) is flush with the
housing. (This shows that the
piston is at the end of its stroke.)
7) Open the relief valve (5) to release the
pressure in the HP oil line.
8) Disconnect the HP oil pump from the
hydraulic ram (94595).
9) Remove the screws (9).
10) Remove the hydraulic ram (94595).
11) Remove the pump plunger (3).
12) Move the piston (8) to the initial
position, see paragraph 2.
13) Continue to disassemble the fuel pump
(see 5556−1).
14) If you cannot remove the plunger (3),
do the procedure given in paragraph 5.
2015
Fuel Pump: Removal of a Seized Pump Plunger
94595
94595B
94935
94932
5 94931
017.890/08
10
WCH02281
8
9
3
4
2
I
I
6
FLUSH
1
7
Fig. 4


 To Next Page